This article was co-authored by Stephen Cardone and by wikiHow staff writer, Janice Tieperman. Stephen Cardone is the COO of NY Headshots, a New York City-based studio that specializes in shooting and producing headshots for individuals and businesses. Stephen has over four years of professional photography experience and over six years of documentary filmmaking experience. Stephen also works extensively as a photographer at NY Headshots. His work includes events, environmental photography, as well as headshots for actors, models, and corporate. He holds a BA in Non-fiction Writing from The New School.
There are 14 references cited in this article, which can be found at the bottom of the page.
This article has been viewed 75,566 times.
Digital photos play a huge role in keeping society connected, whether it’s through phone camera photography, professional photography, or somewhere in between. Unfortunately, this creative field might seem a little intimidating, especially if you don’t have a lot of photography experience. There’s nothing to fear—just play around with your camera settings and lighting until you have an image that you’re really proud of.
Steps
Shooting Pictures with a Phone Camera
-
1Touch the screen or shutter button to adjust your focus and exposure. Tap your screen to help your camera focus on your desired subject. Continue pressing on your screen to find a slider, which helps adjust the exposure, or brightness, of the picture.[1]
- If your phone has manual focus, then your lens will focus on the section of the screen that you tapped.
- Both iPhones and Android cameras will focus if you touch the screen.
-
2Hit the plus and minus signs to zoom your picture in and out. Look on your phone camera’s interface for plus and minus buttons, which control the zooming of your pictures. Experiment with these settings until you’re happy with the focus and range of your picture.[2]
- All phones have plus/minus signs that help you zoom in or out of the picture.
Advertisement -
3Switch between scene modes to improve your picture quality. Swipe through or tap on your phone’s camera settings to find different scene modes, or options that change the default settings of your picture. You can select panorama for a wider picture, while some phones let you select a “night portrait” or “sports” setting.[3]
- Apple phones let you swipe through your camera’s default settings, while Android phones require you to tap on the side of the screen to get more options.
-
4Take HDR photos if you prefer really detailed photos. Select the HDR, or High Dynamic Range setting on your phone. Choose this setting for non-moving subjects, like landscapes or still photos of people. This setting helps you focus on both the shadows and highlights of the picture, which makes the digital photo look very sharp and polished.[4]
- If you’re taking a picture of a beautiful landscape, try using HDR settings.
-
5Choose unique filters with your phone’s camera or photo settings. Tap through your phone’s camera or photo settings to see if there are any digital effects available. Slap a black-and-white or sepia filter to give your photo a rustic look, or try something classier, like a tinted or vintage filter. Save the changes to your photo and then share it with your friends and family![5]
- Photo filters are a great option if you don’t feel like editing your pictures. They’re a popular option on a lot of photo-based social media, like Instagram and Snapchat.
- For example, if you’re at a costume party with some friends, you may want to add a vintage filter to your pictures.
-
6Use flash sparingly in your pictures. See if you can take advantage of natural or artificial light in the area before snapping a picture. If your backdrop is too dark, turn the flash setting on your phone, which will help add a burst of light to your picture. Keep in mind that flash works best up close, and won’t illuminate anything over a long distance.[6]
- For example, if you’re in a club with your friends, invite your friends to stand close to some artificial lights. This will make your picture look more professional than if you shoot with a flash.


Taking Photos with a Camera
-
1Use the rule of thirds so your pictures look extra striking. Pretend a tic-tac-toe board is covering the surface of your potential picture. Focus on the 4 spots where these invisible lines are intersecting. As you prepare to take a photo, arrange your camera so the subject of your photo is centered over some of these intersecting lines.[7] Otherwise known as the rule of thirds, this helps your pictures look elegant and focused without being overly centered.[8]
- Some cameras will show you a physical grid as you take the picture, which makes this process a lot easier.
-
2
-
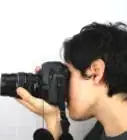
3Adjust the focus manually to improve your picture quality. Adjust the focus ring around your lens until your photo looks clear. At this point, use the magnifying setting to zoom in and adjust your camera’s perspective.[11] Tweak the focus ring another time to finish up your adjustments, then you’ll be ready to take your picture![12]
- Manual focus can help you gain a lot more experience with your camera.
- Manual focus works well in places without a lot of lighting. It can also help you take pictures in crowded places.
-
4Experiment with wider lenses to give your pictures more depth. Switch out your regular lens with a wider alternative, like a 24mm lens. Find a focal point that’s close to your lens, then take your wide photo. This can add a lot of depth to your digital photography, especially if you’re shooting expansive scenes, like a landscape.[13]
- For instance, if you’re taking a picture at some railroad tracks, place your camera at ground level first. Focus on your lens on a nail or weed that’s a few inches or centimeters away from your lens, then take the picture.
-
5Choose a simple backdrop for your pictures. Prioritize the subject of your photos instead of the backgrounds. Look for areas where your model or other subject can be the star of the show, like a neutral-toned wall, or another area with a lot of neutral colors. Don’t shoot your pictures in an area where your backdrop has a lot of strange designs or color schemes, as this can distract away from your photo.[14]
- For instance, if you’re photographing a model in front of a badly stained wall, viewers might focus on the wall instead of the model. Instead, choose a uniform, neutral-toned wall as your backdrop.
-
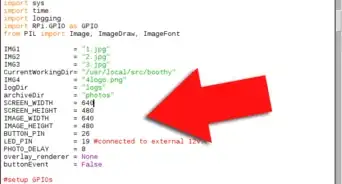
6Increase your ISO setting indoors instead of using flash. Adjust your ISO settings so they’re somewhere between 800 and 1600. Additionally, make your aperture as wide as possible, which will help a lot of light make it into your camera. To keep your pictures clean and crisp, set your camera on a tripod before you take any pictures.[15]
- High ISO settings will make a picture automatically brighter, while high aperture settings help your camera take in more light.
-
7Adjust your ISO settings depending on the outdoor lighting. Keep your ISO at a lower setting, like 100, if you’re shooting in a sunny, outdoor area. If it’s dark or cloudy outside, adjust your settings somewhere between 400 and 3200. Play around with different ISO settings until you’re happy with the amount of light in your photo![16]
-
8Incorporate flash into your pictures to make them more dynamic. Check that your flash is turned on, or that you have a flash attached to your camera. Take a few pictures with and without flash to see if you can notice a difference. You can add a lot of dimension to your photos with flash, especially if your subject is in a shadowy area.[17]
- For instance, if you’re photographing someone in the woods, flash can cut through the shadows and make the subject a lot clearer.
-
9Select a slower shutter speed setting to create cool motion effects. Set your shutter speed at 1 second or longer to capture more movement in a single photo. Adjust your shutter speed to several seconds if you want a dramatic lighting or motion captured in your photos. If you’d prefer more sleek, crisp photos, set your shutter speed to ½ or ¼ of a second instead.[18]
- Some cameras have a max shutter speed of 30 seconds.


Getting a Passport Photo
-
1Find a section of your home with a white, flat wall. Look around your home for any open sections of white wall that don’t have any texture or decor in the background. Don’t set up your passport picture in front of a textured door, as this will make your passport picture look a bit unprofessional.[19]
- If you can’t find any open space in your home, see if you can take the picture at a friend or family member’s home.
-
2See if there’s enough room for you to stand comfortably. Check that there’s enough space for you to stand with your back against the wall and your shoulders relaxed. Make sure that no plants, paintings, or other decorations are leaning into the picture, as these pictures can’t be printed with your passport.[20]
- Your head, neck, and shoulders need to be clearly visible, so it’ll be easier to take the picture sitting down.
-
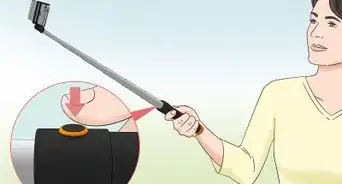
3Set up a camera and tripod at eye-level to take your picture. Find a tripod or other sturdy surface that can keep your camera steady and balanced. Check that camera has a timer setting, which will give you a few seconds to sit and compose yourself before the camera snaps. Note that the tripod needs to be eye-level and at least 3 to 4 ft (0.91 to 1.22 m) away from the wall, so your head and shoulders are centered and visible in the photo.[21]
- A tripod will help you take the picture while you stay seated.
- You can use any kind of digital camera to take your picture, as long as it takes high-quality pictures.
- There are also phone apps that can help you take a passport photo, like Passport Photo Booth.[22]
- If you don’t have a tripod, you can always ask another person to take your picture. Some pharmacies and other establishments also offer professional photography services.[23]
-
4Dress in your usual attire. Wear something that you’d usually wear going out and about. As you travel, airport officials are going to compare you to your passport picture, so you want that photo to be a realistic version of how you usually look.[24] Additionally, remove any accessories that you currently have on, like a hat or a pair of glasses.[25]
- If you usually wear makeup, choose a subtle, neutral look for your passport photo.
- Special costumes or attire are only allowed if you’re wearing them for a religious purpose.
-
5Adjust the lighting so your entire face is well-lit in the picture. Set up your photo near a window with a lot of natural natural light, so your passport is well-illuminated. Double-check that the lighting is evenly covering your entire face, and is not lighting up 1 half and shadowing the other.[26]
- For instance, an open wall that’s opposite of a sunny window would be a great place to take your passport photos.
-
6Maintain a neutral expression during the picture. Try to look as expressionless as possible, with your eyes focused on the camera. Look straight ahead so future airport officials can get a good luck at your facial features and hair color.[27]
-
7Look at the photo to see if it meets all of the requirements. Check to see if your photo is in color, and that it has consistent, clear lighting. Measure the photo to make sure it’s 2 by 2 in (5.1 by 5.1 cm), with the head centered between 1 and 1.4 in (2.5 and 3.6 cm). Avoid digitally touching up the photo in any way, as this could mess with the picture’s quality.[28]
- If your photo doesn’t meet these requirements, your passport application may be denied.


Expert Q&A
Did you know you can get expert answers for this article?
Unlock expert answers by supporting wikiHow
-
QuestionCan I take a digital photo with my phone?
 Stephen CardoneStephen Cardone is the COO of NY Headshots, a New York City-based studio that specializes in shooting and producing headshots for individuals and businesses. Stephen has over four years of professional photography experience and over six years of documentary filmmaking experience. Stephen also works extensively as a photographer at NY Headshots. His work includes events, environmental photography, as well as headshots for actors, models, and corporate. He holds a BA in Non-fiction Writing from The New School.
Professional PhotographerYes, so long as you have a camera on your phone. You couldn't take a film photo with a digital phone.
Support wikiHow by unlocking this expert answer.
-
QuestionIs it harder to shoot on film or digital?Stephen CardoneStephen Cardone is the COO of NY Headshots, a New York City-based studio that specializes in shooting and producing headshots for individuals and businesses. Stephen has over four years of professional photography experience and over six years of documentary filmmaking experience. Stephen also works extensively as a photographer at NY Headshots. His work includes events, environmental photography, as well as headshots for actors, models, and corporate. He holds a BA in Non-fiction Writing from The New School.
Professional PhotographerDigital is exponentially easier. You can review your shots immediately, and you don't need to fiddle around with the film in a dark room.Support wikiHow by unlocking this expert answer.
-
QuestionHow do I make sure my photos aren't going to loo weird after I compress and upload them?Stephen CardoneStephen Cardone is the COO of NY Headshots, a New York City-based studio that specializes in shooting and producing headshots for individuals and businesses. Stephen has over four years of professional photography experience and over six years of documentary filmmaking experience. Stephen also works extensively as a photographer at NY Headshots. His work includes events, environmental photography, as well as headshots for actors, models, and corporate. He holds a BA in Non-fiction Writing from The New School.
Professional PhotographerA good practice is to check the resolution of the photo and then look at the limitation where you're uploading it. If the gap between those two resolutions is too high, it's probably going to look off.Support wikiHow by unlocking this expert answer.


References
- ↑ https://www.popsci.com/take-better-smartphone-photos/
- ↑ https://edu.gcfglobal.org/en/digitalphotography/taking-photos-with-a-smartphone/1/
- ↑ https://edu.gcfglobal.org/en/digitalphotography/taking-photos-with-a-smartphone/1/
- ↑ https://www.popsci.com/take-better-smartphone-photos/
- ↑ https://edu.gcfglobal.org/en/digitalphotography/taking-photos-with-a-smartphone/1/
- ↑ https://www.popsci.com/take-better-smartphone-photos/
- ↑ Stephen Cardone. Professional Photographer. Expert Interview. 5 May 2020.
- ↑ https://www.nationalgeographic.com/photography/photo-tips/digital-photography-tips/
- ↑ https://www.nationalgeographic.com/photography/photo-tips/digital-photography-tips/
- ↑ https://www.exposureguide.com/top-10-digital-photography-tips/
- ↑ Stephen Cardone. Professional Photographer. Expert Interview. 5 May 2020.
- ↑ https://www.cnet.com/how-to/how-to-use-manual-focus-on-your-dslr-lens/
- ↑ https://www.digitalphotomentor.com/5-mistakes-beginners-make-using-a-wide-angle-lens-and-how-to-avoid-them/
- ↑ https://www.exposureguide.com/top-10-digital-photography-tips/
- ↑ https://www.exposureguide.com/top-10-digital-photography-tips/
- ↑ https://www.exposureguide.com/top-10-digital-photography-tips/
- ↑ https://www.slrlounge.com/workshop/5-reasons-to-use-flash/
- ↑ https://photographylife.com/what-is-shutter-speed-in-photography
- ↑ https://www.digitaltrends.com/photography/how-to-take-a-passport-photo/
- ↑ https://www.digitaltrends.com/photography/how-to-take-a-passport-photo/
- ↑ https://www.forbes.com/sites/deborahljacobs/2014/06/04/a-selfie-for-your-passport-photo/
- ↑ https://www.smartertravel.com/take-your-own-passport-photos/
- ↑ https://www.cnet.com/how-to/how-to-take-your-own-passport-photos/
- ↑ https://www.cnet.com/how-to/how-to-take-your-own-passport-photos/
- ↑ https://travel.state.gov/content/travel/en/passports/how-apply/photos.html
- ↑ https://travel.state.gov/content/travel/en/passports/how-apply/photos.html
- ↑ https://travel.state.gov/content/travel/en/passports/how-apply/photos.html
- ↑ https://travel.state.gov/content/travel/en/passports/how-apply/photos.html
- ↑ https://www.popsci.com/take-better-smartphone-photos/
- ↑ https://www.popsci.com/take-better-smartphone-photos/
- ↑ https://photographylife.com/what-is-shutter-speed-in-photography
About This Article