This article was co-authored by Karen De Jager and by wikiHow staff writer, Jessica Gibson. Karen De Jager is a Professional Photographer and the Owner of Spectrum Photography LLC, operating in the broader East Bay area based in Pleasant Hill, California. Karen is a published and award-winning photographer who offers both in-studio, outdoor, and on-location sessions specializing in capturing a wide variety of special moments and events in a natural, photojournalistic style. Her ability to look at every photoshoot as an adventure and general passion for delivering excellent customer service led to Spectrum Photography’s recognition by Expertise.com as the “Best Wedding Photographers in Vallejo” in both 2018 and 2020.
There are 14 references cited in this article, which can be found at the bottom of the page.
This article has been viewed 163,988 times.
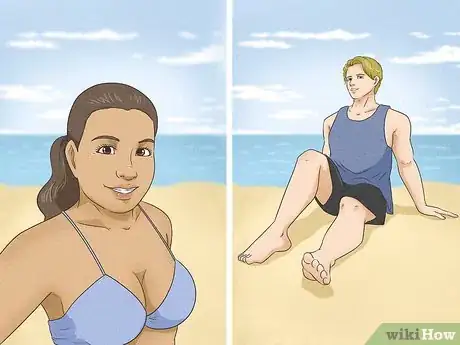
Between the clear waves, colorful sunsets, and beautiful shoreline, beach photos are inspired. However, it's also a little challenging to get the lighting just right. You want your subjects to show up on a bright, sunny day, or be visible if you're photographing in the evening. Read a few of the most common questions that people have about capturing memorable beach shots.
Steps
What settings should I use for beach photography?
-
1Use your camera's beach mode if you don't want to manually adjust the settings. If you don't feel comfortable adjusting shutter speed, flash, or ISO, look for the "beach mode" on your digital camera. When you choose this setting, the camera will automatically adjust the light sensitivity to balance out the sand and sun. This way, your subjects will be visible instead of too dark.[1]
- "Beach mode" might be listed as "snow mode" on your camera. You can use either setting when shooting at the beach.
-
2Play around with a higher shutter speed if you want to adjust the settings. If you want to control the effects of the waves, for instance, change your shutter speed. Make it faster, around 1/250 or 1/500, to freeze the waves, or set a slower speed, around 1/125 or 1/60, to get a misty, blurred effect.[2] When you have a fast shutter speed, you can set the aperture (f-stop) so it's really small and you'll get a focused shot.[3]
- If you want to adjust the aperture, remember that a larger aperture blurs more of the background. If you don't want the water to be in focus, for instance, try shooting at f/8 or f/11. This can make the waves blur together.
Advertisement -
3Use a flash if you're taking portraits at the beach. If your subjects are in front of your light source, so if the sunrise or sunset is behind them, use your camera's flash. The light fills in their faces so you don't get shadows or a silhouette. The flash also balance out the exposure in the shot.[4]
- Taking a landscape shot? Skip the flash since you're trying to balance the light of the sand, water, and sky.
- If you stand too far away from your subject, the flash won't be very effective so read your camera's manual to find out how close to your subject you need to be.
How can I take beach pictures with my phone?
-
1Shoot in burst mode so you're more likely to get a good image. Sometimes camera phones aren't as responsive as digital cameras. To increase your chances of taking a great shot, set your camera phone to burst mode so it takes at least 3 photos every time you press the shutter button.[5]
- Your phone may take more than 3 photos in one burst. Read your manual to find out how many frames it will take with each shot.
- This setting is really useful if you're trying to photograph people as they move or act casually.
-
2Hold your phone right at the water's level to get a great beach reflection shot. Camera phones offer a little more flexibility when it comes to getting close to the beach. Support the bottom edge of your phone and lower it down to the water. Then, exhale while you press the capture button. This is a great way to get a unique landscape since you'll capture more of the water or sky.[6]
- This is a wonderful way to focus on details that are along the shoreline while capturing the waves or an amazing reflection.
How do I take sunset photos at the beach?
-
1Position your sunset so it's not in the center of the photo. If you put the horizon line with the setting sun in the center of your shot, it can look too forced or staged. Instead, frame your image so the sunset is off-center. This leads your viewer's eyes towards the sunset and makes for a much more interesting picture.[7]
- Think of your image like a grid that's divided into thirds. Photograph the sunset so it's not dead-center. Instead, it should be in the upper third or lower third of the frame, or to the right or left.
-
2Shoot from low down to capture more of the water or sand. To create a dramatic sunset shot, get down on the beach or set up a tripod so it's almost on the sand. Then, focus your camera on something that's in the foreground like a unique rock or piece of driftwood. You'll get the details of your subject with the beautiful sunset reflected in the water on the horizon.[8]
- Work quickly since the sun goes down quickly once it's reached the horizon.
-
3Skip the flash if you'd like to make a dramatic silhouette. For a more artistic shot, don't illuminate your subjects. By shooting without a flash, you'll create a dark silhouette that is really striking. Try this if you're photographing couples and want to create a sense of intimacy, for instance.[9]
- This works well if you don't want to focus on facial expressions or the subject's details.
How can I take beach photos of myself?
-
1Take a selfie! If you're walking alone on the beach and inspiration strikes, simply position yourself in front of the waves and point the camera directly at yourself. Let your finger push down slightly on the shutter to focus the shot before you take it. This way, you'll have a clear picture of yourself with the beach in the background.[10]
- For an easy shot that looks relaxed, stretch your feet out on the sand. Photograph your feet with the waves lapping against them. The image will look casual, but stylish.
-
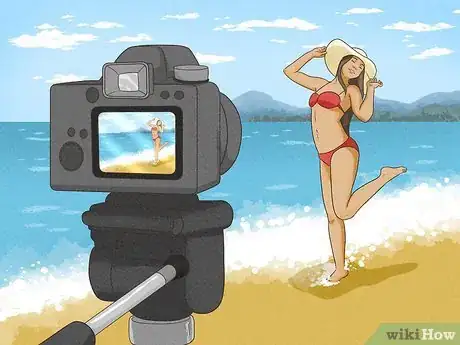
2Set up a tripod so you can pose without getting a blurry image. If you've got the time and equipment, set up a sturdy tripod on the beach and attach your camera. This makes it easier to compose your shot and check that everything's in focus. Then, set the camera's timer so you can get in front of the lens before it takes the picture.[11]
- If you don't feel like scrambling to get in front of the camera before the timer goes off, attach a camera remote control. Then, just press on the control when you're ready to take the picture.
What can I do to make my beach shots turn out great?
-
1Choose an interesting subject. Sure, the water, sand, and sky can be beautiful, but if you really want your beach image or landscape to stand out, choose a unique subject. You could photograph people, creatures at the beach like nesting birds, starfish, or crabs, or things on the shore. Try photographing piers or boats, for instance.[12]
- Use reflections in your photography! The reflections from a tide pool or from water trapped in a rock can make for unusual beach photographs.
- Capture the details and textures of your subjects. Get close so you see the rough texture of driftwood, impressions in the sand, or foam on the edge of the water. If you're getting really close to something small, turn on your camera's macro setting to capture the most detail.
-
2Take your shots in the morning or late afternoon so you don't get harsh lighting. If you try to photograph in the middle of the day—typically between 10 am and 2 pm—you'll get glare from the sand and extreme shadows. To capture great shots with natural lighting, photograph when the sun is low in the sky—early in the morning or in the twilight.[13] [14]
- The softer lighting will make it easier to capture details on the beach like the grains of sand, the waves lapping at the shore, and your subjects' faces.
- The hour shortly after sunrise or before sunset is known as the golden hour. This is when the lighting is warm and golden. You won't get many shadows, but you'll get naturally gentle lighting.
-
3Make sure the horizon line is straight. The horizon line is one of the first things you'll notice about a beach shot if it's at an angle, especially if you've shot a sweeping landscape image. To ensure your horizon line is balanced, line it up with the bottom or top of the frame. If your camera has a digital level or grid, use the feature to line up the horizon line.[15]
- To use the digital level, look through your camera's viewfinder or monitor. You'll see a level gauge and it should turn green once the horizon is level.
Expert Q&A
-
QuestionHow can I prevent a glare from the light hitting my camera lens?
 Karen De JagerKaren De Jager is a Professional Photographer and the Owner of Spectrum Photography LLC, operating in the broader East Bay area based in Pleasant Hill, California. Karen is a published and award-winning photographer who offers both in-studio, outdoor, and on-location sessions specializing in capturing a wide variety of special moments and events in a natural, photojournalistic style. Her ability to look at every photoshoot as an adventure and general passion for delivering excellent customer service led to Spectrum Photography’s recognition by Expertise.com as the “Best Wedding Photographers in Vallejo” in both 2018 and 2020.
Professional Photographer Make sure to use your lens hood, which will help reduce some of the glare and haze that will hit your lens. Add a neutral density filter on your lens as well, which will help reduce the amount of light that hits your lens.
 -
QuestionWhat time of day is best for taking photos at the beach?
 Karen De JagerKaren De Jager is a Professional Photographer and the Owner of Spectrum Photography LLC, operating in the broader East Bay area based in Pleasant Hill, California. Karen is a published and award-winning photographer who offers both in-studio, outdoor, and on-location sessions specializing in capturing a wide variety of special moments and events in a natural, photojournalistic style. Her ability to look at every photoshoot as an adventure and general passion for delivering excellent customer service led to Spectrum Photography’s recognition by Expertise.com as the “Best Wedding Photographers in Vallejo” in both 2018 and 2020.
Professional Photographer Just like all outdoor photography, it is ideal to have a session at the golden hour (within two hours of sunset). The most beautiful moment is about 15 minutes before the sun completely sets.
Warnings
- Sand and salt water can damage your camera lenses so be really careful as you photograph on the beach.⧼thumbs_response⧽
References
- ↑ https://www.easybasicphotography.com/camera-shooting-and-scene-modes.html
- ↑ https://www.exposureguide.com/beach-photography-tips/
- ↑ https://youtu.be/-UMrMYF4xdE?t=169
- ↑ https://www.slrphotographyguide.com/beach-photography/
- ↑ https://photoswithphones.com/guide-beach-photography-smartphone/
- ↑ https://youtu.be/N7JB0RUjT_k?t=194
- ↑ https://youtu.be/id3QbTomivY?t=120
- ↑ https://youtu.be/IB7GtW6BkX8?t=506
- ↑ https://strobtools.com/10-tips-for-beautiful-sunset-portrait-photography/
- ↑ https://www.travelinglifestyle.net/smart-ways-to-take-photos-of-yourself-when-traveling-solo/
- ↑ https://www.travelinglifestyle.net/smart-ways-to-take-photos-of-yourself-when-traveling-solo/
- ↑ https://youtu.be/044YujYOxoY?t=576
- ↑ https://www.picturecorrect.com/photography-five-tips-for-great-beach-photos/
- ↑ Karen De Jager. Professional Photographer. Expert Interview. 18 March 2021.
- ↑ https://www.slrphotographyguide.com/composition-tips/


