This article was co-authored by wikiHow Staff. Our trained team of editors and researchers validate articles for accuracy and comprehensiveness. wikiHow's Content Management Team carefully monitors the work from our editorial staff to ensure that each article is backed by trusted research and meets our high quality standards.
This article has been viewed 15,735 times.
Learn more...
Scapes are a seasonal vegetable that have a very light garlic taste that complements a variety of dishes. You can store scapes based on how you plan to use them. If you want them readily available while you cook, you can store them in water at room temperature for a few days. For long-term storage, you’ll need to refrigerate or freeze the scapes to keep them fresh.
Steps
Storing Scapes at Room Temperature
-
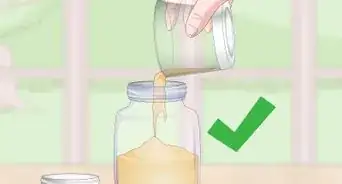
1Fill a glass or jar halfway with cool, filtered water. Pick a glass or jar that is large enough to fit the scapes and add cool, filtered water. It’s important to used filtered water because nutrients in unfiltered water can cause the scapes to break down quickly in the glass.[1]
- The glass or jar doesn’t have to have a lid, since you’ll be changing the water frequently to prevent contamination.
-
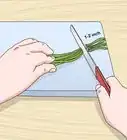
2Place the scapes in the glass and leave it on the counter. Position the scapes so that the thickest part of the stalk is at the bottom of the glass, and the thinner part is at the bottom. If your scapes are very long, you might have to cut them in half before you put them in the water.[2]
- Be aware that if you have too much water in the glass, putting the scapes into the water can cause the level to rise, resulting in a spill.
- Make sure the glass is not in direct sunlight on the counter. Heat can cause the scapes to go bad quickly.
Advertisement -
3Replace the water in the glass every day to keep it fresh. Remove the scapes from the water and pour the old water into the drain. Then, refill the glass with fresh, cool, filtered water and place the scapes back into the glass to use them as needed.[3]
- You may also need to change the glass or wash it out if it becomes dirty.
-
4Store the scapes at room temperature for 2-3 days. When you need a scape, simply pull it out of the glass and incorporate it into your recipe. After a few days or if the scapes start to wilt or droop at any point, transfer them to a bag and place them in the fridge.[4]


Refrigerating Garlic Scapes
-
1Rinse and dry the scapes to remove dirt and debris. Hold the stalks under cool, running water to clean them, rotating them in your hands so the water runs over each stalk. Then, lay them out to air dry for about 30 minutes, or pat them with a paper towel to remove the excess moisture.[5]
- Refrigerating dirty scapes can cause other fruits and vegetables in your fridge to go back quicker than they normally would.
-
2Put the scapes in a plastic bag and leave it slightly open. Use a plastic bag with an open end or a mesh produce bag to allow air to circulate around the stalks in the refrigerator. Leave the bag open since closing it can cut off air circulation and cause the stalks to wilt.[6]
- You can use a resealable bag, but make sure you don’t accidentally close the bag.
-
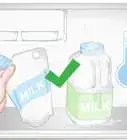
3Place the bag in the crisper drawer of the refrigerator. Transfer the bag of scapes to the refrigerator, and store them in the same drawer as the rest of your vegetables. Make sure the crispness level of the drawer is as high as possible.[7]
- Once you put the scapes in the drawer, check to make sure the bag is still open. Move any other vegetables that could fall onto the bag, causing it to close.
-
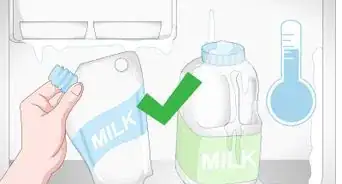
4Use the scapes within 2 weeks. After about a week, check on the scapes to make sure they’re still fresh. The stalks should still be crisp and firm, and there should be little to no wilting at the ends of the stalks. Throw the stalks away and purchase new ones if they’ve been in the refrigerator for more than 2 weeks.[8]
- If the stalks begin to wilt or smell bad at any time before 2 weeks have passed, throw them away immediately.


Freezing for Long-Term Storage
-
1Wash the scapes with cool, running water and dry them. Run the scapes under tap water to remove dirty and debris before you freeze them. Then, lay them out to air dry or pat them dry with a paper towel to remove excess moisture.[9]
- It’s important to wash the scapes to remove dangerous bacteria before you freeze them. Freezing can slow down the reproduction of bacteria, but they will “reactivate” at a warmer temperature when you remove the scapes from the freezer.[10]
-
2Chop the scapes to fit in your chosen container. Use a sharp paring knife to cut the scapes into halves or quarters. Try to keep them roughly the same size to make it easier to use them in recipes. Some chefs recommend cutting off the tip of the stalk and the pod at the bottom before freezing the scapes.[11]
- You can freeze the scapes whole as long as they fit into the container.
-
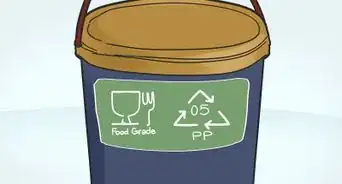
3Place the scapes in an airtight container and seal it. Make sure there are no cracks or holes in the container and that it’s closed tightly. The scapes should fit in the container without bending or snapping, which can cause them to wilt.[12]
- There’s no need to blanch the scapes before you freeze them, since they’ll retain their flavor without being cooked.
-
4Store the scapes in the freezer for up to 12 months. Scapes are seasonal vegetables, so it might be hard to find them when they’re out of season in the summer, fall, and winter. Use them as needed throughout the year, and make sure to close the container tightly when you return them to the freezer.[13]
- If the scapes begin to wilt or smell at any point, throw them away immediately to prevent bacteria growth.


Warnings
- Never eat scapes that have wilted, changed colors, or have a bad smell.⧼thumbs_response⧽


References
- ↑ https://cedarcirclefarm.org/tips/entry/garlic-scapes
- ↑ https://cedarcirclefarm.org/tips/entry/garlic-scapes
- ↑ https://cedarcirclefarm.org/tips/entry/garlic-scapes
- ↑ https://cedarcirclefarm.org/tips/entry/garlic-scapes
- ↑ https://www.backyardboss.net/what-to-do-with-garlic-scapes/
- ↑ https://www.epicurious.com/ingredients/how-to-buy-and-store-garlic-and-garlic-scapes-like-a-pro-article
- ↑ https://www.epicurious.com/ingredients/how-to-buy-and-store-garlic-and-garlic-scapes-like-a-pro-article
- ↑ https://www.epicurious.com/ingredients/how-to-buy-and-store-garlic-and-garlic-scapes-like-a-pro-article
- ↑ https://www.backyardboss.net/what-to-do-with-garlic-scapes/
- ↑ https://www.npr.org/sections/thesalt/2013/04/04/176242166/freezing-food-doesnt-kill-e-coli-and-other-germs
- ↑ https://nesfp.org/world-peas-food-hub/world-peas-csa/produce-recipes/garlic-scape
- ↑ https://nesfp.org/world-peas-food-hub/world-peas-csa/produce-recipes/garlic-scape
- ↑ https://nesfp.org/world-peas-food-hub/world-peas-csa/produce-recipes/garlic-scape
About This Article