This article was co-authored by wikiHow Staff. Our trained team of editors and researchers validate articles for accuracy and comprehensiveness. wikiHow's Content Management Team carefully monitors the work from our editorial staff to ensure that each article is backed by trusted research and meets our high quality standards.
There are 8 references cited in this article, which can be found at the bottom of the page.
The wikiHow Culinary Team also followed the article's instructions and verified that they work.
This article has been viewed 9,944 times.
Learn more...
Oat milk is a dairy-free type of milk that you can easily make at home. It’s a great alternative for people who can’t drink dairy or nut-based milks. One issue people sometimes have when they make homemade oat milk is that it ends up with a slimy texture, which makes it less appealing than creamy store-bought oat milk. Luckily, there are ways to make non-slimy oat milk at home that tastes just as good as what you can find in a store! The keys to slime-free oat milk are the proper blending and straining techniques.
Ingredients
- 1 cup (90 g) of rolled oats
- 4 cups (960 mL) of water
- 1/4 tsp (1.25 g) of salt
- 2 tbsp (30 mL) of maple syrup (optional)
- 1 tsp (4.9 mL) of vanilla extract (optional)
Steps
Blending the Oats
-
1Put 1 cup (90 g) of rolled oats in a blender. Measure out the oats using a dry measuring cup and pour them into the blender. Avoid using quick oats because they absorb water faster and are more prone to going slimy.[1]
- Rolled oats are also sometimes called old-fashioned oats or whole oats.
- Use organic rolled oats for the healthiest option.
- You can use any type of blender you have available, though high-powered blenders are the best because they chop the oats up evenly more quickly.
- Don’t use a food processor because you will probably have to blend the oats longer to get an even consistency, which makes them slimy.
-
2Pour 4 cups (960 mL) of cold water into the blender. Use a liquid measuring cup to measure out the water and pour it into the blender on top of the oats. Never use warm or hot water because heat makes oats starchy and gummy, so it will result in slimier oat milk.[2]
- The colder the water, the better. If you have ice water, such as in a fridge with a water dispenser, use that instead of cold tap water.
- Don’t let the oats soak in the water. Finish adding the rest of the ingredients and blend the oat milk as quickly as possible. Soaking oats is another reason oat milk goes slimy.
Advertisement -
3Dump 1/4 tsp (1.25 g) of salt into the blender. Measure out the salt using a measuring spoon and pour it into the blender. This pinch of salt helps give the oat milk a creamier, more savory texture and flavor.[3]
- You can use either regular table salt or kosher salt for this.
-
4Add maple syrup and vanilla extract if you want sweetened oat milk. Use a measuring spoon to measure out 2 tbsp (30 mL) of maple syrup and 1 tsp (4.9 mL) of vanilla extract and add them to the blender. Skip this if you want unsweetened oat milk.[4]
- You could use honey instead of maple syrup to sweeten your oat milk.
- Whether or not you add sweetener shouldn’t affect whether the oat milk turns out slimy.
-
5Blend the mixture immediately for 20-30 seconds at high speed. Turn the blender on to the highest speed setting. Stop the blender as soon as the oats are well blended and don’t let it run for any longer than 30 seconds.[5]
- Pay close attention during this step and stop the blender within 20-30 seconds once the oats are broken up and mixed with the water.
- If you blend the oats too long, the heat and friction from the blender can make them slimy.

Straining the Oat Milk
-
1Place a nut milk bag into a large measuring cup. A nut milk bag is a tightly woven bag that is specially designed for straining nut milks, so it works perfectly for oat milk as well. Place the bag into a measuring cup with a capacity of at least 4 cups (960 mL), so it can hold all the milk you strain out.[6]
- You can purchase a nut milk bag online for under $10 USD.
- As an alternative to a nut milk bag, you can place some cheese cloth over a fine mesh strainer and pour the milk through that.
- Don’t use a strainer or a piece of cheese cloth on its own because the weave is not tight enough and too many oat particles will get through.
- If you don’t have a big enough measuring cup, you can use a large glass jar or any other convenient container that can hold all the milk.
-
2Pour the mixture into the nut milk bag in the measuring cup. Hold the nut milk bag open with 1 hand and grab the blender in your other hand. Carefully pour the oat milk mixture out of the blender into the bag.[7]
- If you need both hands to maneuver your blender, you could also fold the edges of the nut milk bag over the rim of the measuring cup to keep it open or get a helper to hold it open for you.
-
3Press the milk out from the oats by applying light pressure with your hands. Lift up the nut milk bag carefully and let the milk start draining out into the measuring cup. Apply very light pressure to the sides of the bag by squeezing it gently between your hands to help push the milk through, but don’t squish the oats.[8]
- Squeezing the mixture too hard is another reason oat milk can end up being slimy. Try to strain as much of the milk out as possible with the least effort.
- The less you squeeze on the mixture, the creamier your oat milk will be.
-
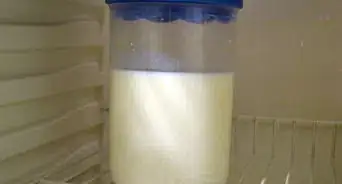
4Store the milk in an airtight container in your fridge for up to 5 days. Pour the strained oat milk into a sealable glass jar or other sealable container and close it up. Put it in your refrigerator and use it within 5 days.[9]
- For example, mason jars are perfect for storing oat milk.
- You can tell when oat milk goes bad because it starts to smell funny.
-
5Avoid heating the oat milk before you use it, which causes it to thicken. Remember that heat is the enemy of oat milk. Just take the oat milk out of the fridge and shake it up vigorously before you use it.[10]
- It’s normal for your oat milk to separate in the fridge. Shaking it up will mix everything back together.


Warnings
- Make sure not to over-blend your oat milk. The heat and friction caused by the blender can turn your oat milk slimy.⧼thumbs_response⧽
- Avoid soaking your oats before you blend them. Less time soaking in the water translates to less slimy oat milk.⧼thumbs_response⧽
- Don’t heat up oat milk before you drink it. This will cause it to thicken and get slimy.⧼thumbs_response⧽
Things You’ll Need
- Dry measuring cup
- Liquid measuring cup
- Measuring spoons
- Blender
- Nut milk bag
- Sealable jar


References
- ↑ https://lovingitvegan.com/oat-milk/
- ↑ https://lovingitvegan.com/oat-milk/
- ↑ https://cleananddelicious.com/how-to-make-oat-milk-easy-delicious/
- ↑ https://www.youtube.com/watch?v=MTt_Mlj6YN8&feature=youtu.be&t=114
- ↑ https://cleananddelicious.com/how-to-make-oat-milk-easy-delicious/
- ↑ https://www.youtube.com/watch?v=MTt_Mlj6YN8&feature=youtu.be&t=146
- ↑ https://www.youtube.com/watch?v=MTt_Mlj6YN8&feature=youtu.be&t=150
- ↑ https://www.youtube.com/watch?v=MTt_Mlj6YN8&feature=youtu.be&t=159
- ↑ https://jamaicahospital.org/newsletter/homemade-oat-milk-receipe/
About This Article