This article was co-authored by wikiHow staff writer, Amber Crain. Amber Crain has been a member of wikiHow’s writing staff for the last six years. She graduated from the University of Houston where she majored in Classical Studies and minored in Painting. Before coming to wikiHow, she worked in a variety of industries including marketing, education, and music journalism. She's been a radio DJ for 10+ years and currently DJs a biweekly music program on the award-winning internet radio station DKFM. Her work at wikiHow supports her lifelong passion for learning and her belief that knowledge belongs to anyone who desires to seek it.
wikiHow marks an article as reader-approved once it receives enough positive feedback. In this case, several readers have written to tell us that this article was helpful to them, earning it our reader-approved status.
This article has been viewed 238,707 times.
Learn more...
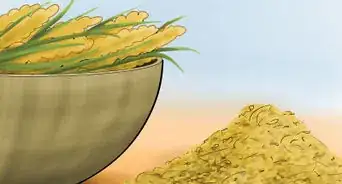
Stacking hay is hard work! Hay bales are heavy and they can't be stacked haphazardly. They need to be positioned in specific ways to prevent damage. To protect your bales from mold, always build stacks on wooden pallets. Pack the bales in tightly for the most stability. Once you get your bales to the pallet area, you can choose from two different stacking patterns, based on your needs.
Steps
Moving the Bales to the Pallet
-
1Arrange your pallets in an accessible area. Your stacks need to be easy to get to, so choose a place you can access without difficulty. Avoid stacking bales directly on the ground. The hay will soak up moisture and become moldy. To prevent this, use wooden pallets as the foundation.[1]
- You can also use old tires or telephone poles to build your stacks on, but pallets are the easiest and most common choice.[2]
- Consider covering your pallets with a tarp for an extra layer of protection.
-
2Grab the bale by the strings with both hands. Put one hand around each string. This work is tough on your hands and sometimes hay can be thorny. Wear leather gloves or use hay hooks if you're moving a lot of bales.Advertisement
-
3Lift with your legs rather than your back or arms. Stand with your feet shoulder width apart, bend your knees and lower yourself to the ground. Keep your back straight and your abs tightened. Lift the bale with power generated by your legs. Then, lean the bale against your pelvis as you carry it to the stacking area or to the next person.
- Lifting bales with your arms and back can cause strain and injury.
-
4Carry or toss the bale if you're strong enough. You can carry bales manually, but if you have a lot to move, this may not be feasible. Tossing them is hard work, but some people prefer this technique. Toss the bales into the pallet area.
- If you're working with a partner, don't expect them to catch bales. You'll probably knock them over instead! Toss it so that it'll land near them, not on them.
-
5Move the bale with a dolly for easier transport. A dolly makes moving bales easy for most people. Tip the bale on its end. Lean it about 10 degrees, and then put it on the dolly. Using hay hooks can help stabilize the load.
-
6Drop the bale on the floor or pallet. Using the transport method of your choice, move the bales, one by one, to the pallet area for stacking.
-
7Avoid stacking bales that are loose or have broken strings. Twine needs to be snug to keep the bale compact. Bales with loose twine can threaten the stability of the stack. Save them for the top of the stack, or put them aside to be repaired.[3]
- If you don't have the means to repair it, put it aside to be used as feed right away.
-
8Repair or replace broken twine. Hold down the bale with your knee. Tie a replacement string onto the existing string on the end of the bale. Wrap it around the length of the bale, then tie it at the other end.
-
9Follow a stacking pattern. Be sure to follow a pattern when stacking hay. There are several traditional ones you can try. Make sure the stack height does not exceed 1.5 times the shortest base dimension. Don't stack higher than you can comfortably reach.[4]
- For example, if the stack is 20 feet (6.1 m) wide and 40 feet (12.2 m) long, the height should not exceed 30 feet (9.1 m).
- Use Stacking Pattern #1 to create basic four-layer stacks.
- Use Stacking Pattern #2 to create taller stacks with greater stability.


Using Stacking Pattern #1 for Standard Four-Layer Stacks
-
1Stack the bottom layer "cut side up." Place the bales onto the pallet on their sides with the cut side up. Line them up evenly, side by side, until you fully cover the pallet with a single layer of bales. If stacked properly, the strings will be on the sides, rather than the top and bottom. This allows for better air circulation.[5]
- When a bale is on its side, the hay stems should run vertically. The top of the bale will feel sharp and jagged.
-
2Stack the second layer "top side up." The second layer needs to be placed perpendicularly to the first, with all the bales placed width-wise. This time, the strings will be on the top and bottom rather than on the side.[6]
-
3Tuck your bales tightly together. You can usually put them loosely in their spot and kick them firmly into place, especially if it's a tight spot. You can also shove the bale in with your knee, which would be safer. Make sure the bales are packed in as tightly as possible.[7]
- Tightly packing the bales helps prevent unstable stacks. The orientation of the bales (cut side up) allows for circulation.[8]
- If your bales are still green, pack them in a little more loosely.
-
4Continue alternating the direction for each layer. Alternating the direction allows for good air circulation and results in very stable stacks. Changing the direction each time locks the bales in together, almost like puzzle pieces, with great stability.[9]
- This is the simplest and easiest way to stack hay.
-
5Do four layers total for the most stability. Vertically, the bales will form four-bale columns, and between these columns, the stack can collapse. If your stacks are four bales or fewer, this won't be as much of an issue.[10]
-
6Fill the pallet to capacity. Cover the pallet with the first layer, then start building stacks from the corners toward the middle. Make sure to keep the corners or each new stack perfectly lined up with the corners below to assure stability.


Using Stacking Pattern #2 for Taller Stacks
-
1Put a bale in the corner width-wise. Position this first bale top side up. The strings will be on the top and bottom rather than on the side. Start in the far left corner and work from left to right.[11]
-
2Stack two bales next to it lengthwise. Position these bales "cut side up." The string will be on the sides. Place these side by side, since you're currently creating the first layer.
-
3Continue stacking the bales length-wise. Keep going until you get to the wall or the edge of the pallet.
-
4Stack the other corner bale width-wise. This corner bale will be top side up. It finishes off a row that runs from left to right. To make the corner sturdy, make this two bales thick.
- The first (far left) corner was one bale thick. This (far right) corner is two bales thick. This begins the interlocking pattern, as opposed to the regular vertical stacking of Pattern #1.
-
5Stack the next row two bale widths thick. This row is in front of the corner bale (closer to you) with ALL the bales lengthwise.
-
6Stack the next row after that just like the first. Repeat the exact same placement as before.
-
7Follow the same pattern for the second layer. This time, though, it is flipped on its side. Put a bale in the corner lengthwise, then stack a row of two bales in front of it width-wise, etc.
-
8Start the next layer like the first and continue alternating patterns. While difficult to get used to, this pattern will maximize stability by crossing bales over each other perpendicularly and thus "locking" them together. Use this method to make very high stacks (4+ layers). It can help prevent your stacks from collapsing and ensure the safety of those working around them.[12]


Community Q&A
-
QuestionHow do I make a system that stacks hay?
 Community AnswerYou can purchase an automatic bale stacker, as they already exist.
 -
QuestionCan a hay bale self-combust if it is stacked in a loft?Community AnswerYes, if the hay is not properly dried before baling. However, this rarely happens. More often than not, the bale gets moldy.
Warnings
- If the bale feels particularly heavy with moisture, set it aside. Spontaneous combustion is a reality when it comes to hay, and one bale can burn down an entire barn.⧼thumbs_response⧽
- Sometimes hay is thorny, so consider wearing gloves.⧼thumbs_response⧽
- Periodically sweep the loose hay from the floor. The last thing you need to do is slip on a patch of hay while you're carrying a bale.⧼thumbs_response⧽


References
- ↑ http://www.horsechannel.com/horse-news/2014/08/20-how-to-stack-hay.aspx
- ↑ http://www.hobbyfarms.com/how-to-store-hay-to-make-it-last-2/
- ↑ http://www.hobbyfarms.com/how-to-store-hay-to-make-it-last-2/
- ↑ http://www.ebay.com/gds/5-Tips-for-Building-Haystacks-/10000000178883041/g.html
- ↑ http://www.horsechannel.com/horse-news/2014/08/20-how-to-stack-hay.aspx
- ↑ http://www.horsechannel.com/horse-news/2014/08/20-how-to-stack-hay.aspx
- ↑ http://www.horsechannel.com/horse-news/2014/08/20-how-to-stack-hay.aspx
- ↑ http://www.sheepscreek.com/rural/haying.html
- ↑ http://www.hobbyfarms.com/how-to-store-hay-to-make-it-last-2/
About This Article