This article was co-authored by wikiHow Staff. Our trained team of editors and researchers validate articles for accuracy and comprehensiveness. wikiHow's Content Management Team carefully monitors the work from our editorial staff to ensure that each article is backed by trusted research and meets our high quality standards.
wikiHow marks an article as reader-approved once it receives enough positive feedback. In this case, 90% of readers who voted found the article helpful, earning it our reader-approved status.
This article has been viewed 169,171 times.
Learn more...
Stained glass is a great way to make a beautiful ornament, picture frame, or window decoration. Learning how to solder stained glass can open the door to a lot of great craft ideas. Soldering can be dangerous, so it's important to learn how to prep your glass and your soldering equipment correctly so you can solder safely and easily.
Steps
Applying Foil and Flux for Soldering
-
1Turn on your soldering iron and set up your materials. Set out your copper foil, liquid flux, and coil of solder. Plug in your soldering iron, set it on its stand, and allow it to heat up. It's important to have everything set up before you begin the soldering process, because precise timing is very important in this project.
-
2Cut a length of adhesive copper foil to fit your glass pieces. Solder won't stick to glass by itself--you need another metal on the surface to hold it in. Adhesive copper foil will wrap around the edge of the glass you want to solder. Measure this by lining up the copper foil along the edge of the glass, leaving about 1⁄8 inch (3.2 mm) on each end. Then cut the foil carefully with your scissors.
- You can buy readymade strips of foil from most craft stores.
Advertisement -
3Remove the backing from the strip of adhesive foil. After you cut the foil pieces, you can gently peel the backing off. You should be able to easily strip away the paper backing from the foil, revealing the adhesive side.
-
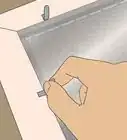
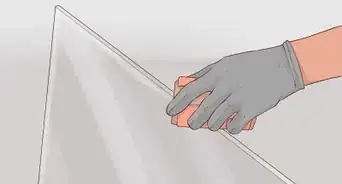
4Place the adhesive side of the copper foil on the edge of the glass. Try to position the edge of the glass directly on the center of the copper foil. Then, press the foil down gently around the edges of the glass. Be careful when wrapping the foil around sharp edges!
- You can wear heavy-duty craft gloves to protect your hands from cuts.
-
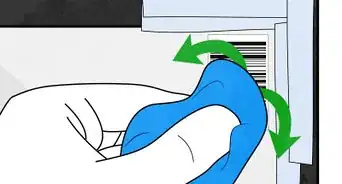
5Use a roller to make sure the foil is firmly on the glass. Use a roller or a pencil to roll out any creases, wrinkles, or bubbles in the foil. This is very important because the solder may not bond with wrinkled foil.
-
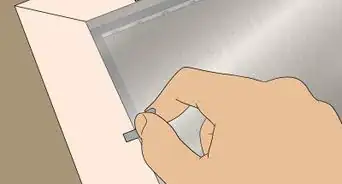
6Repeat until all your glass pieces are lined with foil. Each one of the pieces you plan to use should have foil wrapped all the way around it. Double-check to be sure the foil is firmly stuck on all the glass edges.[1]
-
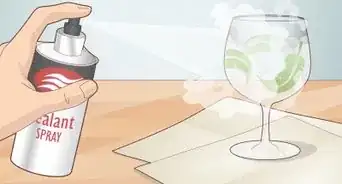
7Brush a coat of liquid flux onto the copper foil. The flux helps the metal in the solder and the foil to stick together permanently. Brush one coat of liquid flux onto all of the copper foil. It doesn't have to be applied perfectly, so long as all the foil is covered.[2]


Soldering Prepared Glass Pieces
-
1Position your glass pieces for soldering. Assemble your glass pieces into their final design position. Leave a very thin gap (about 1⁄16 inch (1.6 mm)) between the pieces so the solder will be able to flow into the seam. You can assemble the glass on any hard, heat-resistant surface, but metal work tables are best.
-
2Unroll about 4 inches (100 mm) of solder from the coil. This will melt to form the bond between the two pieces of glass. Since most solder contains lead, it's best to wear gloves to prevent accidental poisoning.[3]
-
3Hold the coil of solder in your left hand and the soldering iron in your right hand. This can be reversed if you are left-handed. Choose whichever is more comfortable for you. Be very careful picking up the soldering iron--the tip can easily cause serious burns.[4]
-
4Place the tip of the unrolled solder above the copper foil. It might be tempting to lie the solder down on the seams between two pieces of glass and use the iron directly on them, but don't do it. Keep the solder at least 1⁄2 inch (13 mm) above the foil.The best results are achieved by letting the melted solder drop into the seam between the pieces of glass.[5]
-
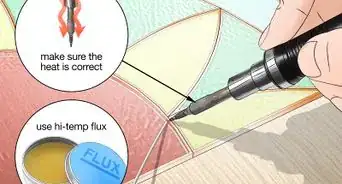
5Touch the tip of the soldering iron to the tip of the unrolled solder. It will immediately begin to melt the solder and the solder will drop into the seam. Be very careful--the soldering iron is extremely hot.[6]
- Don't worry if solder falls onto the glass. It won't stick.
- If your solder beads up too much, simply run the tip of the soldering iron through it gently.
-
6Move both hands along the seam. Keep your hands in the same position--one holding the solder, the other holding the soldering iron up to it. Move your hands along the seams of the glass while the solder drips down onto it. Move quickly enough so that the melted solder does not bunch up in one area, but slow enough so that the entire seam gets coated with the bead of solder.[7]
-
7Remove the tip of the soldering iron when you reach the end of the seam. You should see a continuous line of solder along the intersection of the two pieces of glass. The glass is now strongly and permanently bonded together.[8]
-
8Repeat until all the glass is soldered. Solder the rest of the glass, moving in the same direction to prevent dripping. It's okay if it's not perfectly even the first time. The more times you practice this process, the more comfortable you will feel and the cleaner your soldering lines will look.[9]


Cutting Glass for Soldering
-
1Choose your design. Decide what you'd like to make and how much glass and solder you'll need for it. The amounts of both will depend on what you're trying to make, but if you're a beginner, it's best to start out small with a simple design.[10]
-
2Put the glass on a towel on a hard surface. You'll want to brace the glass against something hard, but too much force can cause it to shatter. The towel will keep the glass from sliding around and will catch any small fragments of glass that break off in the cutting process.[11]
-
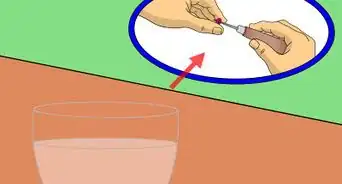
3Score the glass. Using your glass cutter, press down firmly and make one single score, from one edge to the other, where you'd like the glass to break. It's very important to make only one score line in order to get a clean break. Be careful scoring the glass--both the cutter and the glass itself can be dangerous.[12]
-
4Snap the glass along the score line. Carefully break the glass along the line you made. The simplest way to do this is by holding the glass with one hand on each side of the line. Make a quick snapping motion and the glass will separate along the score line.[13]
-
5Score the glass until you have enough to work with. Continue scoring and breaking glass until you make enough glass pieces to create your project. Most stained glass projects use pieces that fit together like a puzzle. If you are looking for pattern ideas, you can buy stained glass patterns from craft stores or find them online.[14]
-
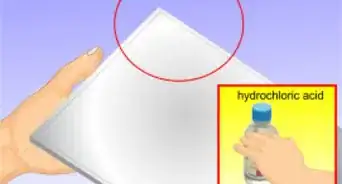
6Wipe the glass. Gently wipe the glass off to get rid of any small shards. You can use a wet sponge or wet paper towels. Be careful disposing of them--small pieces can cause splinters.[15]


Community Q&A
-
QuestionMy solder is not melting on the foil. Does this mean my solder gun is not hot enough?
 T. ChinsenTop AnswererSoldering needs a clean, hot surface. If the foil you're using is too wide, then the iron will need to provide more heat to get the foil to the solder melting temperature. Contamination on the foil will also prevent the solder from melting. Scrub the foil with a nail file and wipe it down with alcohol before trying again.
 -
QuestionI have a piece I am working on that doesn't have all the glass between the picture. What is the easiest way to solder this piece and keep it from bending?T. ChinsenTop AnswererAdding a "wire frame" around critical areas can stabilize the glass. Be sure to position and solder the wire in the middle of the foil. Use a wooden shim at the level of the wire for keeping a constant height when soldering the wire. This should keep the piece level.
-
QuestionThe solder balls up and does not spread evenly across the foil. I applied more flux, but the solder still balls up. What am I doing wrong?T. ChinsenTop AnswererSweat and oil from hands can tarnish the foil. Test a piece of the foil with solder. Flux is supposed to clean the surface, but if there is contamination, it cannot clear the surface. Try scrubbing the surface with a nail file/emery board and wipe off with alcohol. Get new foil if this does not work on the test foil.
Warnings
- Always have a well ventilated work area. Many solders contain lead, so avoid breathing in the fumes as much as possible.⧼thumbs_response⧽
- Soldering irons function at extremely high temperatures. Be very careful when using a soldering iron to prevent burning yourself or starting a fire.⧼thumbs_response⧽
- Get a good metal stand for the iron. Do NOT use the handle to prop it up on!⧼thumbs_response⧽
Things You'll Need
- Pieces of stained glass
- Glass cutter
- Scissors
- Copper foil
- Liquid flux
- Coil of non-lead solder
- Soldering iron
- Metal Soldering Iron stand


References
- ↑ http://everythingstainedglass.com/stained-glass-soldering
- ↑ http://everythingstainedglass.com/stained-glass-soldering
- ↑ https://www.delphiglass.com/page/knowledgeBaseView?KBItemID=16
- ↑ https://www.delphiglass.com/page/knowledgeBaseView?KBItemID=16
- ↑ http://everythingstainedglass.com/stained-glass-soldering
- ↑ https://www.delphiglass.com/page/knowledgeBaseView?KBItemID=16
- ↑ https://www.delphiglass.com/page/knowledgeBaseView?KBItemID=16
- ↑ http://everythingstainedglass.com/stained-glass-soldering
- ↑ http://everythingstainedglass.com/stained-glass-soldering
About This Article

To solder stained glass, start by wrapping copper foil around the edges of your stained glass. Then, use a roller to flatten the foil on the glass, and brush a coat of liquid flux on the foil so it bonds together later. Next, heat up a soldering iron, and assemble the glass pieces into your desired final design. Finally, use the soldering iron and a coil of solder to bond the copper foil on each piece to the foil next to it. To learn how to cut glass for soldering, scroll down!