This article was co-authored by Kelly Medford and by wikiHow staff writer, Hunter Rising. Kelly Medford is an American painter based in Rome, Italy. She studied classical painting, drawing and printmaking both in the U.S. and in Italy. She works primarily en plein air on the streets of Rome, and also travels for private international collectors on commission. She founded Sketching Rome Tours in 2012 where she teaches sketchbook journaling to visitors of Rome. Kelly is a graduate of the Florence Academy of Art.
There are 10 references cited in this article, which can be found at the bottom of the page.
wikiHow marks an article as reader-approved once it receives enough positive feedback. This article received 13 testimonials and 83% of readers who voted found it helpful, earning it our reader-approved status.
This article has been viewed 867,647 times.
If you want your line drawings to pop off the page and simulate a three-dimensional look, add value and shading to your drawing. Shading adds depth, contrast, and helps direct the viewer’s eyes to the focal point of your art. After you choose a method for shading, you can start in your drawing and bring it to life!
Steps
Choosing a Shading Method
-
1Start with hatching for a basic shading technique. Hatching is making a series of parallel lines to simulate shadows in your drawing.[1] You can space the lines closer together to make darker shadows or the lines can be spaced further apart to make the area seem brighter. Pull hatching lines in one long stroke to keep them uniform.[2]
- Hatching lines can be horizontal, vertical, or at an angle.
- Follow the angles and curves of objects with the shapes of your line to simulate a three-dimensional form. For example, shade a round object with curved lines rather than straight lines.
-
2Use cross-hatching to shade quickly. Cross-hatching builds onto hatch marks by adding a second layer of lines going at an opposite direction.[3] For example, first, make parallel horizontal lines and then layer vertical lines on top of them. This method of shading allows you to make areas darker quicker than basic hatching.[4]
- Draw the cross-hatching lines close together to make a densely shaded area on your drawing or spread them apart to make it lighter.
- Use hatch marks without a second layer to make a lighter shadow.
Advertisement -
3Work with stippling for a stylized look. Stippling is a time-intensive process of lifting your pencil up and down from the paper to make a series of dots on your drawing. Make an area of your drawing darker by keeping the dots close to one another.[5]
- Instead of dots make short lines that overlap to make shading in a more Impressionist style.
- Stippling works great for shading with a thicker marker.
-
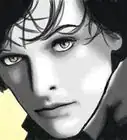
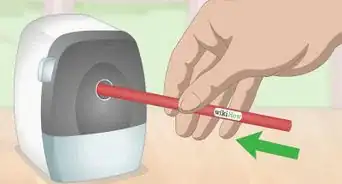
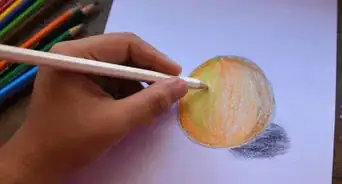
4Use blending for a smooth appearance. Blending your shading gives your drawing a smooth and realistic finish and requires the most time and technique to do correctly. Shade with the side of a soft graphite pencil and increase the amount of pressure you apply to the paper to make transitions between light and dark values.[6] [7]
- Art pencils have varying degrees of hardness and are labeled with a number and either the letter B or H. Soft graphite is labeled with the letter B and gets softer with a higher number. Hard graphite is labeled with the letter H and is more difficult to use for smooth transitions the higher the number goes. A standard number 2 pencil has an HB hardness, which is a medium between hard and soft graphite.
- Practice shading on simple polygon forms, like cubes and spheres before jumping in to shade your drawing.
Adding Value to Your Drawing
-
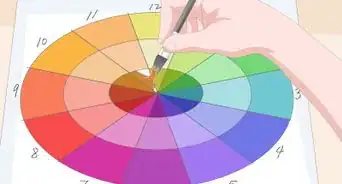
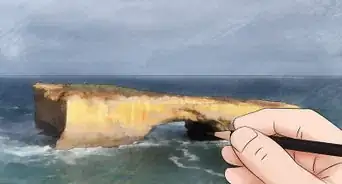
1Determine the direction of your light source. Your light source will determine where the darkest shadows and the brightest highlights appear on your drawing. Shadows will be on the opposite side of your light source while highlights will appear where your light source is pointing.[8]
- Work from real life or a photograph to understand how light affects the object you’re drawing. Move lights if you can to play with different shadow angles.
- People looking at your drawing will be drawn to the lightest areas of the drawing. Determine the area that you want viewers to focus on and make it the brightest.
-
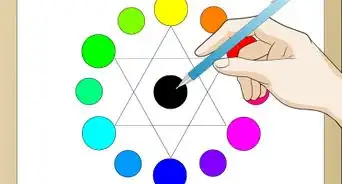
2Make a value scale from light to dark on a separate piece of paper. Draw a long rectangle and separate it with lines into 10 equal pieces. Shade the square on one side of the rectangle with your darkest value. Start to add value to the adjacent square so it is lighter than the darkest value. Work on each square, making them progressively lighter, until you reach the other end of the rectangle. Leave the last square empty so that it is brightest value.[9]
- Only use the values in your scale as you shade in your drawing.
- Use the same type of paper your drawing is on. Different papers have different textures and affect how the shades look.
- Aim to have smooth transitions between each of the squares rather than having drastic changes in value. The square next to your lightest shade shouldn’t be too dark.
-
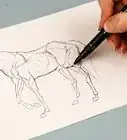
3Apply light pressure with your pencil to create a base layer of shading. Use a soft pencil, like a 4B hardness, to create the middle shade.[10] Move your arm back and forth rather than your wrist to maintain a smooth range of motion.[11]
- Don’t press too hard with your pencil since it will make your marks more difficult to erase later on.
-
4Darken the areas that are furthest from the light source. Press slightly harder with your pencil to make darker values on the opposite side of your light source. Build up layers of shading, working towards the darkest part of the drawing.[12]
- Your darkest shadow is called the core shadow.
- Rounded shapes will have reflected shadows on the opposite side of the light source. These shadows are lighter than the core shadow but darker than the highlights.
-
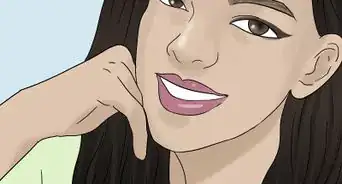
5Erase areas that have bright highlights. The areas closest to your light source will be the brightest parts of your drawings. Work gently with your eraser to lighten the areas in layers to develop a smooth transition from light to dark.[13]
- Add white pencil or pastel to make solid white areas that pop. Use this sparingly so it isn’t too overwhelming.
- Certain materials will reflect light in different ways. Objects with metallic finishes will have a brighter highlight while objects with a matte finish will look duller.
-
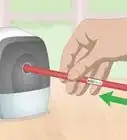
6Blend your marks with a smudge stick if you want a smooth finish. Mix your values together, working from the darkest part of your drawing to the lightest. Use the side of the smudge stick to make smooth transitions between different values.[14]
- Smudge sticks can be purchased at any art supply store or online.
- Don’t use your finger to blend values. Your finger gives you less control than a smudge stick and the oils from your skin could affect your drawing over time.
-
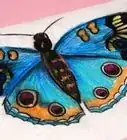
7Add drop shadows for a realistic look. If you want your object to look three-dimensional, a drop shadow will make it look like your drawing exists in deeper space. Your drop shadow will mimic the shape of the object casting it. Determine the surface where the shadow would land, and use the side of your pencil to shade in the drop shadow.[15]
- Look at a photograph or a still-life to see how your light angle affects the drop shadow.
- The hardness of the edge of your drop shadow depends on the strength of your light source. Brighter lights will cause a harder edge while dim lights make the edges softer.

Expert Q&A
Did you know you can get premium answers for this article?
Unlock premium answers by supporting wikiHow
-
QuestionHow do I shade basic forms?
 Kelly MedfordKelly Medford is an American painter based in Rome, Italy. She studied classical painting, drawing and printmaking both in the U.S. and in Italy. She works primarily en plein air on the streets of Rome, and also travels for private international collectors on commission. She founded Sketching Rome Tours in 2012 where she teaches sketchbook journaling to visitors of Rome. Kelly is a graduate of the Florence Academy of Art.
Professional ArtistThere are a variety of techniques you can use, but hatching and cross-hatching are very popular to try.
Support wikiHow by unlocking this expert answer.
-
QuestionWhat can I use to shade drawings?Kelly MedfordKelly Medford is an American painter based in Rome, Italy. She studied classical painting, drawing and printmaking both in the U.S. and in Italy. She works primarily en plein air on the streets of Rome, and also travels for private international collectors on commission. She founded Sketching Rome Tours in 2012 where she teaches sketchbook journaling to visitors of Rome. Kelly is a graduate of the Florence Academy of Art.
Professional ArtistUse the side of a soft 4B pencil if you want smooth, uniform shading in your drawing.Support wikiHow by unlocking this expert answer.
-
QuestionIs there a way to shade on drawing apps that don't use layers?
 wikiHow Staff EditorThis answer was written by one of our trained team of researchers who validated it for accuracy and comprehensiveness.
Staff AnswerwikiHow Staff EditorStaff AnswerYou can shade drawings all on the same layer, but it will also affect the line drawing you've made.Support wikiHow by unlocking this staff-researched answer.

Things You’ll Need
- Paper
- Pencils with soft graphite (HB or lower)
- Eraser
- Smudge stick (optional)
References
- ↑ Kelly Medford. Professional Artist. Expert Interview. 10 March 2021
- ↑ http://www.erikalancaster.com/art-blog/guide-to-shading-techniques-hatching-cross-hatching-scribbling-and-others
- ↑ Kelly Medford. Professional Artist. Expert Interview. 10 March 2021
- ↑ http://www.erikalancaster.com/art-blog/guide-to-shading-techniques-hatching-cross-hatching-scribbling-and-others
- ↑ http://www.erikalancaster.com/art-blog/guide-to-shading-techniques-hatching-cross-hatching-scribbling-and-others
- ↑ Kelly Medford. Professional Artist. Expert Interview. 10 March 2021
- ↑ https://youtu.be/vMr6eimcolc?t=1m54s
- ↑ https://youtu.be/-dqGkHWC5IU?t=4m10s
- ↑ https://youtu.be/-WR-FyUQc6I?t=1m14s
- ↑ Kelly Medford. Professional Artist. Expert Interview. 10 March 2021
- ↑ https://youtu.be/c_FcWFIXusA?t=2m18s
- ↑ https://youtu.be/vMr6eimcolc?t=2m
- ↑ http://rapidfireart.com/2017/09/30/lesson-9-learn-how-to-shade/
- ↑ https://youtu.be/Iw3RYSKpYjg?t=31s
- ↑ https://youtu.be/-dqGkHWC5IU?t=8m13s
About This Article

To shade drawings, start by deciding where the light is coming from in your drawing so you know where the shadows and highlights will fall. Then, lightly shade in your entire drawing to create a base layer of shading. Next, go back and heavily shade the parts of your drawing that are hidden from the light so they're the darkest. Finally, erase the parts of your drawing that the light is directly shining on to create white highlights. To learn different shading techniques you can use, like cross-hatching, keep reading!