This article was co-authored by wikiHow staff writer, Jessica Gibson. Jessica Gibson is a Writer and Editor who's been with wikiHow since 2014. After completing a year of art studies at the Emily Carr University in Vancouver, she graduated from Columbia College with a BA in History. Jessica also completed an MA in History from The University of Oregon in 2013.
The wikiHow Video Team also followed the article's instructions and verified that they work.
This article has been viewed 28,317 times.
Learn more...
Clear vinyl is a fun and durable material to sew with. Since it's thicker than most cloth fabrics, you'll need to prepare your machine to stitch through it. Switch to heavier needles and a strong polyester thread. Adjust your sewing machine's foot so it won't stick on the vinyl. Once you're ready to sew your project, keep your stitches at least 3.0 mm apart to avoid making too many holes in the vinyl.
Steps
Setting up Your Machine
-
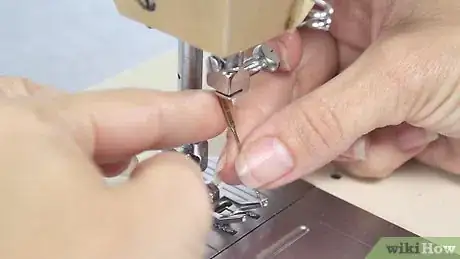
1Pick a sharp size 14, 16, or 18 needle. Since some clear vinyls are thick, use a very sharp needle that can cut through the material. Use a leather needle size 14 or a universal needle in 16 or 18. These won't bend when you sew through the vinyl.[1]
- If you can't find needles for leather, you can also choose needles made for denim.
-
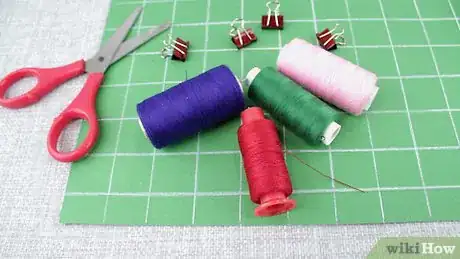
2Choose a polyester thread in your choice of color. If you're making something that will be stored outside, use a bonded nylon thread because it's weatherproof. For most other projects, you can use a standard polyester thread.[2]
- For an eye-catching project, consider using several different colors of thread.
Advertisement -
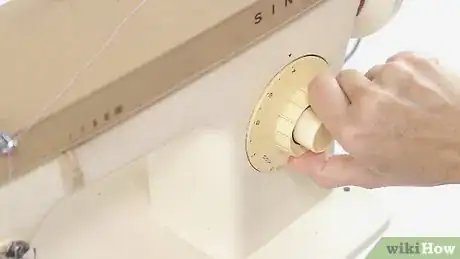
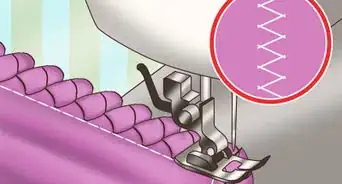
3Adjust stitches to 3.0 mm or longer. To prevent the stitches from pulling and tearing the clear vinyl, adjust your machine to make stitches that are at least 3.0 mm or longer. This will make stronger seams that those made with shorter stitches.[3]
- The stitches should be at least 2.5 mm wide.
-
4Use a walking, roller, or non-stick foot to prevent the vinyl from sticking. A general or standard foot can stick to the vinyl or the vinyl may slip out from under the foot. Remove the standard or general foot and pop a walking, roller, or non-stick foot in its place.[4]
- If you don't have 1 of these feet, lay a sheet of tissue paper over the vinyl. Stitch as usual and then tear the tissue paper away once you've finished.
Stitching the Clear Vinyl
-
1Avoid ironing any creases in the clear vinyl. Although most clear vinyl is sold on a roll, there may be small creases in the material when you unroll it. Instead of ironing which will melt the vinyl, lay the vinyl in a warm room or outside in the sun for a few hours. When the material warms, the crease should disappear.[5]
- You can set a heavy book or box on the vinyl to smooth the material faster.
-
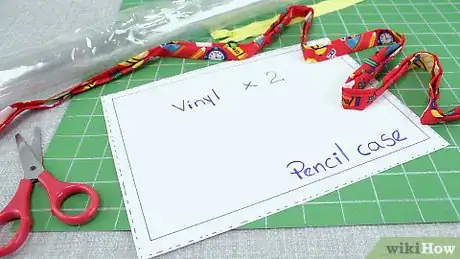
2Pick a pattern to use with the clear vinyl. Zipper bags, makeup bags, and pouches are popular projects to sew with clear vinyl. Buy patterns from fabric stores or online. Consider lining bibs, aprons, place mats, and tablecloths with vinyl. You can also make:[6]
- Wallets, ID pouches
- Outdoor cushions
- Shower curtains
- Porch protectors or screens
-
3Cut the vinyl with a rotary cutter and stitch it according to your pattern. Since most clear vinyls are thick, you'll need a sewing machine to stitch it. Follow your pattern to cut the vinyl into pieces with a rotary cutter. Then sew it or clip it into place.[7]
- If you don't have a rotary cutter, you can still use a pair of scissors or shears. These just might not give as neat of an edge.
-
4Use clips to join layers of the clear vinyl. Since you may want to sew layers of clear vinyl or stack it on fabric, it's useful to keep the layers in place. Instead of sticking pins into the vinyl which can leave holes, use fabric clips, paperclips, or clothespins. Clips can stop the vinyl from sliding around as you stitch.[8]
- Keep in mind that if you do have small holes in the clear vinyl, they can quickly become larger and tear the material.
-
5Cut decorative edges or sew fabric edges to your project. Although the clear vinyl won't fray, you may want to finish the edges to give your project a professional look. You can cut along the sides of the clear vinyl using pinking shears or decorative scissors. Or fold a strip of soft fabric over the sides and hem the material.
- For example, add a fun fabric edge for the sides of a clear makeup bag or cosmetic pouch.
Things You'll Need
- Sewing machine
- Walking, roller, or non-stick foot
- Polyester or bonded nylon thread
- Size 14, 16, or 18 needle
- Clear vinyl
- Clips such as fabric clips, paperclips, or clothespins
- Rotary cutter or scissors
- Pattern
References
- ↑ https://www.sewingpartsonline.com/blog/how-to-sew-vinyl-faux-leather-oilcloth/
- ↑ https://www.onlinefabricstore.net/makersmill/clear-vinyl-fabric/
- ↑ https://www.sewingpartsonline.com/blog/how-to-sew-vinyl-faux-leather-oilcloth/
- ↑ https://www.sewingpartsonline.com/blog/how-to-sew-vinyl-faux-leather-oilcloth/
- ↑ https://www.sewingpartsonline.com/blog/how-to-sew-vinyl-faux-leather-oilcloth/
- ↑ https://www.onlinefabricstore.net/makersmill/clear-vinyl-fabric/
- ↑ https://mellysews.com/2014/01/tips-for-sewing-vinyl.html
- ↑ https://www.nationalsewingcircle.com/video/sewing-vinyl-make-a-zippered-bag-008320/
