This article was co-authored by wikiHow staff writer, Jack Lloyd. Jack Lloyd is a Technology Writer and Editor for wikiHow. He has over two years of experience writing and editing technology-related articles. He is technology enthusiast and an English teacher.
The wikiHow Tech Team also followed the article's instructions and verified that they work.
This article has been viewed 114,695 times.
Learn more...
If you ever want to print off a list of the songs you have in Windows Media Player, you can do so by dragging your library's contents into a playlist and then opening the playlist in Notepad. You can then translate the document into plaintext--a much more readable format that Media Player's native one--by using Microsoft Word's "Find and Replace" feature.
Steps
Using a Simple Text Editor
-
1Open Windows Media Player. Windows Media Player is included as a standard app on any Windows computer.
- Type "WMP" into the taskbar search field to find Windows Media Player.
-
2Click the "Play" tab. This is in the upper right-hand corner of your screen, next to the "Burn" and "Sync" options. The "Play" tab is where you'll assemble your playlist.Advertisement
-
3Click "Music" in the options tree. This is on the left side of the screen.
-
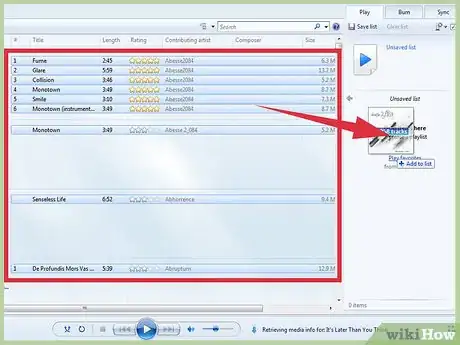
4Select a song, then hold down Ctrl and tap A. This will select your entire library.
-
5Click and drag your selected songs into the "Play" pane. This will add your library to your new playlist.
-
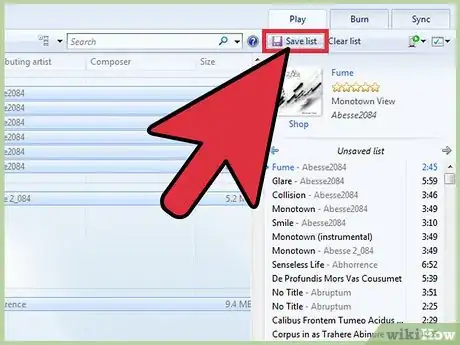
6Click the "Save List" option. This is in the top left corner of your playlist's window. Clicking "Save List" will prompt you to enter a name for your playlist.
-
7Enter a name for your playlist. When you're done, press ↵ Enter to save the playlist. It should appear under the "Playlists" section in the options tree.
-
8Click the "Playlists" option. This will open your Playlists folder; you should see your new playlist in here.
-
9Right-click your playlist and select "Open file location". This will take you to the folder in which the playlist's data file is saved.
-
10Open the "Notepad" app. Notepad is a basic text editor found in the "Desktop Apps" folder; you can find it by typing "Notepad" into the search field in the taskbar.
- You can also open the Start menu, click "All Apps", and navigate to "Windows Accessories". Notepad is in the Windows Accessories folder.
-
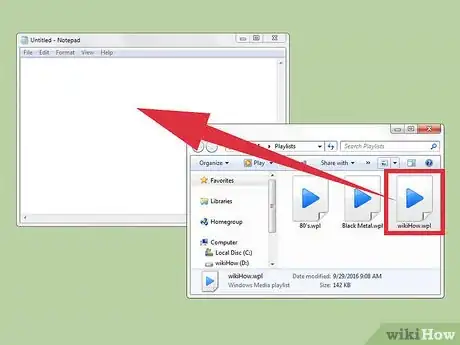
11Click and drag your playlist file from its folder. You'll need to drop the file inside Notepad's editing interface.
- Snapping Notepad to one side of the screen and the playlist folder to the other is the easiest way to do this.
-
12Drop the file in Notepad. You should see a long column of text appear. Notepad saves your songs in directory format, meaning that your music tags will look something like "\destination folder\Music\[Artist Name]\[Album]\[Song Name]".
-
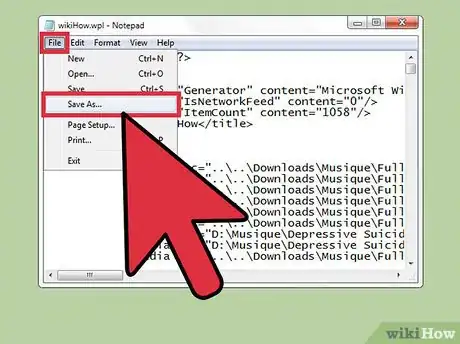
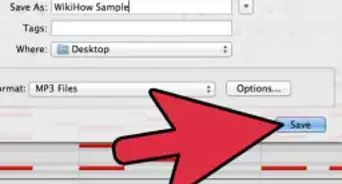
13Save your file. You can do this by clicking "File" in the top left corner of Notepad, clicking "Save As", naming your file, and clicking "OK". You have successfully saved a list of your songs!
Cleaning Up Your List with Find and Replace
-
1Copy the contents of your Notepad document. The easiest way to do this is by holding down Ctrl and tapping A to select everything in Notepad, then holding down Ctrl and tapping C.
-
2Open a new Microsoft Word document. If you don't have MS Word installed on your computer, you can use Google Docs' free version of Word.
- Depending on your version of Word, you may have to click "Blank Document" to open a new document.
-
3Paste your Notepad contents into Word. Do this by holding down Ctrl, then tapping V.
-
4Familiarize yourself with MS Word's "Find and Replace" feature. Holding down Ctrl and tapping H will activate this feature; you can then add text you wish to find to the "Find what" field and add the replacement text to the "Replace with" field. You can use this feature to remove the HTML tags from your song list, making it much easier to read.
-
5Copy the media tags and destination folder information. To do this, highlight the "<media src=".." tag from the beginning of a directory line, then copy it with Ctrl + C. Make sure you highlight the line all the way up to and including the "\" before an artist's name.
-
6Open the "Find and Replace" feature. Make sure your mouse cursor is set at the beginning of your document to ensure that the Find and Replace feature formats your entire document.
-
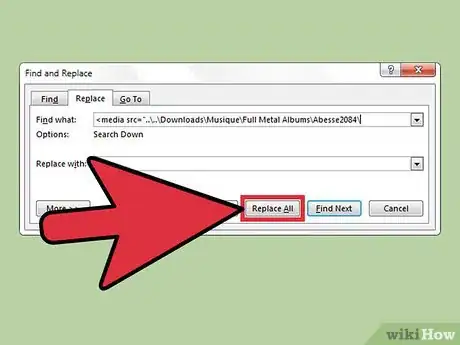
7Paste the media tag into the "Find" field. You can just add a space (Space) to the "Replace" field.
-
8Click "Replace All". If Word asks you for permission to search from the beginning of the document, click "Yes".
- You'll need to repeat this process a few times if your sections of your music are in separate directories.
-
9Delete the file tags. File tags you'll see are .mp3, .mp4, .wav, and so on; these are at the end of your directory lines. Delete them by copying and pasting the ".[file type]"/>" text from the end of a directory line into the "Find" field and placing a space in the "Replace" field of Find and Replace.
- You'll need to repeat this process a few times if your files aren't all in one format.
- You should also consider replacing the "\" separations with a double space. Doing so will separate your artist names, albums, and song names into distinct columns.
-
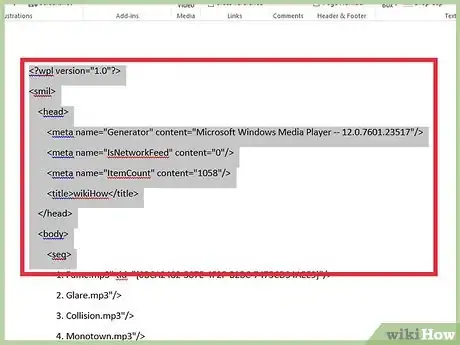
10Delete the HTML text at the beginning and end of your list. You'll see a set of HTML tags before the first artist's name appears at the beginning of the article; similarly, there is a set of HTML tags at the end. Select these and tap Delete to get rid of them. These should be the last chunks of non-plaintext writing.
-
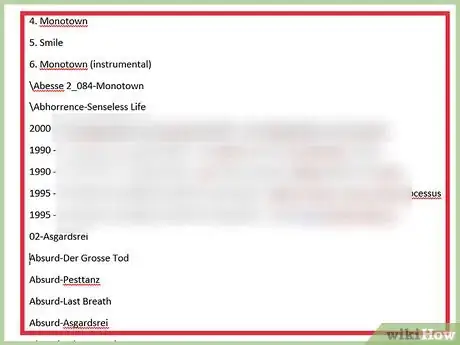
11Review your list. Now you can print your library list in a readable format!
Community Q&A
-
QuestionWhat if I can't copy to Notepad?
 Community AnswerHere's a quicker fix to get the list into notepad form: copy the .wpl forms to a different folder. Then change the extension from .wpl to .txt. That's it.
Warnings
- Make sure you save your work when you're done!⧼thumbs_response⧽


