X
wikiHow is a “wiki,” similar to Wikipedia, which means that many of our articles are co-written by multiple authors. To create this article, volunteer authors worked to edit and improve it over time.
This article has been viewed 44,961 times.
Learn more...
If your starter needs replacing and you don't have the immediate time and finances to send it to a shop, you may wish just go out on a limb and repair it on your own. This article will help you replace your starter on a Chevrolet Cavalier or a Pontiac Sunfire (1995-2005). Automatic Transmission OHV 2.2L Engine Models.
Steps
-
1Tools and Materials You'll Need
- Socket and Ratchet Wrench
- 8mm, 13mm, 15mm Wrench w/ 10 inch extension
- Cardboard Box or Carpet Mat.
- Fast Orange Soap
- Flashlight
- Floor Jack.
- Jack Stands.
- Towel.
- WD-40 Lubricant
- Wood Blocks.
- Work Gloves and Goggles.
-
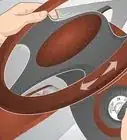
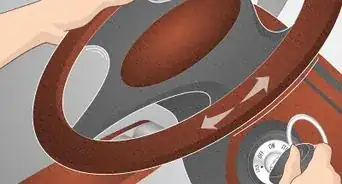
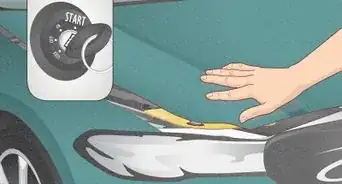
2Open the hood. Vehicles around this model year usually have a hood release lever under the steering column to initiate this step. Once done, lift the hood and insert the stick to hold the hood in place for operation.Advertisement
-
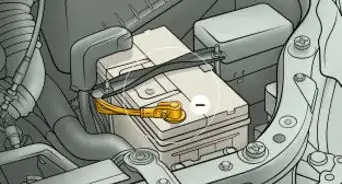
3Disconnect the negative (black) cable from its battery post. Using an 8mm socket wrench or 8mm wrench remove the terminal nut from the negative cable and gently place it somewhere safe. Doing so will reduce the chances of sparking the battery and damaging any other electrical part in the vehicle.
-
4Apply the emergency parking brake in the vehicle. Simply press down on the brake as you press and the hold the button on the parking brake to pull up the lever until it locks the mechanism.
-
5Raise the vehicle. You will need to lift the front of the vehicle using a floor jack. Find a secure spot strong enough under the vehicle and jack the car until you’re able to station the jack stand under the designated position. Remember to block the rear wheels.
-
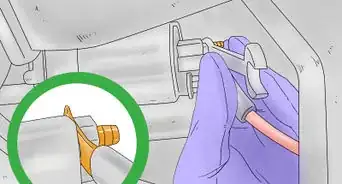
6Remove the terminal nuts and wires. Once the vehicle is properly raised, it's time to go under the vehicle. Place a carpet, mat, or cardboard box on the ground to lye on and remove the two terminal nuts with a 13mm wrench from around the electrical wires. Also, you can do this without going under the vehicle. Depending on your preference.
-
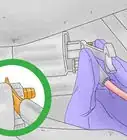
7Remove the bell-housing shield. This mechanical part is only on some OHV 2.2L Engine models. If yours has it, there are 3 bolts that need to be removed from this plate. The first located face first by the starter and the second is below the starter. The other bolt is located on the other end of the plate between the oil and transaxle pan.
-
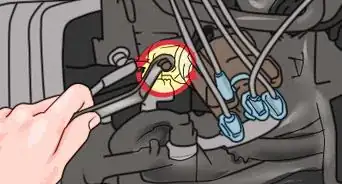
8Remove mounting bolts. Now that the plate is removed there are two 15mm bolts that are connected to the starter mount. Disconnect them with the socket and ratchet, and the starter will be removed.
-
9Reinstall. Once the old starter is removed the process to insert the new one is done in reverse sequential order.


Advertisement
Community Q&A
-
QuestionOn the starter, the battery cable is connected by itself, and the other 3 wires go together. What does this mean?
 Community AnswerThe three other wires are likely for the solenoid. There should be a small threaded piece with a loose nut on the new starter. That is where the wires will go. They are the signal that your ignition switch sends to engage the starter.
Advertisement
Warnings
- When jacking the vehicle, be sure that you placed the jack in a proper location under the vehicle!⧼thumbs_response⧽
- Do not start working under the hood or the vehicle until you disconnect the battery cable(s) first!⧼thumbs_response⧽
- Be sure to wear Gloves to protect your hands and Goggles for your eyes while working under the vehicle!⧼thumbs_response⧽
- Avoid wearing long sleeve clothing.⧼thumbs_response⧽
- Do not life the vehicle from the oil pan!⧼thumbs_response⧽
- Don't use any other tools other than the ones essentially assigned for this operation!⧼thumbs_response⧽
- When unscrewing nuts and bolts be careful not to strip them!⧼thumbs_response⧽
- Do not have the car sitting on the floor jack for too long!⧼thumbs_response⧽
Advertisement

References
About This Article
Advertisement