This article was co-authored by Nick Yahoodain. Nick Yahoodain is a General Contractor and the CEO of Advanced Builders & Contractors in Los Angeles, California. With over 16 years of experience, Nick specializes in large residential projects such as new construction, developments, major renovations, additions, and hillside construction. Advanced Builders & Contractors is a member of the BBB, is licensed by the Contractors State License Board, and is fully bonded and insured. Advanced Builders & Contractors has been featured on NBC News, Elle Decor, Architectural Digest, and Voyage LA.
There are 13 references cited in this article, which can be found at the bottom of the page.
This article has been viewed 180,745 times.
It happens to the best of best of us—an accident occurs, and your wall gets the short end of the stick. Whether you're dealing with drywall, concrete, or plaster, how can you repair the crack for good? That's where we come in! Below, we're walking you through the entire process, from start to finish. You'll have that wall fixed in no time, and you'll probably find that this project is easier than you'd think. Read on for more!
Steps
Fixing a Crack in Drywall
-
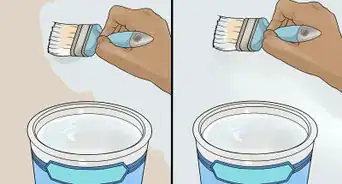
1Buy either pre-mixed or "setting-type" joint compound. Setting-type joint compound is in powder form. You should mix it in a "mud tray" using a taping knife. Do not use spackling. [1] Joint compound, mud trays and taping knives are sold at hardware stores and home centers.
- Setting-type joint compound is harder to apply smoothly and to sand, so it is not the best option for beginners. It is preferred by pros because it dries quickly.
-
2Cut a V-notch 1⁄4 to 1⁄8 inch (0.64 to 0.32 cm) along the crack. The “V” shape will help keep the compound in place.[2]
- Remove the dust from the crack by brushing it out with a paint brush or using a hand vacuum cleaner.
Advertisement -
3Apply coats of joint compound over the crack. Use a 3 to 4 in (7.6 to 10.2 cm) putty knife. Let the compound dry completely between coats. Layer on as many coats as necessary to fill the crack. The average is 3 coats.[3]
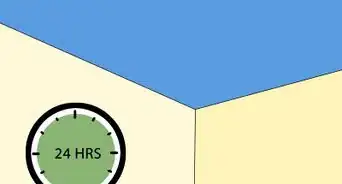
- Drying can take from 20 minutes for each coat of setting-type joint compound to 24 hours for a thick first coat of pre-mixed compound.[4]
- If the cut is deeper than 1⁄4 inch (0.64 cm), you may need to press a strip of mesh or paper tape into the first layer of compound before it dries to better seal the crack.[5]
- Thinner coats are ideal as they're easier to sand down to match the wall once dry.[6]
-
4Sand the dried joint compound with medium-grit sandpaper. Use a sanding block to smooth out the section to the flatness of the wall. Always wear a dust mask when sanding to avoid inhaling particles.
-
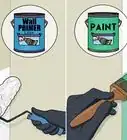
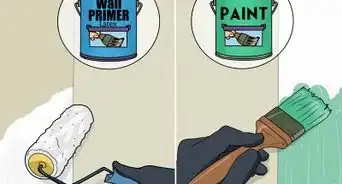
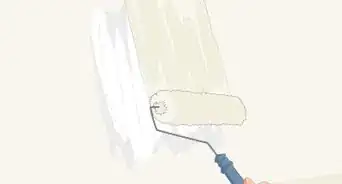
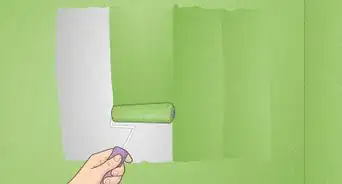
5Paint over the crack with latex primer followed by wall paint. If you don't use primer first, your patched area won't blend in properly with the rest of the wall.[9]
- The exception to this is if you used a paint and primer in one. Then you only need a coat or two of the paint directly on the affected area.


Filling a Crack in a Concrete Wall
-
1Enlarge the crack with a chisel and hammer. Patching material is heavy and will not fill a thin crack. A technique known as undercutting (which is essentially chipping away at the concrete) should be done to 1 inch (2.5 cm) below the edges of the crack. This provides more surface area for the patching material to grip.[10]
-
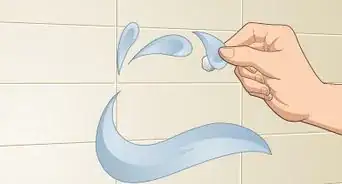
2Clean debris from the crack using a paint brush or a hand vacuum. Rinse it with water and dry it with a hair dryer.[11]
-
3Prime the area with a concrete bonding adhesive. This will help the patching material adhere better to the concrete. You'll want to use an old paintbrush to spread a thin layer around the edges and deep into the crack.
-
4Apply multiple coats of concrete patching with a stiff putty knife or pointed trowel. Press each layer into the crack and let dry completely between coats. Repeat until the crack is filled and level with the rest of the wall.
-
5Add texture to the patched area before it dries. The patched area will look bad if it is smoother than the surrounding area. Matching new concrete to old concrete can be hard. Test your method of adding texture by applying a coat of patching mix to piece of wood, and roughing it up to see if the texture matches. [12]
- Sealing the patch with a heavy-duty water-based polyurethane with a brush can prevent stains and other marks.[13]


Repairing a Plaster Wall Crack
-
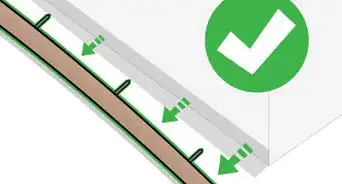
1Press gently on the wall near the crack to see if it gives. If the plaster moves toward the wall, the plaster has likely come apart from the lath strips These are wooden strips, approximately 3/8" x 1" (1cm x 2.5cm), with thin gaps between them. [14] If the plaster has come loose, screw it onto the lath strips using 1 1/4" (3.2cm) drywall screws. Bury each screw head into the plaster. Do not use longer screws because there could be an electric cable behind the wall.
-
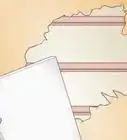
2Widen the crack using a putty knife if it's less than 1⁄4 inch (6.4 mm) wide. This will create a wider surface for the joint compound to adhere to.[15]
-
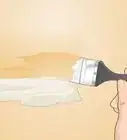
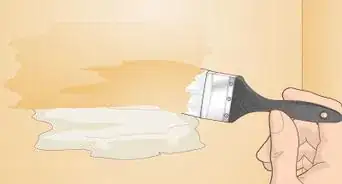
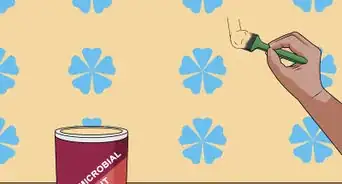
3Spread ready-mixed or setting-type joint compound over the crack. Use a 6" (15.2cm) taping knife or a 4" (10.2cm) putty knife. Ready-mixed joint compound applies more smoothly, especially for beginners. Setting-type joint compound must be mixed using a "mud tray" and a taping knife or putty knife. It can be smoothed out when partially dry, so very little sanding is needed, preventing dust from spreading around the room. [16]
- Dampening the crack before applying the compound will remove any loose particles and help the compound stick better.
-
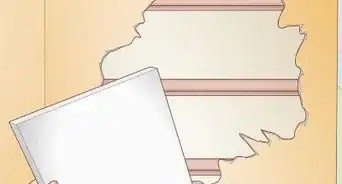
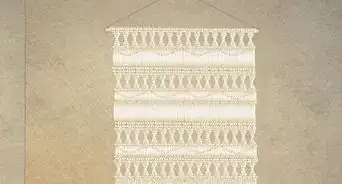
4If the crack is large, cover it with self-adhesive fiberglass mesh tape before applying the plaster. This will prevent the new plaster from cracking there if there is movement in the wall which caused the crack.[17] Let dry.
- For setting-type joint compound to dry thoroughly, the room should be between 55 and 70 °F (13 and 21 °C).
-
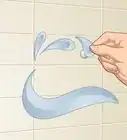
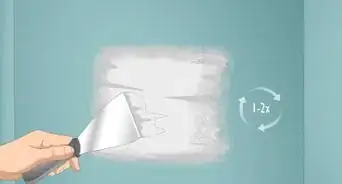
5Apply 2 or 3 layers of compound over the taped area. The final layer can be smoothed out using a wet sponge. With each additional layer, extend the compound another 2 to 3 inches (5.1 to 7.6 cm) outside the previous layer's edges. Your last layer should extend 12 inches (30 cm) beyond the original area. For this you should use a 6" taping knife. [18] Lightly sand each layer with a fine sandpaper to remove bumps.
- Use a feathering technique when applying the compound. With the knife at a 70-degree angle, start at the center and pull the knife to the outside edges of each coat, increasing pressure the further away from the middle you get.[19]
-
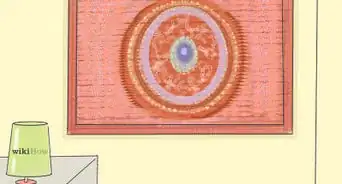
6Paint over the patched area to match the rest of the wall. If you can see a raised section where you did your repair, sand it flush to the wall before painting so it blends seamlessly.
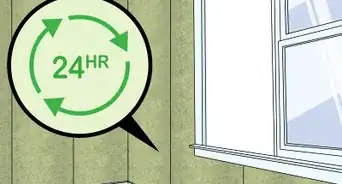
- It's smart to wait at least 24 hours prior to painting to ensure the compound is completely dry..[20]


Expert Q&A
Did you know you can get expert answers for this article?
Unlock expert answers by supporting wikiHow
-
QuestionWhy are my walls cracking?
 Nick YahoodainNick Yahoodain is a General Contractor and the CEO of Advanced Builders & Contractors in Los Angeles, California. With over 16 years of experience, Nick specializes in large residential projects such as new construction, developments, major renovations, additions, and hillside construction. Advanced Builders & Contractors is a member of the BBB, is licensed by the Contractors State License Board, and is fully bonded and insured. Advanced Builders & Contractors has been featured on NBC News, Elle Decor, Architectural Digest, and Voyage LA.
General ContractorCracking in your walls could be due to settlement in a particular area, or it could be due to soil erosion under the foundation. Other times, it could be that the original contractors didn't put in the proper foundation, so now that particular spot is leaning, and it's pulling the house with it.
Support wikiHow by unlocking this expert answer.
Warnings
- If cracks are long or very deep, the repair process is much more involved and beginners may want to hire a professional.⧼thumbs_response⧽
Things You'll Need
- Pre-mixed or setting-type joint compound
- 4" (10cm) putty knife or 6" (15cm) taping knife (a 6" taping knife is better).
- Self-adhesive fiberglass mesh tape
- "Mud tray" if setting-type compound will be used.
References
- ↑ https://www.finehomebuilding.com/membership/pdf/14169/021122064.pdf
- ↑ https://www.blackanddecker.com/ideas-and-inspiration/projects/repair-cracks-and-gashes-in-drywall
- ↑ https://www.todayshomeowner.com/video/how-to-repair-cracks-and-dents-in-drywall/
- ↑ https://www.familyhandyman.com/drywall/taping/how-to-choose-joint-compound/view-all/
- ↑ https://www.finehomebuilding.com/membership/pdf/14169/021122064.pdf
- ↑ https://www.bobvila.com/articles/repairing-drywall/
- ↑ https://www.dummies.com/home-garden/walls-ceilings/how-to-fix-small-cracks-in-plaster/
- ↑ https://www.bobvila.com/articles/repairing-drywall/
- ↑ https://www.doityourself.com/stry/how-to-paint-over-a-wall-patch
- ↑ https://cdn.ymaws.com/www.rfmaonline.com/resource/resmgr/crfp/howtorepairconcrete.pdf
- ↑ https://projects.truevalue.com/paint/interior/general_repairs/plaster_wall_repairs.aspx
- ↑ https://cdn.ymaws.com/www.rfmaonline.com/resource/resmgr/crfp/howtorepairconcrete.pdf
- ↑ https://www.thebalancesmb.com/is-this-the-best-way-to-repair-concrete-cracks-844642
- ↑ https://www.thesawguy.com/repair-plaster-walls/
- ↑ https://www.dummies.com/home-garden/walls-ceilings/how-to-fix-small-cracks-in-plaster/
- ↑ https://www.askthebuilder.com/patching-plaster-walls/
- ↑ https://projects.truevalue.com/paint/interior/general_repairs/plaster_wall_repairs.aspx
- ↑ https://projects.truevalue.com/paint/interior/general_repairs/plaster_wall_repairs.aspx
- ↑ https://www.bobvila.com/articles/repairing-drywall/
- ↑ https://projects.truevalue.com/paint/interior/general_repairs/plaster_wall_repairs.aspx
- ↑ Nick Yahoodain. General Contractor. Expert Interview. 6 October 2020.
About This Article

To repair cracks in your drywall, buy prepared joint compound or mix some yourself using the instructions provided on setting-type compound powder, which you can get from the hardware store. Next, cut a V-notch 1/4 to 1/8 inch along the crack to help keep the compound in place and remove any debris inside the crack with a vacuum hose. Using a putty knife, fill the crack by applying as many coats of joint compound as you need. For the best results, let the compound dry completely between coats. Once the final layer has dried, sand the area with medium-grit sandpaper until it's smooth, then paint over the crack with latex primer and wall paint. For more advice, like how to repair a crack in a plaster or concrete wall, keep reading!