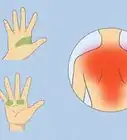
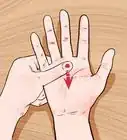
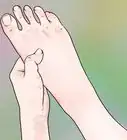
Interested in learning about the world of hand reflexology? This fascinating alternative medicine focuses on providing relief and relaxation through specific pressure points, or reflexology points, that connect to other parts of the body.[1] These points are outlined in a unique diagram known as a hand reflexology chart, which helps you easily visualize these connections. To help you get started, we’ve covered exactly how this chart works, as well as some specific reflexology techniques that you can try at home.

Section 1 of 4:

Hand Reflexology Chart

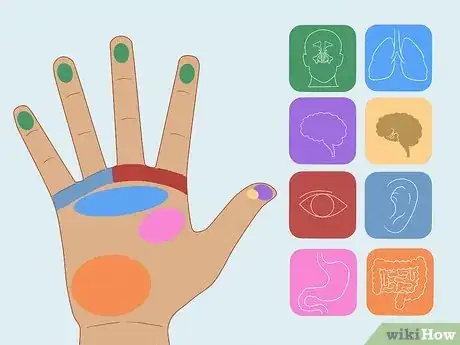
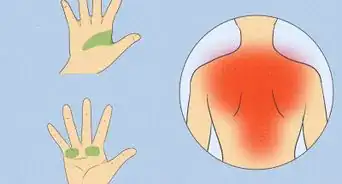
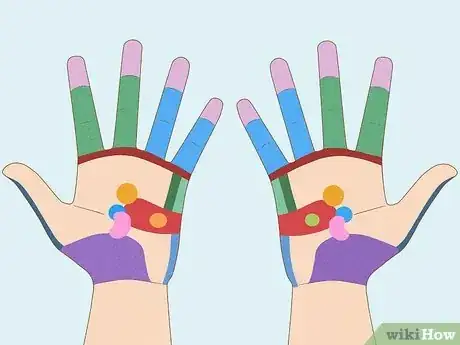
  1. Reflexology points correspond to different regions of the body. Applying pressure to a specific spot on your hand or wrist can provide targeted relief to a connected part of your body, like your eyes, ears, or internal organs.[2] Think of this chart as a map that helps you apply pressure in the correct places.[3]
    • Some of these points exist on both your left and right hands, while other points are specific to just one hand. For example, the reflexology point related to your spleen is on your left hand, while the point connected to your appendix is on your right hand.[4]
    • This chart is called a Western hand reflexology chart. You might see different versions of it floating around the internet, as hand reflexologists don’t follow a single, universal hand reflexology chart.[5]
  2. Advertisement
Section 2 of 4:

Reflexology Points

  1. 1
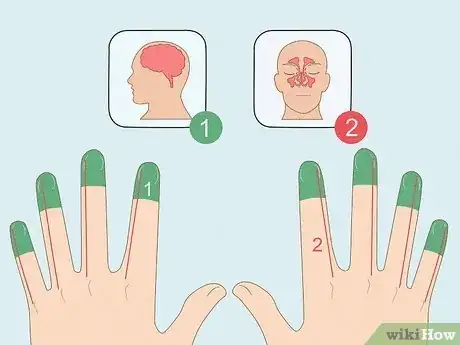
    Fingertips and knucklesAccording to modern hand reflexology, the tips of your pointer, middle, ring, and pinky fingers directly connect with your head and brain.[6] The thin ridges along the inner lines of your knuckles are associated with your facial sinuses.[7]
    • Using reflexology on these points could help with issues like headaches, toothaches, and sinus pain.
    • This doesn’t include the tips of your thumbs—those are connected to different parts of the body, like your nose and pituitary gland.[8]
  2. 2
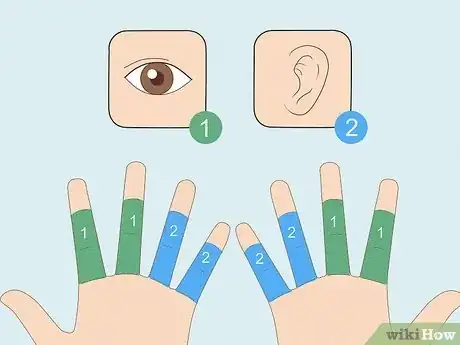
    FingersThe pointer and middle fingers on your right and left hands are both connected to your eyes, while your ring and pinky fingers are both connected to your ears.[9]
    • Apply reflexology techniques to these points if you’re dealing with any type of eye or ear issue.
  3. 3
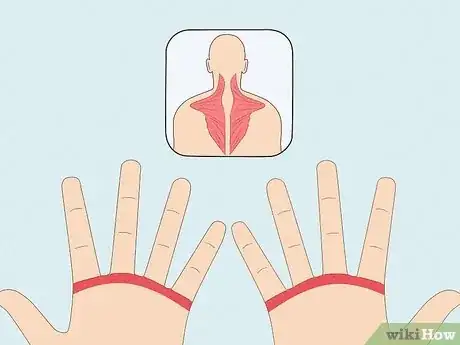
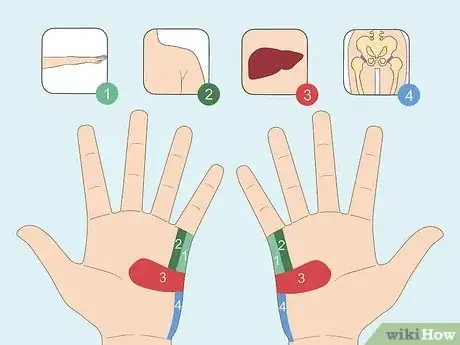
    Top of the palmThe very top of your palm is connected to your trapezius.[10] This is the anatomical name of the muscle that stretches down your neck and upper back.[11]
    • Try reflexology on this point if you’re suffering from any kind of neck or shoulder pain.
  4. 4
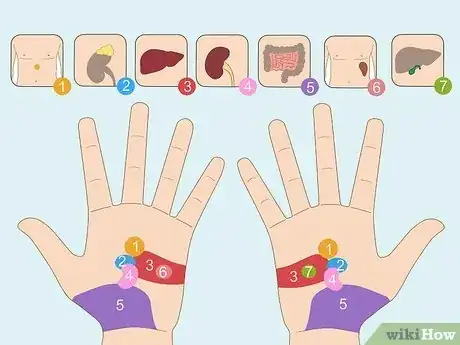
    Beneath the middle fingerThe middle, central portion of your hands are filled with plenty of helpful reflexology points, including the solar plexus, adrenal reflex, liver reflex, kidney reflex, and small intestine reflex. Your right palm specifically connects to the gall bladder, while your left palm connects to the spleen.[12]
    • Using reflexology techniques on these different points can help with many different issues, like intestinal and kidney pain. You can also use these points to treat organ-specific issues in your gall bladder, spleen, and liver.
  5. 5
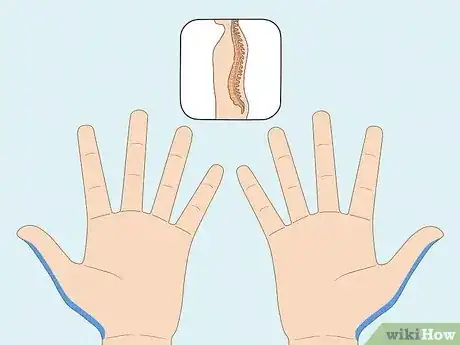
    Along the thumb and wristTrace a line along the outer edge of your thumb, going all the way down to the top of your wrist. This section connects with your entire spine.[13]
    • Use reflexology on this part of your hand if you’re dealing with back pain or other spinal issues.
  6. 6
    Beneath the pinky fingerTrace a finger along the outer edge of your palm, starting beneath your pinky. Then, divide this line into 3 zones: the top, upper zone is split vertically between the shoulder and arm reflexology points; the central zone connects to your liver, and the lower zone connects to your hip joints.[14]
    • Applying reflexology techniques to these points could potentially help with issues like shoulder, arm, and hip pain, along with liver issues.
    • Picture a long vertical rectangle extending below the base of your pinky finger and into your palm. Then, split that rectangle in half vertically—the inner half of the rectangle is your shoulder reflexology point, while the outer half is your arm reflexology point.
  7. Advertisement
Section 3 of 4:

Reflexology Techniques

  1. 1
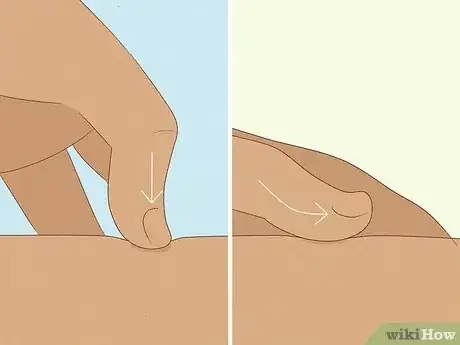
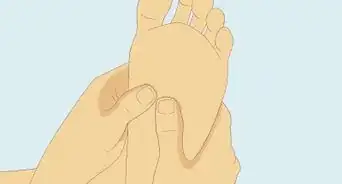
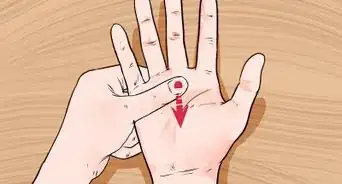
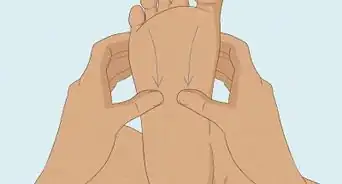
    Target specific reflexology points with the thumb-walking technique. Press the center of your thumb into the pressure point. Then, shift your thumb forward without lifting it off of the skin. Continue this pressing and gliding motion across the skin until you’ve covered the entire area.[15]
    • To really hone your thumb-walking technique, color in the tip of your thumb with a dry erase/washable marker. Then, practice gliding your thumb over the palm. If you’re doing the technique correctly, you won’t be able to see any of the marker as your thumb moves.[16]
  2. 2
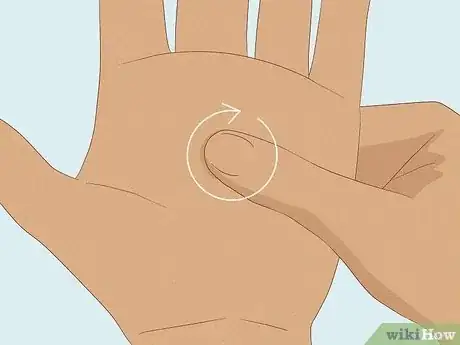
    Press on the point with the base of your thumb. Center your thumb on the reflexology point and press down. Work your thumb in small, stationary circles as you continue to apply pressure.[17]
    • This works well on the solar plexus point along the center of the palms.
  3. 3
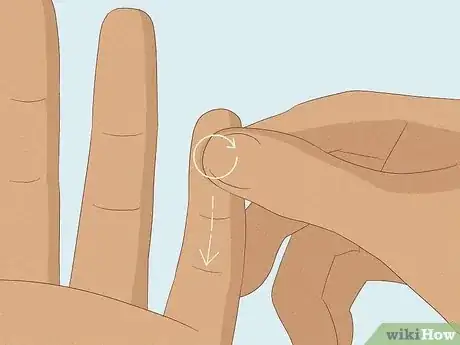
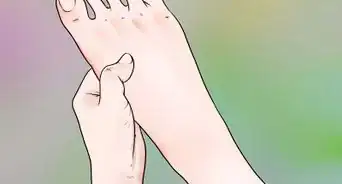
    Rub along the reflexology point in small, circular motions. Place your thumb on top of the pressure point and rotate it in small circles. You can also do this technique with your thumb and pointer finger—simply pinch both fingers together, place them on the reflexology point, and glide them in small circles over the skin.[18]
    • This technique works really well on the fingers.
  4. 4
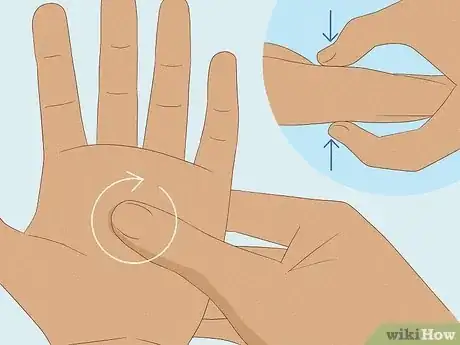
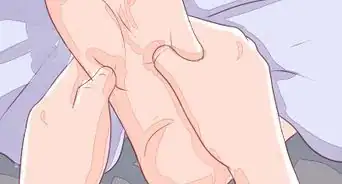
    Pinch the reflexology point with your pointer finger and thumb. Place your thumb on the top of the reflexology point (over the palm) and your pointer finger along the bottom (over the back of the hand). Pinch the area with both fingers, gliding your thumb and pointer finger in small circles as you go.[19]
    • This technique works well for massaging the adrenal reflex.
    • Don’t confuse these reflexology techniques with generic massage! Hand reflexology is all about providing targeted relief through reflexology points. Massage, on the other hand, focuses more on soft tissue—not specific points.
  5. Advertisement
Section 4 of 4:

Other Reflexology Hand Charts

  1. 1
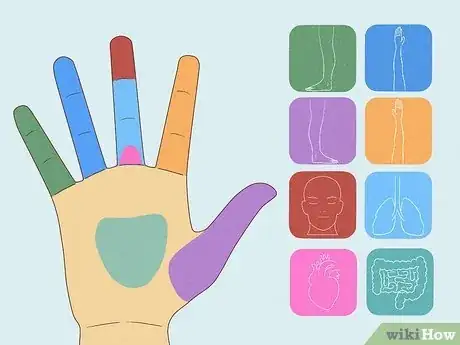
    Indian (Ayurvedic) Hand ChartThe Indian reflexology chart (or acupressure chart) contains several key differences from the Western hand reflexology chart. The reflexology points on the Indian chart are primarily located in the palm of the hand, while the fingertips solely connect to the sinus region. The thumb contains connections to the brain and the pituitary gland.
    • The Ayurvedic chart connects the inner world with the radial (thumb side), and the outer world with the ulnar (little finger side).
    • In keeping with the inner/outer distinction, the eye reflexology point is on the radial side of the palm, beneath the first 2 fingers (index and middle). The ear reflexology point is beneath the last 2 fingers (ring finger and pinky).
  2. 2
    Korean Hand ChartThe Korean hand reflexology chart is unusual in that it doesn't include any areas of the wrist—instead, areas like the reproductive organs connect to the palm of the hand. The Korean, or Koryo Hand Therapy (KHT systems) chart also displays the hands supine and prone, and makes no distinction between left and right hands.
    • The spine, in the Korean system, connects to the central axis of the hand, along the line of the middle finger and extending down along the exterior of the hand.
    • Each finger connects to a different region of the body in this chart.
  3. Advertisement

Warnings

  • Reflexology may be a form of alternative medicine, but it’s not meant or designed to replace formal medical treatments. Always meet with your physician to discuss any health concerns or issues you may have.[22]
    ⧼thumbs_response⧽
  • Use reflexology with caution if you’re pregnant—some people have experienced contractions after a session.[23]
    ⧼thumbs_response⧽
  • Avoid reflexology if you currently have thrombosis or an embolism. It might cause a blood clot to loosen and move towards the heart or brain.[24]
    ⧼thumbs_response⧽
Advertisement

About This Article

Karina Klimtchuk, L.Ac., DACM, Dipl. OM
Co-authored by:
Licensed Acupuncturist & Diplomate of Oriental Medicine
This article was co-authored by Karina Klimtchuk, L.Ac., DACM, Dipl. OM and by wikiHow staff writer, Janice Tieperman. Dr. Karina Klimtchuk is a Licensed Acupuncturist, Diplomate of Oriental Medicine, Faculty Member at Yo San University of Traditional Chinese Medicine, and the Owner of Kai Wellness. She specializes in holistic health, Chinese herbal medicine, and functional medicine. Dr. Klimtchuk also helps patients through emotional and spiritual trauma. She holds a BA in Psychology and Sociology from The University of Massachusetts, Boston, a Master's from Emperor's College in Santa Monica, CA, and a Doctorate of Acupuncture and Chinese Medicine (DACM) from Pacific College of Oriental Medicine. This article has been viewed 188,206 times.
4 votes - 100%
Co-authors: 8
Updated: March 20, 2023
Views: 188,206
Categories: Reflexology

Medical Disclaimer

The content of this article is not intended to be a substitute for professional medical advice, examination, diagnosis, or treatment. You should always contact your doctor or other qualified healthcare professional before starting, changing, or stopping any kind of health treatment.

Article SummaryX

Properly reading a hand reflexology chart will allow you to understand the connection between the hands and other parts of the body. There are many different reflexology charts, such as the Western, Indian, and Korean charts, and they all have slight differences between them. In general, there are several different zones on each hand that correspond to different systems of the body. For instance, the center of the hand can correspond to the nervous system, and the area between the thumb and index finger can correspond to mental health. When you massage or use acupuncture on these specific parts of the hand, it can help relieve stress, tension, and pain in their corresponding parts of the body. To learn how the body’s meridians affect reflexology, read on!
Did this summary help you?
Advertisement