This article was co-authored by wikiHow staff writer, Eric McClure. Eric McClure is an editing fellow at wikiHow where he has been editing, researching, and creating content since 2019. A former educator and poet, his work has appeared in Carcinogenic Poetry, Shot Glass Journal, Prairie Margins, and The Rusty Nail. His digital chapbook, The Internet, was also published in TL;DR Magazine. He was the winner of the Paul Carroll award for outstanding achievement in creative writing in 2014, and he was a featured reader at the Poetry Foundation’s Open Door Reading Series in 2015. Eric holds a BA in English from the University of Illinois at Chicago, and an MEd in secondary education from DePaul University.
There are 8 references cited in this article, which can be found at the bottom of the page.
This article has been viewed 65,821 times.
Learn more...
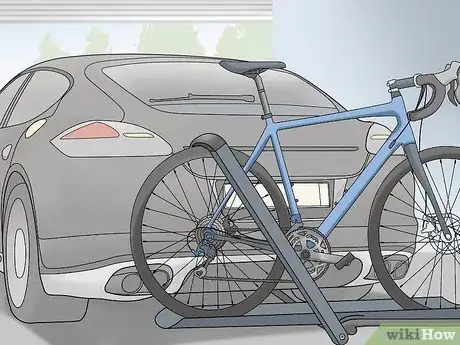
Installing a bike rack on your vehicle will make it easy for you to bring your beloved bike with you on your next road trip. There are several different types of bike racks, all of which have unique advantages and challenges. Trunk racks hook on to your trunk, roof racks use the cross bars on top of a vehicle to store a bike, and hitch racks fit directly into a vehicle's hitch trailer. While installing a hitch trailer often requires a wrench, most bike racks can be installed without any tools. They tend to be fairly straightforward when it comes to assembly and installation as well, although there can be a lot of variation between brands and models. Once you’ve selected a rack, install it in the appropriate location and mount your bikes on it to bring them with you on your next adventure in the great outdoors!
Steps
Selecting a Trunk-Mounted Rack
-
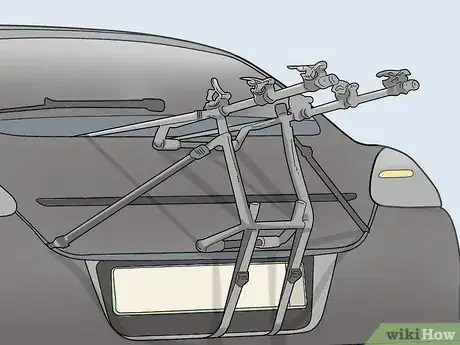
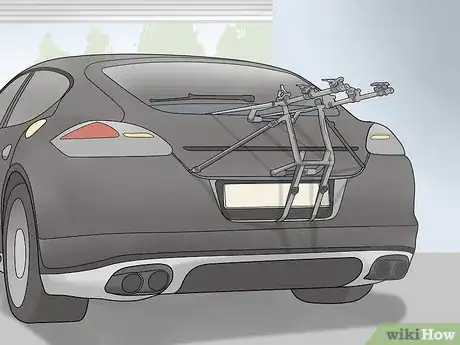
1Choose a standard trunk-mounted rack to save space on top of your car. If you still want to be able to drive under low-hanging branches and underpasses, opt for a trunk mount. This is also a good decision if you ever bring a kayak or sled with you on your biking trips, since those items are more easily stored on top of your car. Trunk-mounted racks hang under the lip of your trunk and attach to the top of your car in the back to store your bikes.[1]
- If you have a camera that allows you to see behind your car when your reverse, you may want to opt for a trunk or hitch rack if you rely on it to park or back out of your driveway.
- Trunk-mounted racks typically hold 1-2 bikes.
Warning: Trunk-mounted racks can leave marks or scratches on your trunk, even if they’re installed properly. If you’re trying to keep your car in mint condition, consider using a hitch or roof rack, which won’t rest directly on the body of your car.
-
2Get a removable, compact trunk rack if you need to park in tight spaces. If parking is an issue where you live and you don’t have cross bars on your vehicle for a roof rack, get a compact rack that can easily be taken on and off of your car. These racks tie around a trunk and can be quickly disassembled to be stored in a vehicle when you don’t need them. They’re a lot like trunk racks, but easier to take on or off.[2]
- Compact racks are usually weaker than the other options and can only hold 1 bike.
- Compact racks are mounted and used like trunk racks. The difference is that compact racks are designed to be taken on and off all the time.
Advertisement -
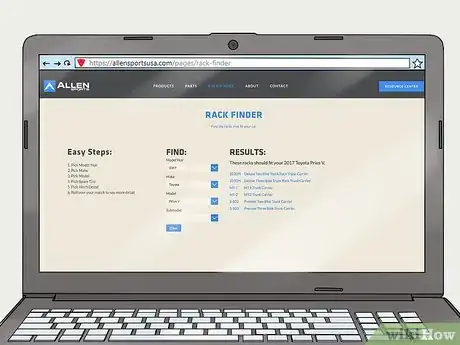
3Search the manufacturer’s website to see if a certain brand will fit your vehicle. Trunk racks are usually modifiable to suit different trunk sizes and styles. However, there are certain elements of a trunk rack that may make it difficult to put on a specific vehicle. Check a manufacturer’s website to see if a specific rack will fit your car.[3]
- Most makers of trunk racks will include a search tool on their website that will make it easy to see a list of racks that fit.
-
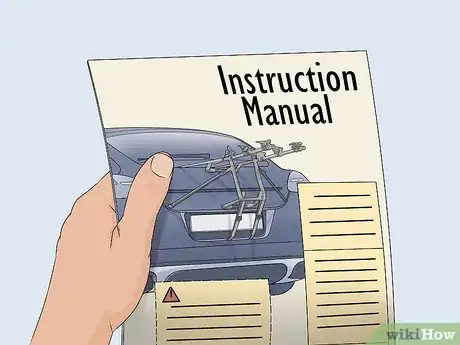
4Unpack your rack and read the instructions. Every brand and type of rack is different, and you should follow the exact instructions associated with your specific model. In general, trunk racks are fairly easy to install, but it's best to read through the instructions before you get started.[4]
- Most trunk-mounted racks do not have a complicated assembly and come in one piece.
-
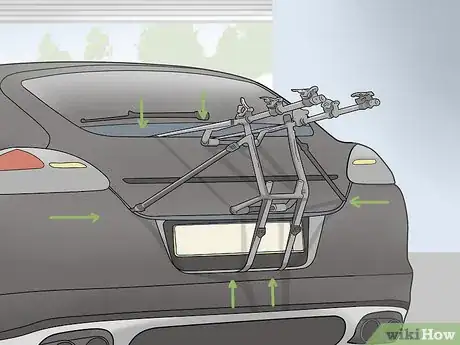
5Wrap the straps on your rack around the sides of your trunk. Most trunk-mounted racks have straps on the sides, top, or bottom. Open your trunk and hook each strap to the corresponding side by folding the lip over the edge where your trunk stops. Adjust the location of your rack by sliding it across your trunk so that the pads that rest on your vehicle are centered. Tighten each strap by either pulling on the buckle or adjusting the slide.[5]
- Many trunk-mounted racks clip all the way around your trunk by locking together inside of your trunk. These racks tend to be more secure.
- Compact racks are typically trunk-mounted racks without locking mechanisms.
-
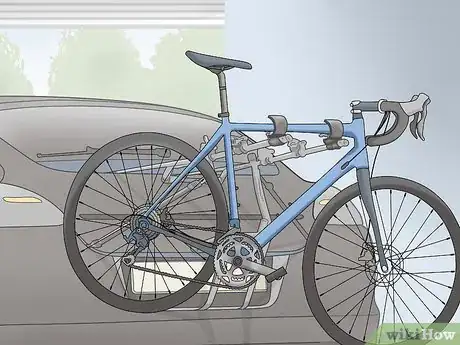
6Lift your bike frame over the 2 hooks that stick out at an angle. Trunk mounts will have 2 bars that stick up away from your trunk at a 15 to 45-degree angle. To add a bike, lift the bike with both hands and slide the top tube over the 2 hooks. Slide your bike down so that it sits as close as it can to your trunk and then wrap the security straps around the wheels, seat stay, or head tube to lock it in place.[6]
- Try to avoid mounting more than 2 bikes on a trunk mount. A bike’s weight fights against the tension of the trunk and if you add too many bikes, the mount could break.
- The top tube is the horizontal bar connecting your handlebars to the seat.
- The seat stay is the vertical bar that connects your seat to the pedals.
Using a Roof-Mounted Rack
-
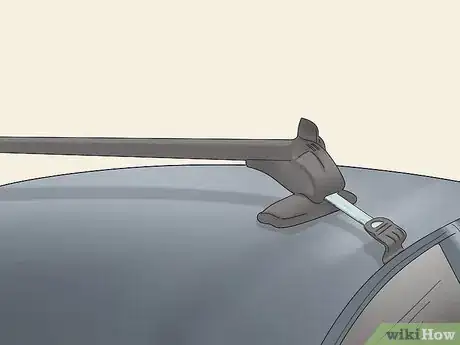
1Get a roof rack if you have cross bars on the top of your vehicle. Roof racks hook on to the cross bars on top of your vehicle and rely on the tension to keep them in place. They’re really only a viable option if you have cross bars on top of your vehicle, though. They will also expose your bikes to wind and debris as you drive, but you won’t have anything obstructing your rearview mirror.[7]
- If you don’t have cross bars on the top of your vehicle, you can install them separately. The benefit of doing this is that you can customize the distance between bars. However, if you don’t fit them perfectly on to your car, they could fly off while you’re driving.
- Roof mounted racks typically only hold 1 bike per rack. You can install multiple roof racks though if you want to store 2-4 bikes.
-
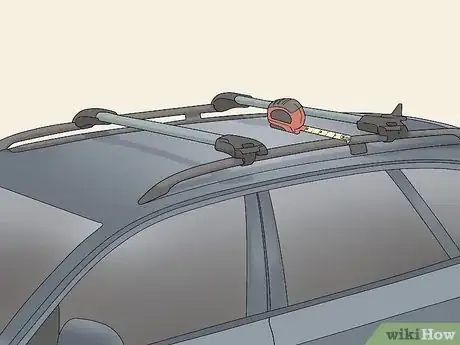
2Measure the distance between cross bars to size your rack. Hook a retractable measuring tape on the exterior edge of a cross bar. Pull the measuring tape across to the other side to determine the distance between your cross bars. Measure the length of a cross bar from end to end in order to determine how long it is. Use these measurements to inform whether a roof rack will fit your vehicle or not.[8]
- Most roof-mounting racks are adjustable, but even the adjustable racks have a predetermined range.
-
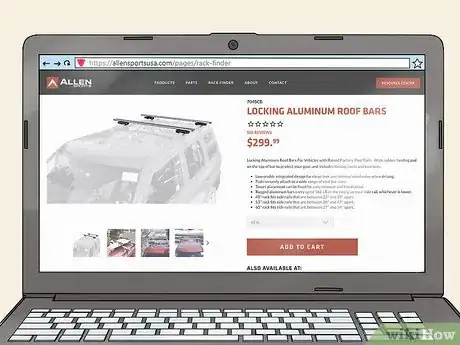
3Check a manufacturer’s website to see if a roof rack fits your vehicle. While some racks may be marketed as universal, you still need to check a manufacturer’s website to see what vehicles a rack will fit. Most producers of bike racks have a search feature on their website that allows you to enter your vehicle’s make and model to see what racks will fit. Use a company’s rack finder before purchasing a roof rack.[9]
- You should still check the manufacturer’s website even if you measured the cross bars for a roof-mounted rack. Different vehicles have different styles of cross bar and just because a rack is sized correctly doesn’t mean that it can be installed on your vehicle.
-
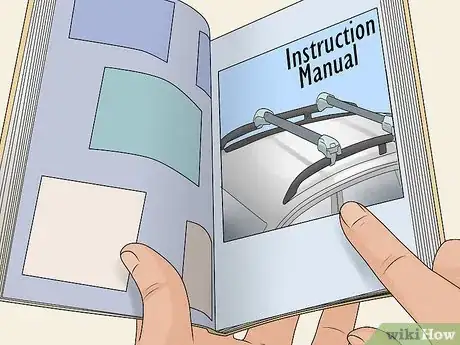
4Read your rack’s instructions to determine how it is assembled. Every brand and style of bike rack is assembled and installed differently. Read your rack’s instructions to see how it meant to be prepared for mounting.[10]
- The majority of roof racks clip around both sides of a wheel on each cross bar to keep it in place. This can make them easy to install but kind of awkward to use if you aren’t tall.
-
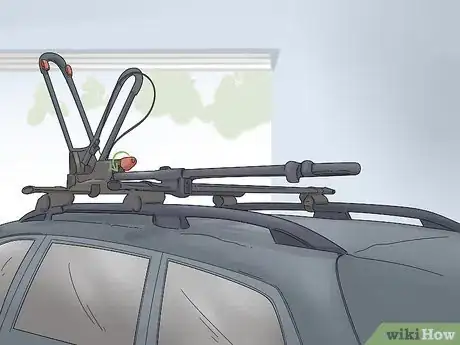
5Hook a roof-mounted rack across each of your cross bars. Assemble the rack on the ground before installing it, if necessary. Use a small step ladder to get to the roof of your car. Place the rack so that the front is facing your windshield. With the rack in the unlocked position, lay it on top of your cross bars and line up the rack with the tracks in your bars. Wrap the front strap to the cross bar in the front and the back strap to the bar in the back. Flip the attachments to the locked position to set it in place.[11]
- If you don’t know which side of your rack is the front, look for adjustable poles that stick out of one end. These poles attach to the front tire and almost always go on the front end of a vehicle.
- Some racks slide through the tracks in the center of your cross bars. Others lay on top of the bars and wrap around them with straps.
Warning: You may need to remove a section of rubber padding from your cross bars to accommodate your bike rack. To do this, remove the rubber padding and use scissors to cut a section out before sliding it back in. The location where you cut the padding is where your rack will go.
-
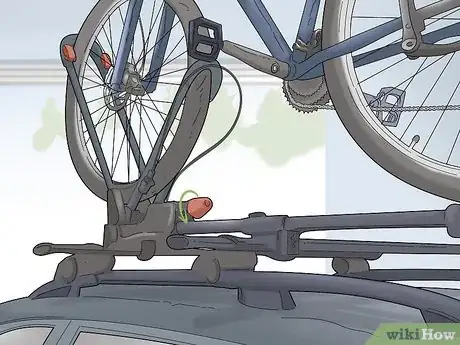
6Mount a bike by lifting it and locking the wheels in place. Open your roof rack by turning the frontmost adjustable bar away from the rack. Use a step stool to lift your bike on to the rack and slide the front wheel into the open bar that is pointing away. Raise the interior bar into the other side of your front wheel to stabilize the bike. Tighten the bars by either turning the crank, pulling the adjustable buckles, or twisting the locking mechanism. Loop the security straps around your wheels and frame to set the bike in place.[12]
- There may be another adjustable bar that attaches to the bike’s frame instead of the tire. Once your bike is mounted on top of the rack, simply lift the bar up until it is resting against the frame and then secure it with the strap or hook at the end.
- You shouldn’t need to hold your bike steady as you tighten the hooks and adjustable bars. It should rest pretty easily in the grooves of your rack.
Installing a Hitch-Mounted Rack
-
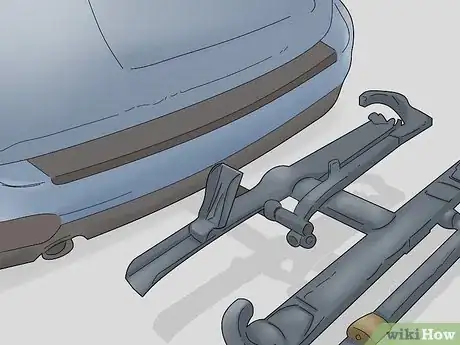
1Get a hitch-mounted rack if you drive a vehicle with a hitch. Hitch racks use a vehicle’s hitch to stabilize and anchor your bikes behind your trunk. This is a good option if you want an easy-to-install rack that relies on a part of your vehicle that is designed to withstand heavy loads without breaking.[13]
- Many cars don’t have a hitch that can be used to install a hitch-mounted rack. Some cars have hitches, but they may be too small for a bike rack.
- Check your car’s towing capacity by reading the manual to see if the car can safely handle a hitch rack plus the weight of a bike. If you drive an SUV or truck, you should be fine.
- Hitch-mounted racks typically can store 2-4 bikes. They offer the most weight capacity out of the 3 major styles of bike rack.
-
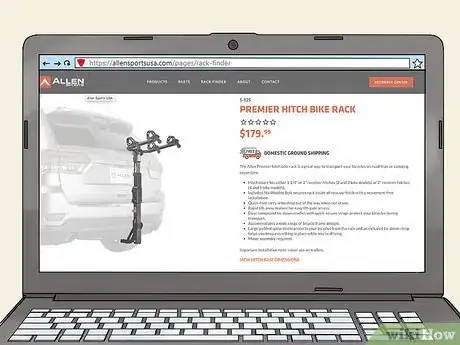
2Determine whether a rack will fit your vehicle by checking with a manufacturer. If your vehicle has a hitch preinstalled, it should be a breeze when it comes to installing a hitch-mounted rack. However, in order to be sure that the shape of your bumper, trunk, or frame doesn’t interfere with a rack, look on the manufacturer’s website to see if a potential rack will fit your vehicle.[14]
-
3Read the instruction manual to see if you need to assemble anything. Hitch-mounted racks typically require very little assembly, and installation is usually 1 or 2 steps. In order to be sure, read your rack’s instruction manual carefully. There may be several options when it comes to installing your rack.
- Hitch racks are usually installed underneath the car’s trunk. You may need to get underneath your vehicle to install it.
-
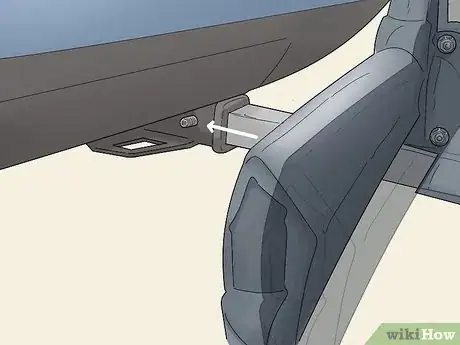
4Screw a hitch-mounted rack on the bottom of your vehicle. Hitch-mounted racks tend to have the greatest variation in how they’re installed, but they’re typically quite easy to affix to your car. Generally, you’ll install a hitch-mounted rack by sliding a pole into the opening of your hitch and screwing a bolt all the way through the opening and the rack.[15]
- Some hitch-mounted racks will require you to screw vertically into your car’s frame from underneath. To do this, slide the rack into the hitch and get underneath the car to line up the opening for the bolt with an opening in your frame.
- Use a socket wrench to make tightening the bolt easy. You can use a regular wrench if you’d like.
-
5Fold the rack down and place the bike in the wheel cradles. Hitch mounts usually fold up against the trunk, but some of them stick out like a trunk mount. For folding mounts, unlock the mount and pull it down so that it sits flat behind the trunk. Pull out the arm that locks the wheel in. Look for the grooves for your tires (called wheel cradles) and fold them out. Load your bike on to the rack by putting your back tire on first, followed by the front tire. Lift the locking arm out at a 45-degree angle and pull it towards the bike until it’s flush with the tire.[16]
- Loop the security straps to the back tire and pull them tight at the buckle.
- Hitch mounts that stick out like a trunk mount are mounted the exact same way as a trunk mount. Slide the top tube over the bars that stick out away from your car and tighten the security straps around the frame and wheels.
Warning: The front tire’s cradle is usually bigger than the back. This is because the front tire can turn left or right and thus requires more support. If you mount your bicycle backward, the front tire will swing into your car repeatedly as you drive.
References
- ↑ https://www.consumerreports.org/cro/news/2015/12/tips-for-choosing-the-right-bike-rack-for-your-car/index.htm
- ↑ https://www.consumerreports.org/cro/news/2015/12/tips-for-choosing-the-right-bike-rack-for-your-car/index.htm
- ↑ https://allensportsusa.com/pages/rack-finder
- ↑ https://www.consumerreports.org/cro/news/2015/12/tips-for-choosing-the-right-bike-rack-for-your-car/index.htm
- ↑ https://youtu.be/i1oWvoJER3M?t=131
- ↑ https://youtu.be/i1oWvoJER3M?t=174
- ↑ https://www.consumerreports.org/cro/news/2015/12/tips-for-choosing-the-right-bike-rack-for-your-car/index.htm
- ↑ https://www.consumerreports.org/cro/news/2015/12/tips-for-choosing-the-right-bike-rack-for-your-car/index.htm
- ↑ https://allensportsusa.com/pages/rack-finder
- ↑ https://www.consumerreports.org/cro/news/2015/12/tips-for-choosing-the-right-bike-rack-for-your-car/index.htm
- ↑ https://youtu.be/yMDuoEkGN00?t=449
- ↑ https://youtu.be/72jLuYAw3E8?t=91
- ↑ https://www.consumerreports.org/cro/news/2015/12/tips-for-choosing-the-right-bike-rack-for-your-car/index.htm
- ↑ https://allensportsusa.com/pages/rack-finder
- ↑ https://youtu.be/fHdx8E0XPFU?t=406
- ↑ https://youtu.be/fHdx8E0XPFU?t=554
