This article was co-authored by Melissa Nelson, DVM, PhD. Dr. Nelson is a Veterinarian who specializes in Companion and Large Animal Medicine in Minnesota, where she has over 18 years of experience as a veterinarian in a rural clinic. She received her Doctor of Veterinary Medicine from the University of Minnesota in 1998.
There are 8 references cited in this article, which can be found at the bottom of the page.
This article has been viewed 71,636 times.
Nail caps are small covers that prevent your cat from scratching furniture or people. Before applying nail caps to your cat, trim its nails (unless it is a kitten). Once you’re ready, coat the inside of the nail cap with an adhesive. Squeeze your cat’s paw gently to extend its nail, then slip the nail over it. Check the nails every few days to ensure none have come loose. Note also that once your adhesive sets, it will be almost impossible to remove the caps until they wear off.
Steps
Trimming Your Cat’s Nails
-
1Get clippers. There are several acceptable implements you could use to trim your cat’s nails. You might want to use regular nail clippers of the same variety people use. You might use guillotine-style clippers. Or you might use clippers that more closely resemble pliers.[1]
- Whatever you choose to use, ensure the blades of the tool remain sharp.
-
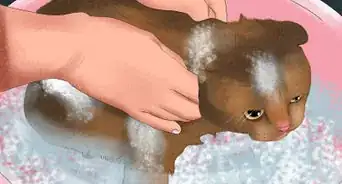
2Situate your cat. Since all cats are different, there is no universally best way to situate your cat in advance of trimming its nails. Get to know what sort of position your cat is most at ease in, and help it adopt this position before you begin trimming its nails.[2]
- For instance, some cats are most relaxed when sitting on their human’s lap.
- Other cats are most at ease when propped on a particular piece of furniture, or in a particular room.
Advertisement -
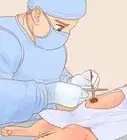
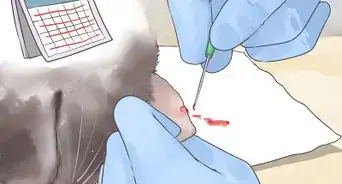
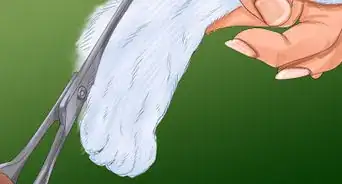
3Clip the cat’s claw. Take the paw whose nails you wish to clip in your hand. Using your thumb and index finger, squeeze the top and bottom of the paw at a point just behind the point from which the claw extends. This will cause the claw to extend. Clip the end of the claw carefully.[3]
- Don’t try to cut all the cat’s nails in one sitting. Do one or two paws per session.
- Don’t clip the quick. The quick is an interconnected network of blood vessels in the part of the nail closest to the cat’s paw. You can identify the quick by looking for a pinkish or reddish mass within the nail.
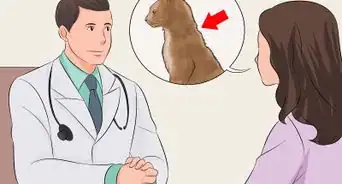
- If you don’t feel comfortable clipping your cat’s nails, go to a veterinarian or professional groomer to have your cat’s nails clipped.[4]


Selecting Your Materials and Getting Help
-
1Choose the right nail caps. Generally, nail caps come in three sizes: small, medium, and large. These sizes depend on your cat’s weight. Each manufacturer will define what sort of cat their product is designed for. Check the packaging carefully when shopping for nail caps to ensure you buy some that fit your cat’s nails.
- Additionally, nail caps come in different sizes. Choose the size that fits your cat’s nails. To select the size that will fit your cat’s nails, check the nail cap package for information regarding which nail caps are best for a cat of a particular size.
- Choose a color that you like.
-
2Ready your materials. Inside the nail cap package, you’ll find a variety of materials. Every nail cap package is different, but each will probably include nail caps, adhesive, and applicator tips in varying quantities. Each of these objects will probably be packaged separately. Open each package in turn so that all necessary materials are ready for use.[5]
- You’ll only need one applicator tip and one container of adhesive.
- You might need to cut the adhesive container’s top off. In other cases, the adhesive’s lid will simply twist off.
- Additionally, your nail cap package should include an instruction manual. Read the instruction manual before applying the nail caps so that you’re aware of the specific directions for use.
-
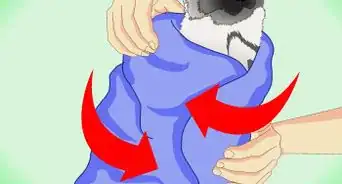
3Ask a friend for help. While it is possible to put nail caps on your cat by yourself, the whole process proceeds much more smoothly if you hold and reassure your cat while a friend or family member applies the glue to the nail cap. Once the nail caps are ready, you can just slide them on your kitty’s claws.[6]


Applying the Caps
-
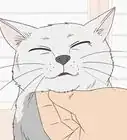
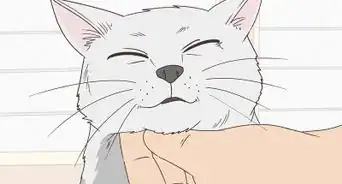
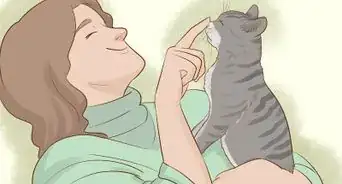
1Soothe your cat during the process. If you project stress and frustration while applying nail caps to your cat, your cat will sense your mood and feel similarly anxious and frustrated. To keep your cat happy and relaxed throughout the process, talk to it kindly from time to time, and rub its belly and neck between each nail cap application.[7]
-
2Cradle your cat in your lap. Place your cat’s rump on your lap. Tuck its head into the crook of an elbow. Rub your cat’s belly and neck gently to reassure it.[8]
- The best place to cradle the cat is in a sofa or chair with large, soft arms. This will enable you to lean the arm supporting your cat’s head against the armrest.
-
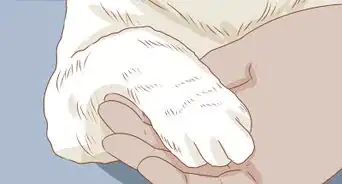
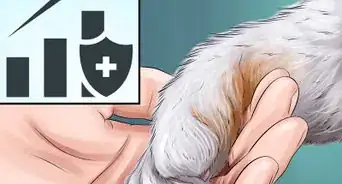
3Extend your cat’s claws. Using your thumb and index finger, gently squeeze the top and bottom of the paw. Place your index finger on the paw pad of the nail you’d like to cap. Above the nail you’d like to cap, push down and out (away from the cat’s body) with your thumb. The claw you’d like to cap should then pop out.[9]
-
4Put the nail caps on. Fill the applicator tip with adhesive. Squeeze one or two drops of adhesive into a nail cap using the applicator tip. This will fill the nail cap with adhesive. Squeeze the sides of the nail cap gently to evenly distribute the adhesive within. Slide the nail cap on your cat’s extended nail until it stops.[10]
- Continue to extend your cat’s claws and apply nail caps to the other nails on each paw.
- If you’re trying to prevent your furniture from being scratched and torn, you probably only need to apply nail caps to the cat’s front paws. Understand that it may take your cat some time to adjust to wearing the nail caps.[11]


References
- ↑ http://www.humanesociety.org/animals/cats/tips/trimming_cat_claws.html
- ↑ http://www.humanesociety.org/animals/cats/tips/trimming_cat_claws.html
- ↑ http://www.humanesociety.org/animals/cats/tips/trimming_cat_claws.html
- ↑ http://prime.peta.org/2009/02/cats-and-their-claws
- ↑ http://cattime.com/cat-facts/how-to/9993-your-cats-claws-clip-cap-or-claw
- ↑ http://cattime.com/cat-facts/how-to/9993-your-cats-claws-clip-cap-or-claw
- ↑ http://cattime.com/cat-facts/how-to/9993-your-cats-claws-clip-cap-or-claw
- ↑ http://cattime.com/cat-facts/how-to/9993-your-cats-claws-clip-cap-or-claw
- ↑ http://cattime.com/cat-facts/how-to/9993-your-cats-claws-clip-cap-or-claw
About This Article

Before you put nail caps on your cat, trim its nails so the caps will fit over them properly. Then, cradle your cat in your lap, and rub its belly and neck to keep it calm. Next, gently squeeze the paw pad with your thumb and forefinger until the claw pops out. After that, put 1-2 drops of adhesive into the cap, squeeze the sides gently to distribute the adhesive, and slide it onto the nail until it stops. Continue extending your cat’s claws and capping them until they’re all done. For more from our Veterinary co-author, like how to choose the right nail caps for your cat, keep reading!