This article was co-authored by wikiHow staff writer, Janice Tieperman. Janice is a professional and creative writer who has worked at wikiHow since 2019. With both a B.A. and M.A. in English from East Stroudsburg University, she has a passion for writing a wide variety of content for anyone and everyone. In her free time, you can find her working on a new crochet pattern, listening to true crime podcasts, or tackling a new creative writing project.
There are 8 references cited in this article, which can be found at the bottom of the page.
This article has been viewed 78,586 times.
Learn more...
Areca palms are a well-loved indoor plant that tend to grow to be about 6 to 7 feet (1.8 to 2.1 m) tall.[1] While this plant can be purchased at a nursery or garden center, you can grow your own palm by cutting and transplanting a smaller offshoot, or by germinating the seeds yourself. Once you’ve planted your Areca palm, keep the plant in a partially shaded area while maintaining a consistent watering and fertilizing schedule. This way, your new plant can stay in great shape!
Steps
Transplanting an Offshoot
-
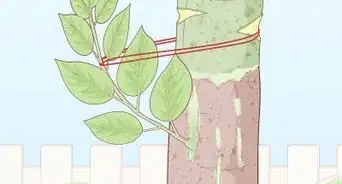
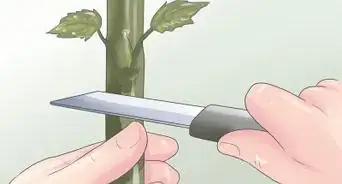
1Separate the offshoot with a knife. Examine the base of the Areca palm to find any offshoots that are growing from the main branch. Use a sharp knife to split this offshoot away from the main plant. If you’re having trouble separating this offshoot, try using sawing motions with your blade.[2]
- You don’t need to have any fancy gardening tools for this.
-
2Pull the separated offshoot from the soil by the root. Grip the offshoot with both hands and try to free it from the soil. Pull on the plant slowly to loosen it from the roots, then tug it out of the soil completely.[3]
- Don’t try to pull out the plant in 1 go. If you can’t see the roots, dig around the base of the plant’s soil to reveal some of the roots.
- Wear gardening gloves to protect your hands.
Advertisement -
3Soak the roots in a bowl of water for 1 hour. Fill a bowl halfway with lukewarm or cool tap water, then submerge the exposed roots. Let the plant soak for around an hour so the roots are ready to be replanted.[4]
- Depending on the size of your offshoot, you may need a large bowl.
-
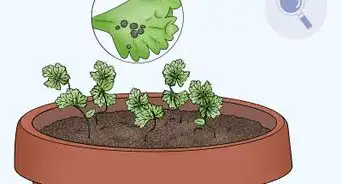
4Transplant the seedling into a pot. Choose a planting pot that’s large enough to fit your Areca palm offshoot. Fill this pot with a commercial soil mixture, then place your seedling inside. Double-check to make sure that the roots are fully buried in the soil so the offset can grow on its own.[5]
- Areca palms can be grown in pots that are as small as 6 in (15 cm) and as large as 52 in (130 cm).
- You can use peat and sand as an alternative for traditional soil mixes, as long as you combine them in a 3:1 ratio. You can also use a mixture of peat, sand, and pine bark, which can be combined in a 6:1:3 ratio.


Germinating the Seeds
-
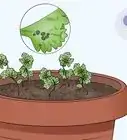
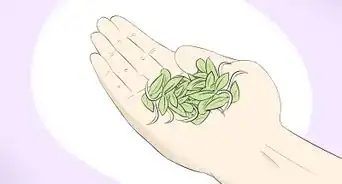
1Scrub the seeds against a mesh screen to get rid of the outer skin. Take a handful of Areca seeds and place them on top of a large, mesh screen. Turn on a hose or tap, then place both the screen and the seeds beneath the water. Rub the wet seeds along the mesh until the outer, fibrous layer of each seed washes away.[8]
- This process is also known as “cleaning” the seed.
- You can purchase Areca palm seeds at a nursery or garden center.
-
2Soak the palm seeds in a cup of lukewarm water for up to 1 week. Fill a bowl or cup with tap water and place your peeled or “cleaned” inside. Change the water on a daily basis so the hard outer shell of the seed can soften.[9]
- Soaked seeds are more likely to germinate successfully.
-
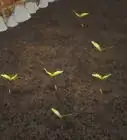
3Sow the palm so the top of the seed is slightly visible. Fill a planting pot with soil, then bury your soaked seed beneath the surface. Since your seeds are in partial shade, you don’t need to bury them all the way.[10]
- You can use a commercial soil mixture to sow your seeds. You can also combine peat and sand at a 3:1 ratio, or peat, sand, and pine bark at 1 6:1:3 ratio.
-
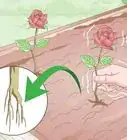
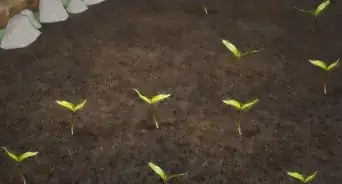
4Plant the seeds 3 to 6 feet (0.91 to 1.83 m) apart if you’re planting outside. Dig a small hole or indent in the soil where you plan to grow your Areca palms. Bury the seed slightly beneath the surface, leaving part of the seed visible. Space any additional seeds by several inches or centimeters so your palms have plenty of room to grow.[11]
- Areca palms grow most successfully in a well-drained, partially shaded area.[12]


Tending to the Palms
-
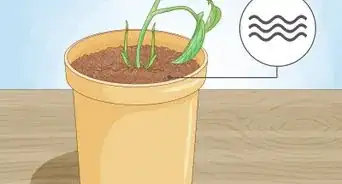
1Water the palm on a daily basis to keep the soil moist. Pour water over the base of the plant until the soil looks moist to the touch. Unlike succulents and other warm-weather plants, note that Areca palms need a consistent, regular amount of water so they don’t dry out.[13]
- You know you’ve overwatered if you see a visible puddle forming on your soil.
- If you overwater the plant, you might damage it.
-
2Grow Areca palms in a partially shaded area. Find an area in your home that doesn’t get a constant amount of sunlight, as you don’t want your plant to dry out.[14] Instead, look for an east-, south-, or west-facing window in your home, as these will give your plant a proper, balanced amount of sunlight and shade.[15]
-
3Leave the palms in an 80 °F (27 °C) environment. During the day, try to keep your plant in a consistently warm area that’s between 75 and 85 °F (24 and 29 °C). At nighttime, keep your palm plant in a cooler temperature that’s between 65 to 70 °F (18 to 21 °C).[16]
- If you don’t want your home to be this hot, keep your Areca palm on a porch, deck, or other outdoor area.
-
4Sprinkle fertilizer over the soil once each month. Visit your local gardening center, nursery, or home improvement store to find a nitrogen-rich fertilizer with a 3-1-2 Nitrogen-Phosphorus-Potassium (NPK) level. Sprinkle a spoonful of this over the surface of the soil, or however much is needed to cover the entire surface.[17]
- You can also use Osmocote, which is a fertilizer with a 19-6-12 NPK ratio.
- A teaspoon (6 g) of fertilizer is generally enough to cover the surface of a 6 in (15 cm) pot.


Things You’ll Need
Transplanting an Offshoot
- Knife
- Bowl
- Water
Germinating the Seeds
- Mesh screen
- Cup
- Water
- Planting pots
- Hose (optional)
Tending to the Palms
- Water
- Fertilizer


References
- ↑ https://hgic.clemson.edu/factsheet/indoor-palms/
- ↑ https://m.youtube.com/watch?v=pL5eil9C6rA&t=3m4s
- ↑ https://m.youtube.com/watch?v=pL5eil9C6rA&t=4m10s
- ↑ https://m.youtube.com/watch?v=PvHTg3UeRlY&t=2m38s
- ↑ https://mrec.ifas.ufl.edu/foliage/folnotes/areca.htm
- ↑ https://www.south-florida-plant-guide.com/areca-palm.html
- ↑ https://www.hgtv.ca/green-living/photos/plants-child-pet-safe-1913786/
- ↑ https://edis.ifas.ufl.edu/ep238
- ↑ https://edis.ifas.ufl.edu/ep238
- ↑ https://edis.ifas.ufl.edu/ep238
- ↑ https://www.south-florida-plant-guide.com/areca-palm.html
- ↑ https://edis.ifas.ufl.edu/ep238
- ↑ https://edis.ifas.ufl.edu/ep238
- ↑ https://mrec.ifas.ufl.edu/foliage/folnotes/areca.htm
- ↑ https://hgic.clemson.edu/factsheet/indoor-palms/
- ↑ https://hgic.clemson.edu/factsheet/indoor-palms/
- ↑ https://mrec.ifas.ufl.edu/foliage/folnotes/areca.htm