wikiHow is a “wiki,” similar to Wikipedia, which means that many of our articles are co-written by multiple authors. To create this article, 14 people, some anonymous, worked to edit and improve it over time.
There are 8 references cited in this article, which can be found at the bottom of the page.
This article has been viewed 43,787 times.
Learn more...
Both sweet and spicy peppers can be preserved in several different ways. If you plan on using the peppers in a recipe, freezing or drying are easy options. To preserve their crunch, a more involved canning process is required. Unless you own a working pressure canner and weights, or one with a dial gauge, follow the canning instructions in full to safely pickle the peppers and avoid dangerous toxins.
Steps
Freezing Peppers
-
1Freeze peppers to preserve flavor, but not texture. Any type of pepper can be frozen, either raw or already roasted. The peppers typically remain flavorful for eight or nine months, but they will be mushy once thawed.[1] This makes this method best suited for peppers that will be diced and used in recipes.
- Unlike most vegetables, peppers do not need to be blanched to maintain quality while frozen.[2] This makes freezing a faster, easier preservation method than with many vegetables.
-
2Wear rubber gloves if the peppers are spicy. Hot peppers can cause a painful skin rash. Always wear rubber gloves while handling hot peppers, and avoid touching sensitive areas of your body, such as your face.[3] Wash anything that comes into contact with the peppers with soap and warm water before using it for anything else.
- While more scientific studies are needed, there is anecdotal evidence that latex gloves may not be able to prevent "burning" from prolonged contact with hot peppers.[4]
Advertisement -
3Wash and cut the peppers. Cut the peppers in half and scoop out the seeds and the white membrane inside. Slice the peppers into strips, or dice them into small pieces, depending on how you prefer them in your recipes.
-
4Freeze the peppers on a baking sheet. Spread the cut peppers out in a single layer, so they will freeze separately from each other and not stick together. Put the tray in the freezer until the peppers are frozen firm, checking about every twenty minutes.
- A baking sheet with sides is best to prevent the peppers from falling, but you may use any flat tray.
- Alternatively, wrap each pepper in wax paper or another freezer-safe material instead, to keep them separate from each other. Move on to the next step.
-
5Transfer the peppers to an airtight container. Once the peppers have been tray frozen, they are unlikely to stick together into one lump in the freezer. At this point, they can be collected and placed in airtight, waterproof containers, such as freezer-safe zip locked bags or sealed plastic containers. Remove as much air as possible from bags before closing.
- Keep your freezer at 0ºF (–17.9ºC) or below for safe, long-term preservation.[6]
- Label the containers with the variety of pepper, or with the general description, such as "spicy" or "bell pepper".
Drying Peppers
-
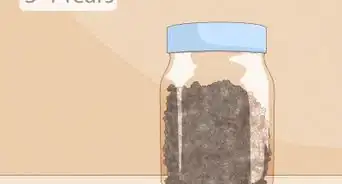
1Dry peppers to create spice powder, or to preserve for cooking purposes. Peppers can be dried without any special equipment, although a dehydrator or oven can speed up the process. Peppers preserved in this way can keep for several months if stored properly. Once preserved, they can be crumbled in a blender to make a spicy topping, or soaked in water for 20 minutes to regain a palatable texture, then used in a recipe.[7]
-
2Dry any pepper in an oven or food dehydrator. These methods can be used for any pepper, although green peppers and bell peppers may take several hours longer than red chili peppers. Remove seeds and membranes, then cut into thin strips or cubes for fastest results. Keep the oven temperature at the lowest setting possible to avoid burning, or set a food dehydrator to 140ºF (60.5ºC) or less.[8] Depending on the type of chili, strips or cubes may take anywhere from 4–10 hours to become completely dry. Check every couple hours, or every hour for an oven due to the less consistent temperature.
- You may preserve roasted peppers this way. Roast until the outer skin blisters, then cut and place the unroasted side face-down on the oven or dehydrator rack.
-
3Try drying chili peppers in full sun. If daytime temperatures are above 85ºF (30ºC), and full sunlight is available, you may dry hot peppers outdoors.[9] First, remove the seeds and membrane from the peppers, then cut them into strips or dice them. Lay them out on a mesh tray or a cookie sheet for several days at least, until brittle. Bring them indoors at night if the temperature drops low enough to form dew.
- Bell peppers are typically too moist and thick-skinned to sun-dry. Try the oven or dehydrator instructions instead.
-
4Alternatively, hang red chili peppers up to dry for several weeks. Creating a string hung with produce, or a ristra, can provide decoration while you dry, and doesn't require anything besides a dry room with good ventilation. Thread a heavy needle with fishing line or twine, pierce the top stem of a chile, and loop the line around the top. Repeat with each chile, using the same length of fishing line, and hang the whole line up to dry.
- This method is only recommended for hot red peppers, since they have thin skins with lower water content. Green peppers or bell peppers are likely to grow moldy before they finish drying.
- Tie clumps of two or three chiles together to create a more decorative braided ristra.
Canning Peppers
-
1Follow this process to preserve peppers safely for up to two years. Despite popular misconceptions, all types of pepper are considered a "low acid" food, and cannot be preserved with water-bath canning unless an acid, typically vinegar, is added to the peppers.[10] However, the vinegar's pickling effect creates a flavor that many people enjoy. This method is also one of the best ways to retain most of the peppers' crunchy texture.
- Note: Because this process can be complicated, reading all the instructions is recommended before you begin. A water-bath canner will make this easier.
- If you have a pressure canner, see tips for a way to preserve peppers without pickling first.
-
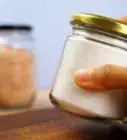
2Wash and heat canning jars and lids. Put sturdy, undamaged canning jars and lids through a hot dishwasher cycle, or place them in a pot of water and simmer, below boiling point, on the stovetop. This helps keep the jars clean, and prevents them from shattering when boiling water is poured into them.
- You'll need tongs to remove jars and lids from hot water.
-
3Wash and prepare the peppers. Peppers should be prepared for preservation by washing them, removing the stems and seeds, and cutting them to the size you wish.
-
4Fill clean canning jars 1 pint (500 mL) or smaller with peppers. Using larger jars or non-canning jars may be unsafe for this recipe. Leave about 1/2–1 inch (1.25–2.5 cm) of head space at the top of each jar.
- About 1 lb (0.45 kg) of peppers is typically required for each 1 pint (475 mL) jar.[11]
-
5Select a strong vinegar. Vinegar can be used as a preserving fluid for peppers, provided it's the correct type of vinegar. Try to use a high-quality vinegar with at least a 5% acetic acid content (or 50-grain strength).[12] ). Avoid using homemade vinegar unless you can be sure it meets this level of acidity.
- Clear liquors will preserve the original color of the pepper, while cider and wine vinegars can darken the peppers but will otherwise work just as well.
-
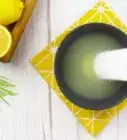
6Mix vinegar, water, and optional ingredients. A typical canning bath batch of nine pint jars (or nine 500 mL jars) requires at least 9 cups (or 2250 mL) solution. At least 1/3 of the solution should be vinegar to safely preserve the pickles, but the other ingredients are up to your taste preferences. Here are two suggestions:
- For bell peppers, use 3 cups (700 mL) vinegar and 3 cups (700 mL) water, and 3 1/2 cups (815 mL) sugar. Add 4.5 tsp (22.5 mL) canning or pickling salt for flavor, unless you want to make a low-sodium version.[13] Optionally, add 9 peeled cloves garlic for flavor.
- For hot peppers, or a mix of hot and sweet peppers, try 5 cups (1200 mL) vinegar, 1 cup (240 mL) water, and 2 tbsp (30 mL) sugar instead of a tarter result. Optionally, add 2 tbsp (30 mL) canning or pickling salt, and 2 cloves of garlic.
-
7Bring this mixture to a boil. Transfer the vinegar and water solution to a large pot over medium or high heat. Wait for the mixture to reach a rolling boil, then immediately remove from heat. Boiling helps eliminate germs and microbes that can contaminate the preserved peppers.
- If you accidentally leave the solution boiling for more than a couple minutes, you may wish to add a little more vinegar and bring to a boil a second time. Over-boiling can destroy some of the acetic acid in the vinegar, which is the main preservative.[14]
-
8Add the hot vinegar mixture until the peppers are submerged. Pour your hot mixture of vinegar, sugar, and water into each pepper container until the peppers are fully covered by liquid. Try to still leave about 1/2 inch (1.25 cm) of space at the top of the jar or container.
-
9Clean and seal the jars. Run a knife around the rim of each jar to dislodge air bubbles. Use a damp, freshly cleaned cloth to wipe the inner rim of each jar for additional cleaning. Seal the canning jar according to the manufacturer's instructions, typically by placing the lid on top and screwing the rim over it and the jar.
-
10Place the jars on a rack in a pot of hot water. Fill a water-bath canner, or a large pot with a metal rack on the bottom, about half full of water. Heat this until it is almost boiling, then lower the sealed jars onto the rack. Move the jars so none of them are touching each other, or the sides of the container. The water must be deep enough to cover the jars with at least 1–2 inches (2.5–5 cm) of water.
-
11Learn how long to boil the jars. The jars must be boiled for a certain amount of time, to create a safe environment for preservation. Start timing the peppers once the water begins boiling, not when they are lowered into the water. If the boiling is interrupted, you must begin timing from the beginning.
- If you are at a high altitude, start with the times below, then add an additional 2 minutes per 1,000 ft (300 m) above sea level.[15]
- Boil hot peppers for at least 15 minutes in jars up to 1 pint (500 mL).
- Boil sweet peppers or bell peppers for at last 10 minutes in jars up to 1 pint (500 mL).
- Safe boiling times for larger jars have not been established for these recipes. You may be able to find another pickled pepper recipe with a recommended boiling time for 1 quart (1 L) jars.
-
12Allow to cool. Store your finished peppers in a cool, dark place, no warmer than 75ºF (24ºC).[16] Under these conditions, the pickled peppers can typically last for one to two years.[17] Once you open a jar, keep it in the refrigerator until the peppers are eaten.
- Do not eat pickled peppers from a jar with a rounded or bulging lid, or if the peppers have turned brown or black.
Community Q&A
-
QuestionIs there a benefit to letting peppers ripen all the way to red?
 Community AnswerYes, they will be softer and sweeter when they are ripe, as with other fruits. Generally, it is good to let fruit ripen before you eat it.
 -
QuestionIs it ideal to eat the pepper with fluid or should I sieve it out before eating?
 Community AnswerIt is ideal to sieve is out before eating as the fluid can cause a major mouth burn and tongue burn.
Things You'll Need
- Peppers
- Knife
- Cutting board
Freezing:
- Baking sheet
- Freezer bags or containers
Drying:
- Dehydrator
- or Oven
- or Sunshine
- or Needle and fishing line
Pickling:
- Canning jars and lids
- Water bath canner, or large pot & rack
- Vinegar
- Water
- Sugar, salt, other spices (optional)
Warnings
- Storing peppers in oil at room temperature can cause the growth of lethal botulinum bacteria.[21] No matter how the peppers were preserved, throw them away if the can lid is bulging, which often indicates the presence of botulinum.⧼thumbs_response⧽
References
- ↑ https://anrcatalog.ucanr.edu/pdf/8004.pdf
- ↑ http://food.unl.edu/preservation/freezing-peppers
- ↑ http://nchfp.uga.edu/how/can_04/peppers.html
- ↑ http://www.washingtonpost.com/blogs/all-we-can-eat/post/should-you-wear-gloves-while-handling-hot-peppers/2012/10/30/de6134b2-22d7-11e2-ac85-e669876c6a24_blog.html
- ↑ http://food.unl.edu/preservation/freezing-peppers
- ↑ https://anrcatalog.ucanr.edu/pdf/8004.pdf
- ↑ https://anrcatalog.ucanr.edu/pdf/8004.pdf
- ↑ https://anrcatalog.ucanr.edu/pdf/8004.pdf
- ↑ https://anrcatalog.ucanr.edu/pdf/8004.pdf
- ↑ https://anrcatalog.ucanr.edu/pdf/8004.pdf
- ↑ https://anrcatalog.ucanr.edu/pdf/8004.pdf
- ↑ https://anrcatalog.ucanr.edu/pdf/8004.pdf
- ↑ https://anrcatalog.ucanr.edu/pdf/8004.pdf
- ↑ https://anrcatalog.ucanr.edu/pdf/8004.pdf
- ↑ http://www.simplycanning.com/altitude-adjustments.html
- ↑ https://anrcatalog.ucanr.edu/pdf/8004.pdf
- ↑ http://www.eatbydate.com/other/condiments/how-long-do-pickles-last/
- ↑ https://anrcatalog.ucanr.edu/pdf/8004.pdf
- ↑ http://nchfp.uga.edu/questions/FAQ_jellied.html#8
- ↑ http://www.food.com/recipe/hot-pepper-jelly-58516
- ↑ https://anrcatalog.ucanr.edu/pdf/8004.pdf
About This Article
If you want to preserve fresh peppers to use later, wash the peppers and cut them in half, then scoop out the seeds and the white membrane inside. If the peppers are spicy, you may want to wear rubber gloves to protect your hands. Spread the peppers in a single layer on a baking sheet, making sure none of the pieces overlap. Put the tray in the freezer and check them every 20 minutes or so until the peppers are firm, then transfer the peppers to an airtight, freezer-safe container and return them to the freezer, where they’ll stay good for 8-9 months. If you want to learn how to dry or can peppers to store them, keep reading the article!