This article was co-authored by Gerber Ortiz-Vega. Gerber Ortiz-Vega is a Masonry Specialist and the Founder of GO Masonry LLC, a masonry company based in Northern Virginia. Gerber specializes in providing brick and stone laying services, concrete installations, and masonry repairs. Gerber has over four years of experience running GO Masonry and over ten years of general masonry work experience. He earned a BA in Marketing from the University of Mary Washington in 2017.
wikiHow marks an article as reader-approved once it receives enough positive feedback. This article received 13 testimonials and 87% of readers who voted found it helpful, earning it our reader-approved status.
This article has been viewed 684,577 times.
Knowing how to pour concrete can help you save a few dollars on small projects around the house. You can pour concrete using items you have in the shed or garage; it does not have to take any special tools to do minor projects. Pouring concrete takes a little muscle as the mixture is quite heavy. Otherwise, using these few steps, you can easily accomplish your concrete projects.
Steps
Preparation
-
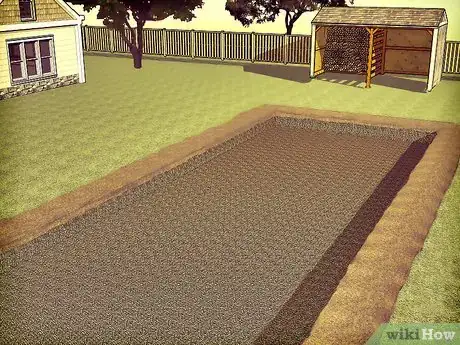
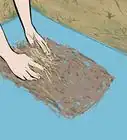
1Clear the area of any objects or material that would interfere in the pouring process. This includes grass, rocks, trees, shrubs, and even old concrete. Clear away everything until raw earth is exposed.
-
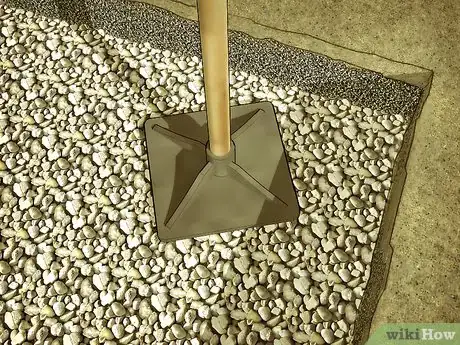
2Prepare your subbase. Your subbase is another word for any material on which the concrete rests. Usually, granular fill or road base is used as a subbase, although in some rare cases, soil itself can be used if it is extremely compacted and stable.[1]
- The soil underneath your subbase is called your subgrade, and your concrete is only going to be as strong as your subgrade.[2] Think about it: If your subgrade shifts, craters, or otherwise moves, the integrity of your concrete is going to be compromised. Make sure your subgrade is properly compacted and stabilized before adding the subbase.[3]
- Many professionals choose open-grade stone or closed-grade fine-grade stone for their subbase. Open-grade stone lack the smaller stones, giving water a way to pass through. Plus, it's less expensive. On the downside, it doesn't really compact as well as finer-grade stone. Finer-grade stone is compactable but tends to be more expensive.[4]
- Lay a 4–8 inch (10.2–20.3 cm) thick subbase with your chosen material, and then compact it with a hand tamper or a plate compactor. Plate compactors can be overkill for small, DIY projects, but offer more power in the compacting process.
Advertisement -
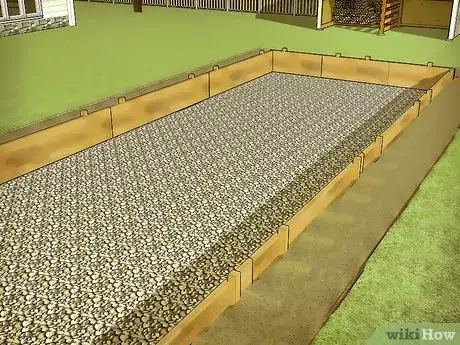
3Prepare a form. A form is usually a wooden perimeter, secured by special nails or screws, and built around the pouring site. A well-built form will help you achieve a better finish on your concrete. Keep a couple things in mind when building your form:
- For square or rectangular forms, make sure that your corners form 90 degree angles. Take a tape measure and measure both diagonals of the square or rectangular; they should correspond to one another exactly. If they don't, it's back to the drawing board with your form.
- Also make sure that the forms have a slight slope to them. If they are completely level, you can expect water build up in the middle of your beautiful concrete. To eliminate this possibility, create a slight slope of 1" for every 10 feet.[5]
-
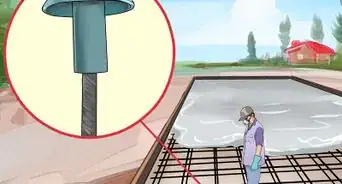
4Add wire mesh or rebar to the inside of your form for support. Reinforce your concrete with wire mesh or rebar, especially on heavy load-bearing structures, such as driveways. This gives you concrete greater structural integrity.[6]
- Wire mesh will help guard small cracks growing and spreading, as well as offer stability across two axes (wire mesh is welded, where rebar is often tied together).
- Rebar may offer better structural integrity, and be better for higher load-bearing surfaces. On the flip side, it doesn't do much to minimize the appearance of cracks that do appear.
Pouring
-
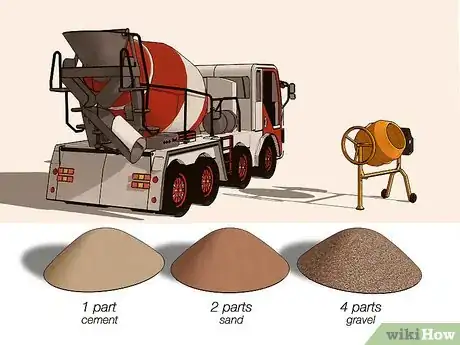
1Mix your concrete. Concrete is mixed by adding together Portland cement, sand, and coarse aggregate (gravel) together in a ratio of 1:2:4. Water is added to the dry mixture to bind all the components together.
- In a concrete mixer, add the determined amount of water and then the concrete mix. You can also mix this in a wheelbarrow with a shovel. Use as little water as possible. Water makes the concrete more maneuverable but it also weakens the constitution of the final product.[7] A drier mix makes the concrete more crack resistant. Turn on the machine. The mix will become smooth and consistent. Shut off the machine.
- Always wear a ventilated mask, safety glasses, gloves, and long sleeves and pants when mixing concrete.[8]
-
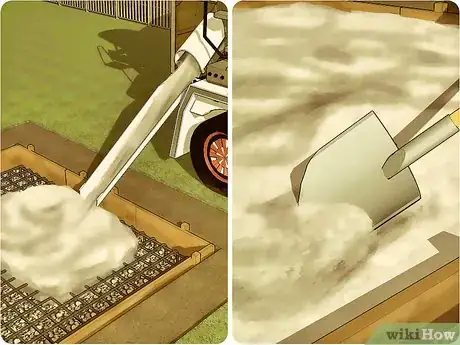
2Pour the concrete into the mold. You can sometimes get a truck to pour concrete straight into your form; otherwise, load it into wheelbarrows and tilt them into the form until the high point is reached. While doing this, enlist some helpers to spread out the concrete with shovels, rakes and "come alongs," which is a special concrete rake.
-
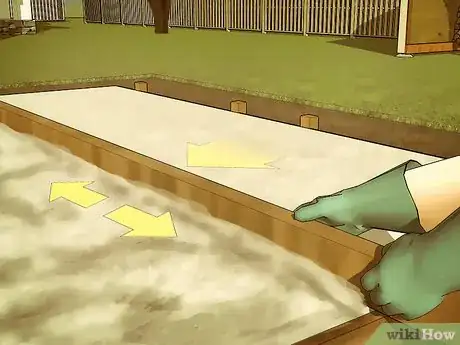
3Screed the top of the concrete. Starting at the uphill point, use a screeding tool to flatten out the wet concrete. Screeding involves jiggling a wide plank of wood back and forth, if possible immediately over the forms, to create a flat surface.
- Work your way from top to bottom, gently screeding until you have a flat surface. Your concrete surface won't be finished yet, but it will begin to look more complete and professional looking at this point.
-
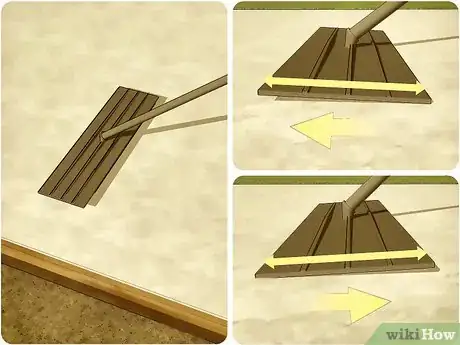
4Float the newly-screeded surface to further compact the concrete. At this point, you should move fairly quickly as the concrete will set fast. Your floating process will contain two steps:
- Use a large floating device, also known as a bull float, to press down aggregate and help the cream (gravel-free concrete) rise to the surface. Do this by moving the bull float away from you, keeping the tailing edge slightly elevated, and then moving the bull float back towards you, keeping the leading edge slightly elevated.
- Use a magnesium hand float to go over the surface. After some of the water bleeds to the surface, use long sweeping motions with your hand float.
-
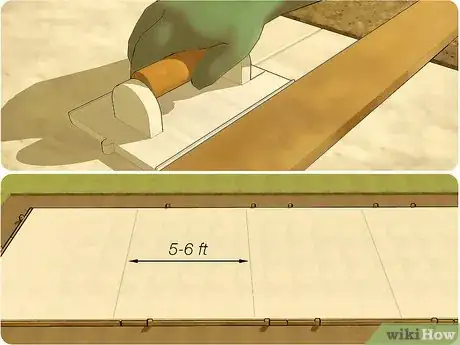
5Make control joints every 5 o 6 feet (1.8 m) with a groover. Line up a plank as a straight edge to make periodic joints in the concrete. These joints will help the concrete withstand cracking due to temperature changes. Cut the joints about a quarter of the thickness of the concrete.
-
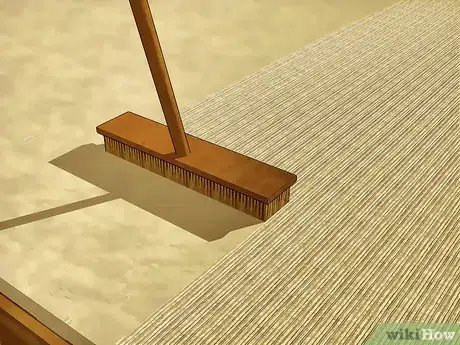
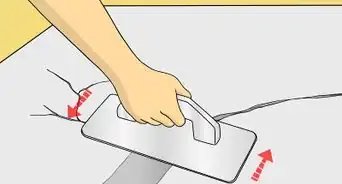
6Create traction. Use a broom to sweep across the surface, creating designs. This will provide traction on the concrete so it is not as slippery when wet. A soft brush can also be used for a different texture that is less rough. For a smoother surface, but one that still has a pattern to it, you can use the trowel and slide it over the surface in a circular motion. Make sure the grooves are not so deep that water stands on the surface. Standing water will compromise the integrity of the concrete.
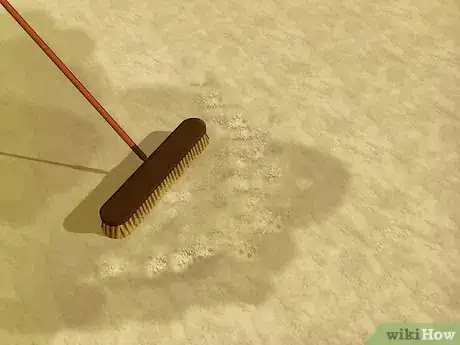
- If moving the broom over the concrete causes clumps of concrete to aggregate on your broom, it's too early to broom. Move over the concrete again with the magnesium floater to smooth out the pattern left by the broom, then try again later.
-
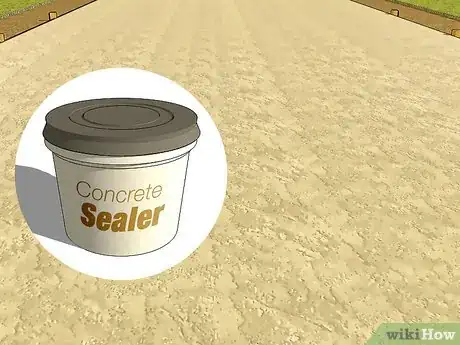
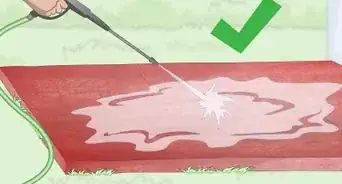
7Cure and seal the concrete. Concrete should be left to cure for 28 days, with the initial day being the most critical. As soon as the concrete has been poured, professionals usually recommend sealing the concrete. The sealant will help the concrete cure, as well as prevent cracks and discoloration.
- Sealing concrete will prevent it from absorbing liquids and staining.[9]
-
8Maintain your concrete. Although concrete is often thought of an a no-hassle surface, it benefits from regular maintenance. Regular soap and water maintenance will help keep the concrete looking its best, while occasional seals (~ every five years) can help keep the concrete from getting damaged through use.
What Should You Do Before Your Pour a Concrete Driveway?
Expert Q&A
Did you know you can get expert answers for this article?
Unlock expert answers by supporting wikiHow
-
QuestionHow much water should I use when mixing the concrete?
 Gerber Ortiz-VegaGerber Ortiz-Vega is a Masonry Specialist and the Founder of GO Masonry LLC, a masonry company based in Northern Virginia. Gerber specializes in providing brick and stone laying services, concrete installations, and masonry repairs. Gerber has over four years of experience running GO Masonry and over ten years of general masonry work experience. He earned a BA in Marketing from the University of Mary Washington in 2017.
Masonry Specialist & Founder, GO Masonry LLC
-
QuestionHow do you prepare the ground for concrete?
 Gerber Ortiz-VegaGerber Ortiz-Vega is a Masonry Specialist and the Founder of GO Masonry LLC, a masonry company based in Northern Virginia. Gerber specializes in providing brick and stone laying services, concrete installations, and masonry repairs. Gerber has over four years of experience running GO Masonry and over ten years of general masonry work experience. He earned a BA in Marketing from the University of Mary Washington in 2017.
Masonry Specialist & Founder, GO Masonry LLC
-
QuestionDo I need to wet the concrete after I lay it down?
 Community AnswerYes. Wetting the concrete after it has initially set is a process called wet curing. During the curing process, concrete needs to be protected from moisture loss, and this process helps keep it moist.
Things You'll Need
- Mold
- Stone
- Steel wire mesh or rebar
- Concrete
- Water
- Concrete mixer or wheelbarrow and shovel
- Float
- Trowel
- Planks
- Broom
- Helpers
References
- ↑ http://www.concretenetwork.com/install-concrete.html
- ↑ http://www.concreteconstruction.net/concrete-construction/preparing-subbase.aspx
- ↑ https://www.youtube.com/watch?v=yD4xNFDZvcA
- ↑ https://www.concreteconstruction.net/how-to/site-prep/preparing-subbase_o
- ↑ https://www.youtube.com/watch?v=yD4xNFDZvcA
- ↑ Gerber Ortiz-Vega. Masonry Specialist & Founder, GO Masonry LLC. Expert Interview. 10 March 2020.
- ↑ https://www.familyhandyman.com/masonry/pouring-concrete/how-to-properly-mix-concrete/
- ↑ Gerber Ortiz-Vega. Masonry Specialist & Founder, GO Masonry LLC. Expert Interview. 10 March 2020.
- ↑ Gerber Ortiz-Vega. Masonry Specialist & Founder, GO Masonry LLC. Expert Interview. 10 March 2020.
About This Article
Before you pour concrete, add a concrete mix and water into a concrete mixer or wheelbarrow. Mix the concrete until smooth and pour it into the mold. Starting at the uphill point, use a screed tool to flatten the wet concrete. Then, float the newly-screeded surface to further compact the concrete. Finally, use a broom or trowel to create some traction so your concrete doesn't get slippery when wet. To learn how to seal your concrete, keep reading!
