This article was co-authored by wikiHow staff writer, Hannah Madden. Hannah Madden is a writer, editor, and artist currently living in Portland, Oregon. In 2018, she graduated from Portland State University with a B.S. in Environmental Studies. Hannah enjoys writing articles about conservation, sustainability, and eco-friendly products. When she isn’t writing, you can find Hannah working on hand embroidery projects and listening to music.
There are 11 references cited in this article, which can be found at the bottom of the page.
Learn more...
Potatoes: not only are they delicious, but they’re easy to grow, too! Whether you’ve been gardening for years or you’ve only just tapped into your green thumb, planting potatoes is the perfect way to set yourself up for success. There are 2 options for planting potatoes from seed: using seed potatoes (which are whole potatoes) or using true seeds (which are seeds from a potato plant). While both will yield the same results, using true seeds takes slightly more time and effort than using seed potatoes. We’ve detailed both processes in this article so you can pick the right method and harvest delicious spuds straight from your garden. Let’s get planting!
Things You Should Know
- Plant potatoes outside in the winter. You can use seed potatoes (whole potatoes from last year’s harvest) or true seeds (seeds from a potato plant).
- To plant seed potatoes, wait until they sprout, then plant them 6 to 8 in (15 to 20 cm) into the ground, a raised bed, or a container.
- To plant potatoes from true seed, sow them indoors, then transplant them outside when they’re about 2 in (5.1 cm) tall.
- Water the potatoes once a week, and harvest them 2 weeks after they flower.
Steps
Planting Potatoes from Seed Potatoes
-
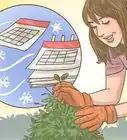
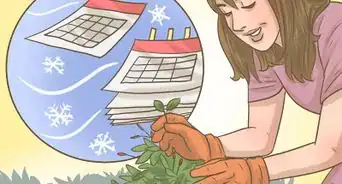
1Prepare to plant potatoes outside in late winter. No matter if you’re planting potatoes from seed or from true seed, late winter is the ideal time. Potatoes will survive a light frost, but they don’t do well in hard frosts or freezes.[1]
- In the western hemisphere, late winter means sometime between January and May, depending on your climate.
- Planting potatoes too early can lead to an uptick of pests and diseases, so experts don’t recommend fall planting potatoes.
-
2Purchase seed potatoes from a nursery or garden center. “Seed potatoes” are actually whole potatoes that are left over from last year’s harvest. Experts recommend buying seed potatoes from a reputable garden center or nursery rather than your grocery store, since grocery store potatoes have often been treated to stop them from sprouting.[2]
- Even saving potatoes from your previous harvest isn’t a good idea, since they can carry over disease and fungus into your new soil. Instead, make sure you buy disease-free seed potatoes from a reputable seller.
- For every 1 lb (0.45 kg) of seed potatoes you plant, expect to harvest about 3 to 5 lb (1.4 to 2.3 kg) of potatoes.
Advertisement -
3Wait for 1 to 2 weeks for the potatoes to sprout. Take your seed potatoes home and keep them in a cool, dark area, like your pantry or basement. Check on them every few days to see if they’ve sprouted yet. It’s important to wait for them to sprout before planting, since that’s how they’ll grow new potatoes.[3]
- At room temp, potatoes will take a little longer to sprout—typically about 3 weeks.
-
4Cut the seed potatoes into 1.25 in (3.2 cm) chunks. Grab a clean knife and start cutting your seed potatoes into chunks. Make sure that each piece has at least 2 “eyes,” or sprouts, on it for best results.[4]
- If your seed potatoes are already small enough, you don’t need to cut them up.
-
5Let the seed potatoes dry at room temperature for 1 to 2 days. Place your seed potatoes in a dry area that’s around 65 °F (18 °C). Leave them for a couple days so that the cut part of the potato develops a hard protective layer.[5]
- Planting seed potatoes before they’ve dried out can lead to mold and rot.
-
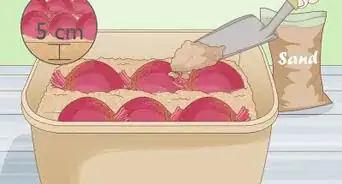
6Plant the seed potatoes 6 to 8 in (15 to 20 cm) deep into the ground. You can plant seed potatoes in a raised bed, in the ground, or in containers. Use a spade to dig a small hole, then place a single seed potato into it with the eye, or the sprout, facing upward. Cover the potato completely with soil.[6]
- The spacing of your potatoes depends on their variety. For most medium and large potato varieties, plant them 10 to 12 in (25 to 30 cm) apart with 30 to 36 in (76 to 91 cm) between rows.[7]


Planting Potatoes from True Seed
-
1Plant true potato seeds 1⁄4 in (0.64 cm) deep in plug trays. Wait until about 6 weeks before the last frost date. Fill up a plug tray with soil, then plant 1 single true potato seed in each spot.[8]
- True potato seeds (TPS) are seeds harvested from the potato fruit. While they are a viable way to grow potatoes, they’re generally more labor-intensive and require a longer growing season, so they’re not used as much as seed potatoes are.
-
2Water the seeds when the soil is dry. Check the potato seeds once a day, and give them water whenever the soil dries out. Potato seeds are generally hearty, so too much or too little water won’t be detrimental to them.[9]
-
3Keep the seeds at 70 °F (21 °C) for 10 to 14 days. When potato seeds first start growing, they need to be kept warm. Crank up the heat for the first 2 weeks or so until the seeds germinate.[10]
- After 14 days, the temperature of the room doesn’t matter as much. Make sure the seeds are kept above freezing until they’re ready to transplant.
-
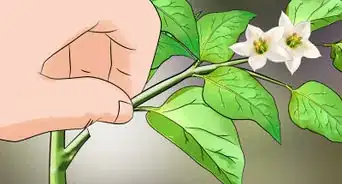
4
-
5Plant the potatoes in the ground, leaving 1 in (2.5 cm) above the surface. You can plant potatoes from true seed in the ground, in a raised bed, or in containers. Use a spade to dig a small hole, then place a single potato sprout inside of it. Cover the area with dirt until only 1 in (2.5 cm) of the sprout is above the soil.[13]
- The ideal spacing depends on the variety of your potato. For smaller potatoes, plant them 8 in (20 cm) apart with 8 in (20 cm) between each row. For medium and large potatoes, plant them 12 in (30 cm) apart with 30 in (76 cm) between each row.
- Once your potatoes are in the ground, stick to the same watering schedule you had when they were indoors.


Maintaining and Growing Potatoes
-
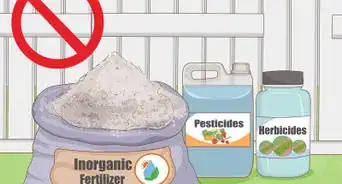
1Keep the soil pH between 5.8 and 6.5. Use a soil test kit to test the pH of your soil, either before you plant your potatoes or right afterwards. You can raise the soil pH with a lime agent or lower the soil pH with compost.[14]
- Potatoes aren’t super pH sensitive, but keeping the pH within the optimal range will ensure they grow quickly and heartily.
-
2Rake the soil around the potatoes to get rid of weeds. Every week or so, head out and check on the soil around your plants. If you spot any weeds, you can either pull them by hand or gently and carefully rake the area to pull the weeds up.[15]
-
3Water the potatoes once a week. Potatoes don’t need a ton of water, but they are drought-sensitive. Use a hose or an irrigation system to thoroughly water your potatoes at least once a week, or more often if you live in a dry climate.[16]
- If it rains for a couple of days, hold off on watering. You don’t want the soil to become too soggy.
-
4Hill the soil when the plants are 6 to 8 in (15 to 20 cm) tall. “Hilling,” also known as “hilling-up,” helps prevent sun exposure that could burn the potatoes. Once the sprouts are tall enough, use a rake or a hoe to push a mound of soil against the base of the plants. After 2 weeks, replenish the hills and make sure they’re upright.[17]
- If you’re dealing with insects, skip the second hilling and instead put down a layer of mulch around each potato plant. This will help insulate the roots from heat and also keep pests away.


Harvesting Potatoes
-
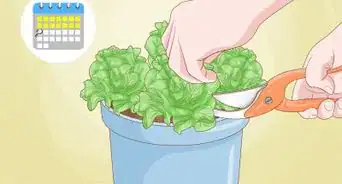
1Harvest the potatoes 2 to 3 weeks after they flower. Potatoes will let you know once they’re ready to harvest! When you notice blooms on your plants, start a countdown: after 2 to 3 weeks, the potatoes will be about the size of a large hen’s egg.[18]
- If you plant potatoes in late winter, they’ll be ready to harvest in late spring or early summer.
-
2Dig into the ground to grab each potato. Here comes the fun part! Using your hands (with gardening gloves, of course) or a spade, carefully dig into the earth underneath each potato plant. For every 1 plant, you’ll find 5 to 10 potatoes under the ground.[19]
- If you’re using a tool, like a spade, dig carefully to avoid piercing any of the potatoes.
-
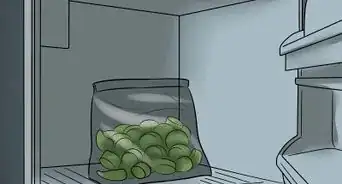
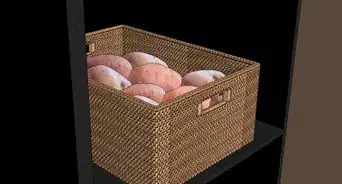
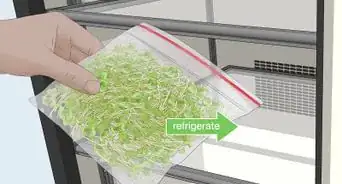
3Store potatoes in a cool, dry place. You’ll probably have a lot of potatoes—more than you can eat right now! Take them inside and store them in an area that stays around 32 to 40 °F (0 to 4 °C).[20]
- Hold off on washing the potatoes until you’re ready to eat them. Washing potatoes too early can lead to rot.


References
- ↑ https://hgic.clemson.edu/factsheet/potato/
- ↑ https://extension.colostate.edu/topic-areas/yard-garden/potatoes-in-the-home-garden-7-617/
- ↑ https://extension.colostate.edu/topic-areas/yard-garden/potatoes-in-the-home-garden-7-617/
- ↑ https://extension.umn.edu/vegetables/growing-potatoes#cutting-tubers-293260
- ↑ https://extension.umn.edu/vegetables/growing-potatoes#planting-seed-pieces-293261
- ↑ https://www.bobvila.com/articles/how-to-grow-potatoes/
- ↑ https://extension.umn.edu/vegetables/growing-potatoes#hilling-293262
- ↑ https://all-americaselections.org/wp-content/uploads/2018/07/Clancy-Growing-Quick-Ref.pdf
- ↑ https://all-americaselections.org/wp-content/uploads/2018/07/Clancy-Growing-Quick-Ref.pdf
- ↑ https://all-americaselections.org/wp-content/uploads/2018/07/Clancy-Growing-Quick-Ref.pdf
- ↑ https://all-americaselections.org/wp-content/uploads/2018/07/Clancy-Growing-Quick-Ref.pdf
- ↑ https://hgic.clemson.edu/factsheet/potato/
- ↑ https://all-americaselections.org/wp-content/uploads/2018/07/Clancy-Growing-Quick-Ref.pdf
- ↑ https://hgic.clemson.edu/factsheet/potato/
- ↑ https://extension.umn.edu/vegetables/growing-potatoes#controlling-weeds-293861
- ↑ https://www.bobvila.com/articles/how-to-grow-potatoes/
- ↑ https://extension.colostate.edu/topic-areas/yard-garden/potatoes-in-the-home-garden-7-617/
- ↑ https://www.gardenersworld.com/how-to/grow-plants/how-to-grow-potatoes/
- ↑ https://www.bobvila.com/articles/how-to-grow-potatoes/
- ↑ https://extension.umn.edu/vegetables/growing-potatoes#harvest-and-storage-293864
- ↑ https://extension.umn.edu/vegetables/growing-potatoes#diseases-293863
About This Article