This article was co-authored by Penny Simmons. Penny Simmons is a Shoe Care Specialist and the Founder of Penny Loafers Shoe Shine Company Inc. in Toronto, Canada. With over 25 years of experience, Penny specializes in shoe cleaning and shining. Penny offers shoe shining at special events, kiosks in Toronto’s underground city, The PATH, and drop-off services. Penny Loafers Shoe Shine Company also operates the oldest shoeshine parlor in Canada. Penny Loafers Shoe Shine Company has been featured in Best of The City - Toronto Life, Saturday Night Magazine, National Post, Globe & Mail, and Toronto Star.
This article has been viewed 1,417,931 times.
A good shoe polishing technique will not only make your shoes look great, it will also extend their life. Learning how to polish your own shoes will give you a great sense of satisfaction and save you a lot of money over the years. Shoe polishing is very easy to do, once you have the right materials and a little patience.
Steps
Gathering the Right Materials
-
1Choose your polish. Shoe polishes are available in wax, cream and liquid forms. Waxes and creams are heavier and will feed the leather and protect the shoes from water damage. Liquid polishes are good for a quick and easy shine. Shoe polishes are available in a variety of colors -- you can buy specific shades to match the shoes you wish to polish, or you can buy a neutral polish which will work on a variety of shoe colors.[1]
-
2Decide whether to use a polishing brush or an old t-shirt. You have a couple of options when it comes to applying your polish. Most people just use an old cotton t-shirt or other soft rag, however it is also possible to get specific polishing brushes with stiff, short bristles. These brushes are included in most shoe polishing kits, which you may choose to invest in. You will also need an old toothbrush or some q-tips to works the polish into hard-to-reach areas.Advertisement
-
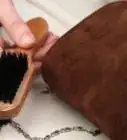
3Get your hands on a horsehair brush. A good horsehair shoe shining brush is the one essential tool you need to properly polish your shoes. It has longer, softer bristles than the polishing brush described above. It is used to brush excess polish from the shoes and to really work the remaining polish into the leather.[2]
-
4Find a soft, lint-free cloth. If you want to add a shiny finish to your polished shoes, you will need to get your hands on a chamois, which is a type of soft leather cloth. Alternatively, you can use any soft, lint-free cloth, such as an old cotton t-shirt.
-
5


Applying the Polish
-
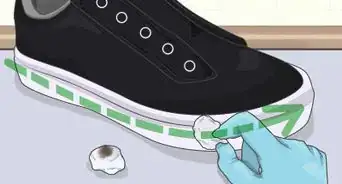
1Clean the shoes. Before you begin polishing, it is important that you first clean your shoes to remove any built up dirt, salt or dust.[4] Otherwise the dirt could get trapped beneath the polish or scratch the surface of the shoes. Brush the shoe vigorously with your horsehair brush to remove any debris.[5]
- Alternatively, use a dampened cloth to wipe all around the surface of the shoe. Just leave the shoes to dry completely before moving on to the next step.
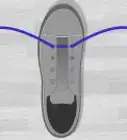
- At this point, you may also want to remove the laces from your shoes. This will give you easier access to the tongue of the shoe and will prevent any polish from getting on the laces.
- You can also clean your shoes with saddle soap or baby shampoo mixed with a little bit of water. Don't soak your shoes in the process, though![6]
-
2Apply the polish using small circular motions. Dip the old t-shirt or polishing brush into your chosen polish and work it into the surface of the shoe, using small circular motions. Apply a medium pressure and make sure to coat the surface evenly, paying special attention to the toe and heel which get the most wear.[7]
- The easiest way to use an old t-shirt is to wrap the material tightly around your index and middle fingers and use them to work the polish into the shoes.
- Use a toothbrush or q-tip to work the polish into the hard-to-reach places, such as the edge of the upper and the cracks in the tongue.
- You may also want to apply polish to the sole of each shoe, in the space between the toe and heel which doesn't touch the ground.
- Try to apply the polish in a really thin layer.[8]
-
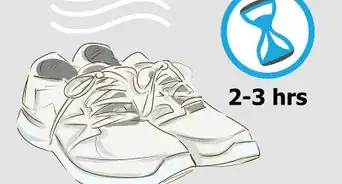
3Allow the polish to dry and add additional layers, if necessary. Once you have applied polish to the first shoe, set it aside on the newspaper and begin working on the second shoe. Each shoe will require about 15 to 20 minutes drying time.[9]
- If you feel like your shoes require another layer of polish, apply this second layer using the same technique as above.
- Remember to use the minimum amount of polish necessary to cover the shoe. It is better to build-up multiple light layers than apply a single thick layer.
-
4Brush off the excess polish. Once any additional layers of polish have dried, grab your horsehair brush and remove the excess polish using short, quick strokes. Don't be afraid to put some elbow grease into it -- the heat generated from the vigorous brush strokes helps the polish to sink into the leather.
- Most of the movement involved in these strokes should come from your wrist. Keep the rest of your arm stationary while your wrist quickly flicks the brush back and forth.
- Make sure to evenly brush the surface of both shoes. When you are done, the shoes should have an even finish with a slight shine. If super shiny shoes are not your thing, you can stop here.
Shining the Shoes
-
1Buff the shoes with a soft cloth. The easiest way to add shine to your shoes is to use a soft cloth -- such as a chamois or an old cotton t-shirt -- to buff the shoes. Place one hand on either end of the cloth and work it across the shoe in a brisk side-to side motion.
- Some people like to breath on the shoe (as if fogging a mirror) before buffing to increase shine.
- If you like, you can place the first shoe on a shoe butler (or on your foot) to make this process easier.
-
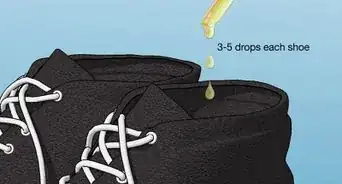
2Use the spit-shine method. Spit shining is a method used in the military to achieve a hard shine. After you have applied the first layer of polish, spray a little water onto the shoes and work it into the surface of the shoe. Then dip the cloth in warm water and use it to apply a second layer of polish.[10]
- Keep repeating this process until you achieve the desired level of shine. Just make sure that you let each layer of polish dry fully before applying the next.
- Spit shining can be done using a soft cloth or a number of cotton balls.
-
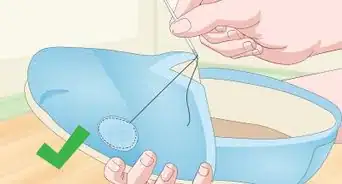
3Try fire shining. Fire shining is a fun, if slightly dangerous, method of shining shoes. It involves lighting the shoe polish on fire for a couple of seconds, until it becomes melted and gooey. This melted polish is then applied to the shoes using the same technique as spit shining.
- Once you have applied several layers of the melted polish, you can take the fire play once step further by using your lighter to evenly heat the polish on the surface of the shoe, until it melts and achieves a wet look.
- Do not let the flame actually touch the shoe and move the lighter constantly, as if spray painting. Once the polish has evenly melted, allow it to dry.
- Apply one final layer of polish, then buff the shoes with a soft cloth to achieve a high-glass shine.

Community Q&A
-
QuestionHow should I remove old polish from my shoes?
 Community AnswerApplying acetone will strip the polish without harming the leather, just be sure to use a leather conditioner once the polish is removed.
 -
QuestionHow long should it take me to shine my boots?Community AnswerIf you are attempting a high gloss, long lasting shine, it will take about an hour, as there are many steps and the polish must be allowed to dry in between coats.
-
QuestionHow do I clean black suede on golf shoes?
 Community AnswerUse a hard bristle brush and a suede eraser. Brush it in one direction first and then use the suede eraser. You may also use a pencil eraser. Shampooing the suede also helps.
Warnings
- Be very careful with the lighter or matches; don't burn the shoe as it will be non-repairable.⧼thumbs_response⧽


References
- ↑ https://www.youtube.com/watch?v=QzC2GY-AAA0
- ↑ https://blog.loake.com/shoe-care/how-to-polish-fine-leather-shoes/
- ↑ https://www.youtube.com/watch?v=QzC2GY-AAA0
- ↑ Penny Simmons. Shoe Care Specialist. Expert Interview. 19 November 2020.
- ↑ https://blog.loake.com/shoe-care/how-to-polish-fine-leather-shoes/
- ↑ Penny Simmons. Shoe Care Specialist. Expert Interview. 19 November 2020.
- ↑ https://www.youtube.com/watch?v=S8UmPvKiao4
- ↑ Penny Simmons. Shoe Care Specialist. Expert Interview. 19 November 2020.
- ↑ https://www.youtube.com/watch?v=S8UmPvKiao4
About This Article

If you want to polish a pair of shoes, make sure you carefully match the color of the polish, or choose a neutral polish. Clean the shoes with a horsehair brush, or wipe them down a dampened cloth, but be sure to let the shoes dry completely if you do this. Apply the polish to the shoes in a circular motion using an old t-shirt or a polishing brush. Pay special attention to the heel and the toe, which get the most wear. Allow the polish to dry and add additional layers, if necessary, then brush off the excess polish. If you want to learn how to shine your shoes when you're finished polishing them, keep reading!