This article was co-authored by wikiHow staff writer, Janice Tieperman. Janice is a professional and creative writer who has worked at wikiHow since 2019. With both a B.A. and M.A. in English from East Stroudsburg University, she has a passion for writing a wide variety of content for anyone and everyone. In her free time, you can find her working on a new crochet pattern, listening to true crime podcasts, or tackling a new creative writing project.
There are 12 references cited in this article, which can be found at the bottom of the page.
The wikiHow Video Team also followed the article's instructions and verified that they work.
This article has been viewed 14,007 times.
Learn more...
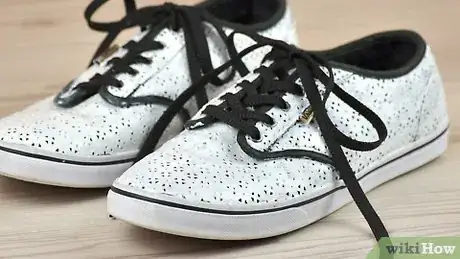
Vans are fun, comfortable shoes that look great with casual outfits. If your Vans aren't the color or pattern you want, paint them white. Since Vans shoes are vulcanized, or heated in a special oven, they're made with heat-resistant materials that can easily be primed, heat-treated, and painted.[1] If you want to give your shoes a complete makeover, use primer and fabric additive to make your shoes easier to paint. If you’d rather get to painting, you can skip priming altogether and start coating your Vans with white leather acrylic paint. Once you’re finished, you can leave your shoes white or jazz them up with fun designs!
Steps
Protecting and Priming Your Shoes
-
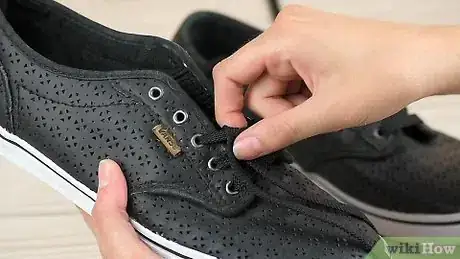
1Remove the shoelaces from your Vans. Untie your shoes and begin to unthread them from the eyelets. Try to remove the laces for 1 pair of eyelets at a time, so your laces don’t get tangled or knotted.[2]
- If you’re painting a pair of shoes without laces or eyelets, you don’t have to worry about this.
-
2Stuff the soles of your shoes with crumpled plastic bags. Take several plastic bags and crumple them up into small balls. Place these bags into the toe and sole portions of your shoes so your Vans can keep a firm shape as you paint them.[3]
- If you don’t have plastic or garbage bags on hand, you can use old socks to stuff your Vans instead.
Advertisement -
3Tie a twist tie through the top 2 eyelets of each shoe to open the tongue. Take a twist tie or bag fastener and insert it through the top row of eyelets. Twist the fastener around each eyelet so your shoes can retain a sturdy, upright shape.[4]
- This process makes it easier for you to paint the tongue of your shoes.
-
4Apply painter’s tape along the entire rim of the outsole. Take a long strip of masking strip and stick it to the very edge of your shoe’s outsole. Pull on the masking tape before placing it on the shoe so the tape can create a tight seal. Continue taping the entire rim of your Vans shoes, so no paint drips onto the outsoles.[5]
- If you want to be extra careful, you can use newspaper or plastic sheeting beneath your painting area.
-
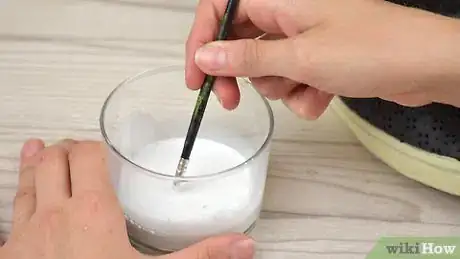
5Mix white acrylic leather paint with fabric additive to create a primer. Pour 2 to 3 tablespoons (30 to 44 mL) of white acrylic leather paint into a small jar or cup. To prepare the primer, pour in an additional 2 to 3 tablespoons (30 to 44 mL) of soft fabric additive to the paint. Stir both of these substances together until they create an even, consistent mixture.[6]
- Fabric additive is a liquid, paint-like substance that helps your primers and paints better adhere to your shoes.
- Always use the same amount of paint and fabric additive when preparing a primer.
- You can purchase these supplies online or in a craft store.
-
6Use a thin, round brush to spread a layer of white primer over your Vans. Apply your primer in smooth, even strokes over the surface of the shoe. Start by priming the large, open sections of the shoes, like the toe, then applying primer around thinner portions of the shoes, like the eyelet. Try to spread it in a thin, even layer to prevent any lumps from forming.[7]
- The primer helps the paint adhere better to the shoe itself.
-
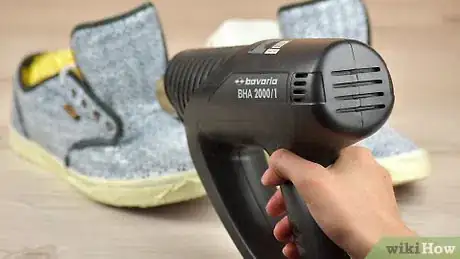
7Use a heat gun to dry and soften each shoe for 3-5 minutes. Place the primed shoe on a flat surface, then plug in your heat gun. Set the device to 300 °F (149 °C), then wave it over the primed surface of your Vans. Apply heat to each individual shoe 3-5 minutes, for a total heating time of 6-10 minutes.[8]
- Heat-setting your shoes helps the material to feel soft, instead of becoming rigid from the paint.
- Try to keep the heat gun about 1 to 2 in (2.5 to 5.1 cm) away from your shoes.
Applying the White Paint
-
1Add a base coat of white paint to open sections of your shoes. Dip a thin, rounded brush into a container of white acrylic leather paint. Spread the paint in smooth, gradual motions so it’s applied in as even a layer as possible. To make the painting process easier, focus first on the larger, more open sections of the shoe, like the toe and heel portions.[9]
-
2Paint around the eyelets and on top of any detail work. Dip your rounded brush into a smaller amount of white paint, then work your way around the thinner edges around and between the eyelets. If your shoes have raised stripes or other types of detail work, paint on top of them to make your shoes appear completely white. Continue applying the paint with smooth, gradual strokes to create an even coat of paint on the shoe.[10]
- If your shoes don’t have eyelets or detail work, you don’t need to worry about this.
-
3Wait several hours for the paint to dry completely. Leave your shoes in a flat, open area so the paint can begin to dry. To be safe, let your shoes sit for 1-2 hours before checking on them. As a test, tap the surface of the paint lightly with your finger—if no paint residue brushes off, then your shoes are adequately dry.[11]
- For more specific drying instructions, check the label on your paint for recommendations.
- Be sure to remove any tape, twist ties, or plastic bags from your shoes before you wear them! Once the shoes are completely dried, take a moment to lace them again.
Tip If you want to add designs to your new white kicks, draw them in paint marker.[12]
Things You’ll Need
Protecting and Priming Your Shoes
- Plastic sheeting
- Bag fasteners
- Painter’s tape
- White acrylic leather paint
- Fabric additive
- Heat-setting gun
Applying the White Paint
- White acrylic leather paint
- Thin paintbrush
- Tissue
References
- ↑ https://sneakerfactory.net/sneakers/2019/02/how-vans-shoes-are-made/
- ↑ https://www.youtube.com/watch?v=a9l3QHL6pAo&t=0m29s
- ↑ https://www.youtube.com/watch?v=a9l3QHL6pAo&t=1m11s
- ↑ https://www.youtube.com/watch?v=a9l3QHL6pAo&t=1m12s
- ↑ https://www.youtube.com/watch?v=6l-wm7Gnv80&t=0m29s
- ↑ https://www.youtube.com/watch?v=qQ5J3R9fYMU&t=1m12s
- ↑ https://www.youtube.com/watch?v=qQ5J3R9fYMU&t=1m25s
- ↑ https://www.youtube.com/watch?v=qQ5J3R9fYMU&t=1m37s
- ↑ https://www.youtube.com/watch?v=OqhiQFNUBqo&t=4m3s
