This article was co-authored by wikiHow Staff. Our trained team of editors and researchers validate articles for accuracy and comprehensiveness. wikiHow's Content Management Team carefully monitors the work from our editorial staff to ensure that each article is backed by trusted research and meets our high quality standards.
There are 10 references cited in this article, which can be found at the bottom of the page.
The wikiHow Video Team also followed the article's instructions and verified that they work.
This article has been viewed 29,351 times.
Learn more...
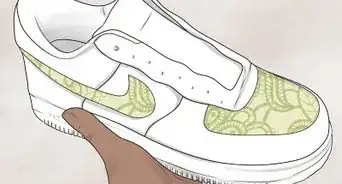
Whether you’re looking to salvage an old pair of sneakers, or just updating the look, painting sneakers is both fun and easy. Start off by cleaning the sneakers and using some nail polish to remove scuff marks so they’re ready to be painted. Then, come up with some designs and color schemes that you want to apply to the sneakers. Apply multiple thin layers of acrylic paint over the design on the sneakers and you’re done!
Steps
Cleaning and Preparing the Sneakers
-
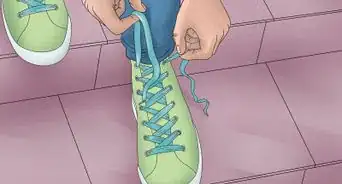
1Remove the laces. Set the laces aside or consider replacing them with new ones that will complement the shoes when they’re painted. Keep the laces nearby so you can put them on when you’re done.[1]
- Pull up the tongue so you can clean inside all of the creases of the shoes.
- You can wash the old laces in a washing machine to clean them.
-
2Clean the sneakers to remove dirt and grime. Use hand soap or laundry detergent and a toothbrush to scrub off any dirt or residue on the sneakers. Let the shoes air dry for 8-12 hours before you paint them.[2]
- Don’t machine-dry the sneakers or you could damage them.
Tip: If the shoes are smelly or have an unpleasant odor, sprinkle 1 teaspoon (4.9 mL) of baking soda inside of them and let them dry.
Advertisement -
3Dip a cotton ball in nail polish remover and scrub any scuff marks. After the shoes are clean, take a cotton ball, dip it in nail polish and clean the toe, back, and midsole areas of the sneakers. Rub the areas and focus on removing scuff marks and stubborn stains.[3]
- The midsole is the layer between the bottom of the shoe and the upper portion of the shoe itself.
- The acetone in the nail polish will also cause the paint to adhere to the sneakers better.
- Use q-tips to clean in between creases and other hard-to-access areas.
-
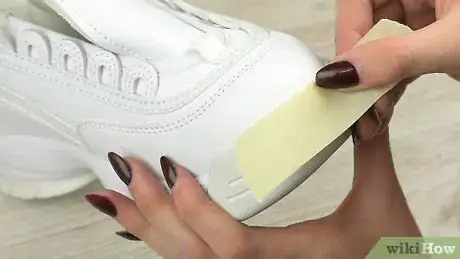
4Cover any areas you don’t want to be painted. Apply painter’s tape to the edge of the soles as well as the inside rim of the top of the sneakers. Insert newspaper inside of the sneakers to keep them protected from the paint.[4]
- Use painter’s tape so there isn’t any residue left behind when you remove it.
- If you’re painting sneakers that have a logo that you want unchanged, like the Nike swoosh or Adidas stripes, cover the logo with painter’s tape.
Drawing a Design and Applying the Paint
-
1Sketch your design out on paper. Draw the entire design so you can decide if there are any changes you want to make. Color in your sketch and try different colors to find what you like best.[5]
- Brainstorm sneaker paint design ideas and research sneaker designs online for inspiration.
- Coordinate colors so the painted sneakers are more aesthetically pleasing.
- If you’re unsure about certain elements or details, draw multiple sketches. For example, if you’re not sure if you should include a diamond pattern or a sawtooth pattern, try drawing a version of each and then make your decision.
-
2Lightly trace the outline on your sneakers with a pencil. Use a standard HB pencil to add the design outline to your sneakers. Add the markings lightly so they don’t show up through the paint and so you can erase and make corrections if you need to. Sketch out the entire design you plan to add to the sneakers.[6]
- Use the sketch you put on paper as a reference.
- Make a stencil of a design to help guide your markings.
-
3Trace over the outline with a paint marker. Paint markers have different tip sizes and come in a variety of colors, so choose one that suits the design you want to create. Then, trace over the lines with a paint marker to make the outline more clear and to add color to your sneakers.[7]
- You can find paint markers at craft supply stores and online.
- Practice tracing over the design on paper to be sure you’re using the best tip size for each outline.
-
4Use acrylic paint and micro-detail paintbrushes to paint sneakers. You’ll need smaller brush tips to apply the paint and add details to your sneakers, so use a clean set of micro-details brushes. Acrylic paint will adhere to the sneaker best.[8]
- You may need different brush sizes for different areas of the sneakers, so have a kit of various sizes handy.
- Organize the paint colors that match your design and keep them nearby so you can apply them more easily when you’re painting.
- Keep a glass of clean water nearby so you can wash the paintbrushes if necessary.
- You can get micro-detail brushes and acrylic paint at department stores, craft stores, and online.
-
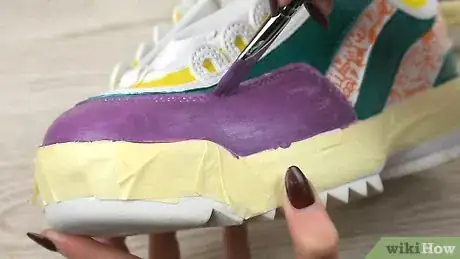
5Add a thin layer of paint to 1 side of the sneaker. Dip the paintbrush in the paint and apply a thin, even layer using smooth and consistent strokes. The first layer will set the base coat down and will not look like a finished product.[9]
- Focus on 1 side at a time so the paint can dry while you’re working on the other side.
- Follow the outline you created and be sure to fill the spaces evenly with the paint.
- Be sure to wash the paintbrush in the glass of water if you plan to use the same brush for different paint colors.
-
6Flip the sneaker and paint the other side. When the first side is done, rotate the sneaker and apply a thin coat of paint on the other side. Fill in the outline with the acrylic paint to match the other side.[10]
- Be careful not to smudge or touch the paint on the other side of the shoe while you paint.
-
7Apply 3-4 more layers to both sides of the sneakers. By the time you finish each side of the sneaker, the coat of paint on the other side should be dry enough for you to add another layer. Continue adding layers until the design is complete and you’re happy with the paint.[11]
- Double check that the paint is dry by touching it lightly with your finger.
- If the paint is taking a long time to dry for you to add another layer, you may be applying layers that are too thick.
-
8Allow the paint to dry for 1 hour and remove the painter’s tape. Acrylic paint dries pretty quickly, especially when it’s applied in thin layers. Keep the sneakers in a cool location so the paint doesn’t run and leave them undisturbed for an hour. Gently pull off the painter’s tape once the sneakers are dry.
- Check that the paint is dry by lightly touching it with your finger.
Tip: Aim a fan at the sneakers to help the paint dry faster.
Things You’ll Need
Cleaning and Preparing the Sneakers
- Sneakers
- Laundry detergent or hand soap
- Nail polish cleaner
- Cotton ball
- Q-tip (optional)
- Painter’s tape
- Newspaper
Drawing a Design and Applying the Paint
- Pencil
- Paint markers
- Micro-detail paintbrushes
- Acrylic paint
References
- ↑ https://youtu.be/xAGF8QntuAw?t=174
- ↑ https://youtu.be/xAGF8QntuAw?t=195
- ↑ https://youtu.be/LcvTS3cZR4Y?t=4
- ↑ https://youtu.be/aJ9cb9uSEcc?t=124
- ↑ https://www.liveabout.com/how-to-customize-your-own-pair-of-sneakers-3019270
- ↑ https://youtu.be/aJ9cb9uSEcc?t=44
- ↑ https://www.liveabout.com/how-to-customize-your-own-pair-of-sneakers-3019270
- ↑ https://youtu.be/aJ9cb9uSEcc?t=106
- ↑ https://youtu.be/xAGF8QntuAw?t=335
About This Article
To paint sneakers, the first step is taking off the laces and cleaning your shoes with dish soap and a toothbrush. Then, cover any areas you don't want to paint with painter's tape. If you want to paint a detailed design, lightly sketch the design on your sneakers with a pencil, then go over it with paint markers. If you're doing solid blocks of color, use small paintbrushes to apply acrylic paint to your sneakers. Add as many coats as you'd like until you get the effect you're going for, letting the paint dry in between coats. Finally, let your sneakers dry for 1 hour before taking off the painter's tape. For more detailed instructions, keep reading the article!

