X
This article was co-authored by wikiHow staff writer, Jack Lloyd. Jack Lloyd is a Technology Writer and Editor for wikiHow. He has over two years of experience writing and editing technology-related articles. He is technology enthusiast and an English teacher.
The wikiHow Tech Team also followed the article's instructions and verified that they work.
This article has been viewed 1,430,554 times.
Learn more...
This wikiHow teaches you how to remove the display on an iPhone 6S or 7 in order to view the internal components of the phone. Keep in mind that opening your iPhone will void its warranty with Apple.
Things You Should Know
- Make sure the iPhone is powered off before opening the display.
- You'll need to ground yourself before picking up your tools to avoid damaging your circuits.
- Opening your iPhone will void its warranty.
Steps
Method 1
Method 1 of 3:
Preparing to Open the iPhone
-
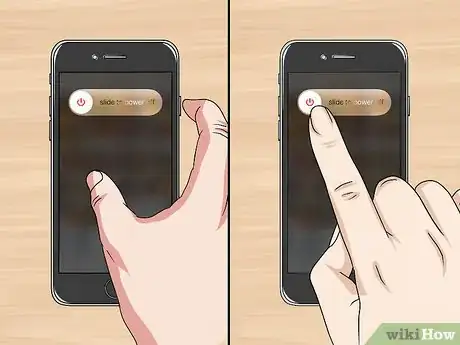
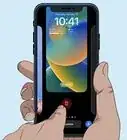
1Turn off the iPhone. Press and hold the iPhone's Power button, then swipe the slide to power off switch at the top of the screen right. This will turn off your iPhone, thereby minimizing the chance of an electric shock.
-
2Remove your iPhone's SIM card. There is a small hole on the right side of your iPhone, a bit below the Power button; insert a thin object, such as a bent paperclip or a pin, into this hole to eject the SIM tray. Once the SIM tray pops out, simply remove the SIM card and push the tray back in.
- Make sure you store the SIM card in a dry, clean place. If you have a small plastic bag or container, it's best to store the SIM card there.
Advertisement -
3Prepare a work surface. You'll want a clean, well-lit, level surface on which to remove your iPhone's display. It will also help to have a soft item, such as a clean microfiber towel, on which you can rest your iPhone screen side-down.
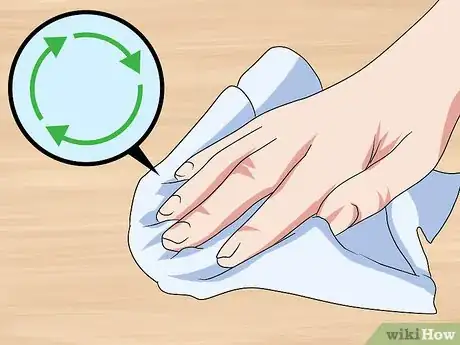
- Consider giving the surface a good wipe-down with a damp rag and letting it dry before you begin working on your iPhone. This will get rid of dust and other tiny bits of foreign matter.
-
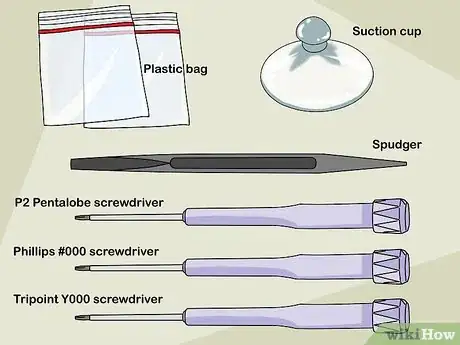
4Gather your tools. You will need the following tools in order to open up an iPhone 7 or iPhone 6S:
- P2 Pentalobe screwdriver - This screwdriver is used for most iPhone repairs and teardowns.
- Phillips #000 screwdriver (iPhone 6 only) - Make sure this one has a + shaped head and not a flathead.
- Tripoint Y000 screwdriver (iPhone 7 only) - This is used for some of the iPhone 7's unique screws.
- Spudger - This thin, plastic lever is used to pry the display and connectors up. You can also use a similar item, such as a guitar pick.
- Heat source - Tech outlets provide different versions of the same general product, which is a gel- or sand-filled bag that you heat up in the microwave and then place on the iPhone to loosen the display adhesive.
- Suction cup - You'll need this in order to pull the iPhone's screen off.
- Plastic bags - These are for any screws or other components you remove. You can also use tupperware containers or bowls if need be.
-
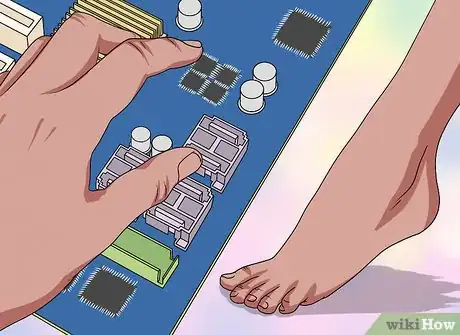
5Ground yourself. Static electricity can be fatal to any one of dozens of exposed circuits in your iPhone's housing, so ground yourself before you even pick up the first screwdriver. Once you're adequately prepared and grounded, you can begin opening up your iPhone 7 or your iPhone 6S.
Advertisement
Method 2
Method 2 of 3:
Opening an iPhone 7
-
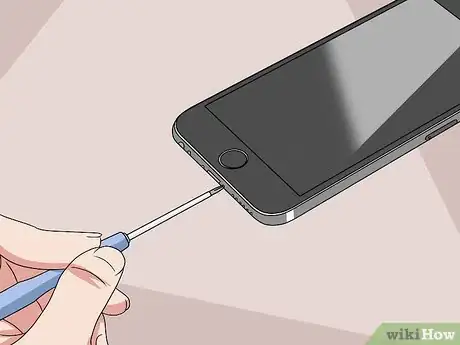
1Remove the two pentalobe screws on the bottom of the iPhone. They're on either side of the charging port. As with any screws you remove during this process, be sure to place them in a bag or bowl when you're done.
-
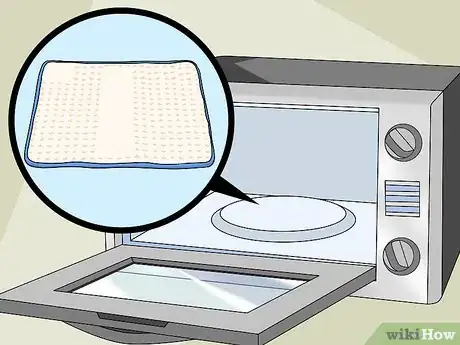
2Prepare your heat source. If you're using a gel bag or a similar item, heat it up in the microwave per the item's instructions.
- Refrain from using a hair dryer when opening your iPhone.
-
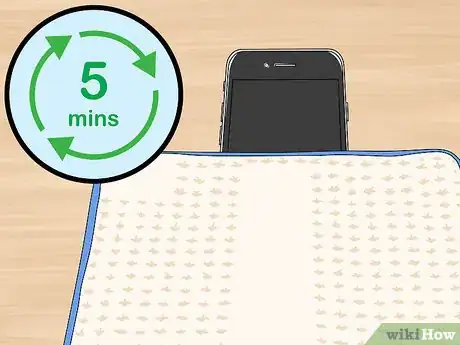
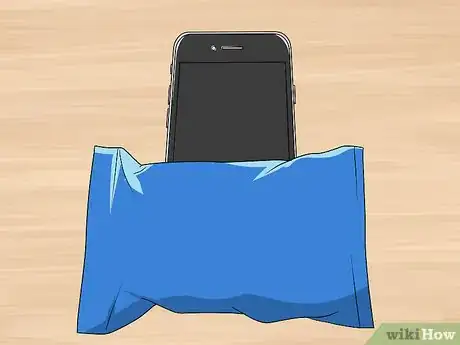
3Place the heat source over the bottom of your iPhone. It should cover the Home button and part of the lower section of screen.
-
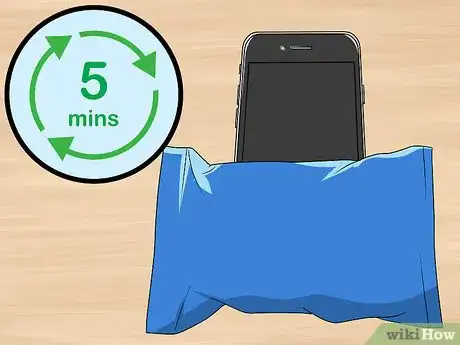
4Wait for at least five minutes. The heat source will soften the adhesive that holds the screen in place, which will make it possible for you to lift up the screen in a bit.[1]
- The adhesive holding the iPhone 7's display in place is extremely strong, so you may need to heat up your item more than once.
-
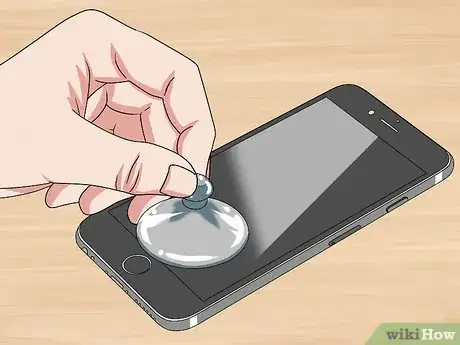
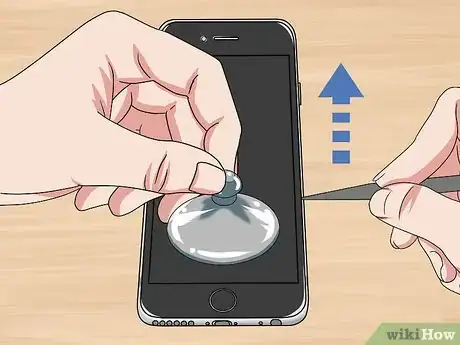
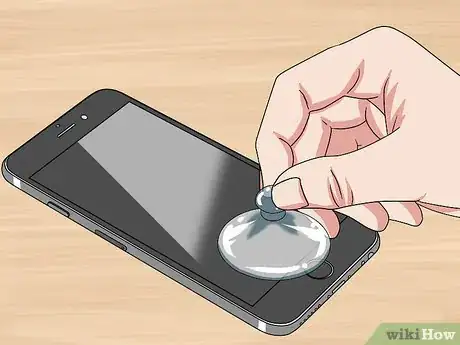
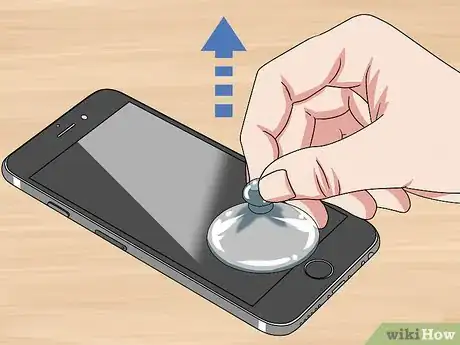
5Attach the suction cup to the bottom of the screen. Make sure the suction cup is firmly fastened before continuing.
- The suction cup must not cover the Home button.
-
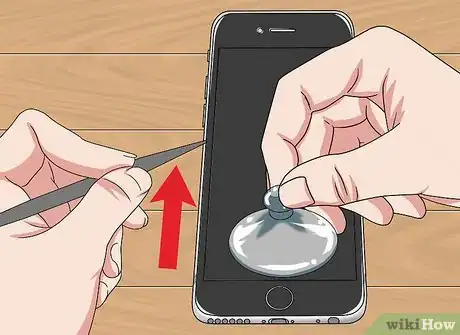
6Pull the screen up. Lift the screen up just high enough to create a space between the screen and the iPhone's casing.
-
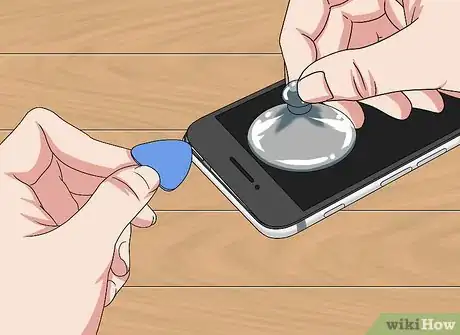
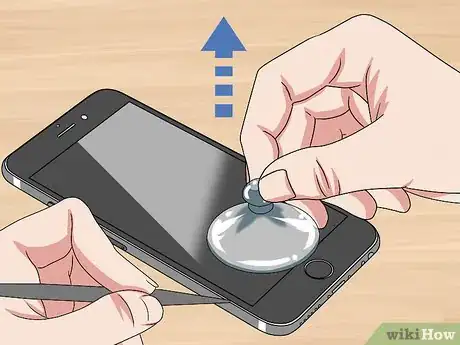
7Insert a spudger into the space between the screen and the casing. If you're using a different prying device, use that instead.
-
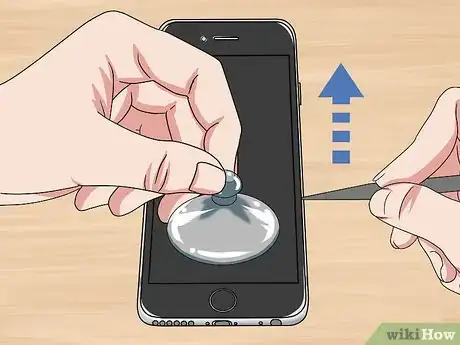
8Slide the spudger up the left side of the iPhone. For best results, twist the spudger from left to right as you slide it up to separate the screen from the phone's casing.
-
9Slide the spudger up the right side of the iPhone. Be very careful when you do this, since there are several connector ribbons on this side of the phone.
-
10Use a credit card or similar item to separate the top of the screen. There are plastic clips holding the top of the screen in place, so make sure you only insert the item far enough in to loosen the clips.
- Do not pry up the top of the screen.
-
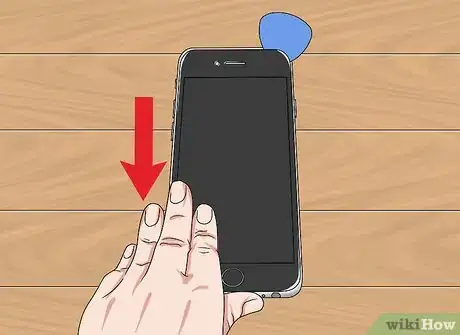
11Pull the screen slightly downward. Moving the screen down half an inch or less will disconnect the clips at the top of the screen.
-
12Open the iPhone's screen to the right. You'll swing the screen open like a book. This is to prevent damage to the connector cables on the right side of the phone.
-
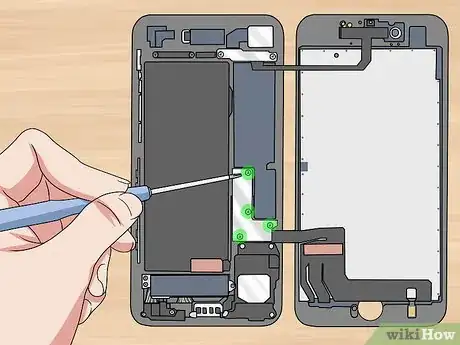
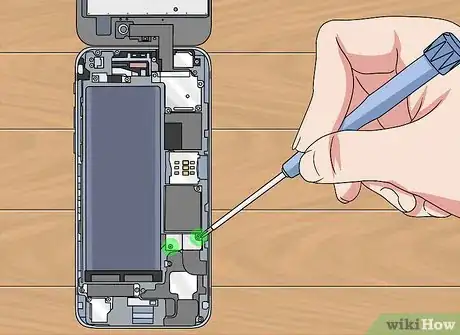
13Remove the L-shaped connector bracket. It's on the lower-right side of the iPhone's inside assembly. You'll need to remove four tri-point screws here.
-
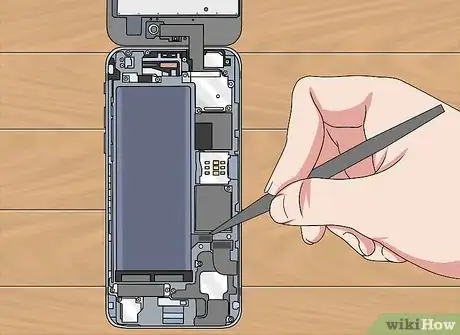
14Pry up the battery and screen connectors. There are three rectangular boxes attached to ribbons in the area that the connector bracket was covering; you'll need to pry these up using the spudger to continue.
-
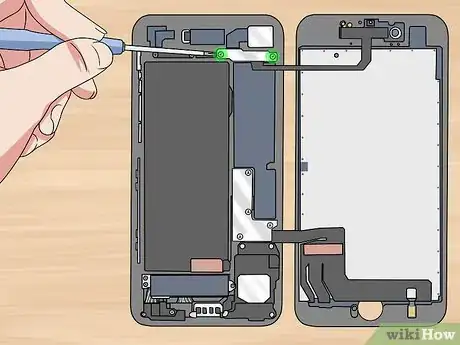
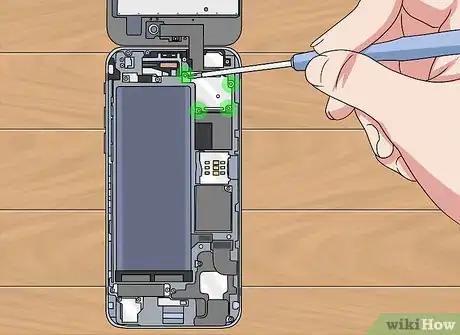
15Remove the thin, wide bracket in the top-right corner of the phone. This bracket covers the last connector that holds the screen in place. You'll need to unscrew two tripoint screws.
-
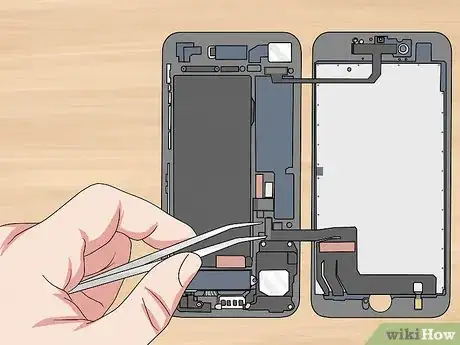
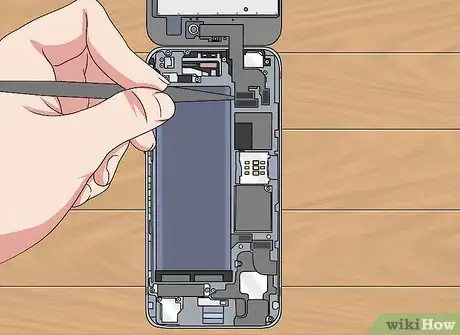
16Pry up the last battery connector. It's below the bracket you just removed.
-
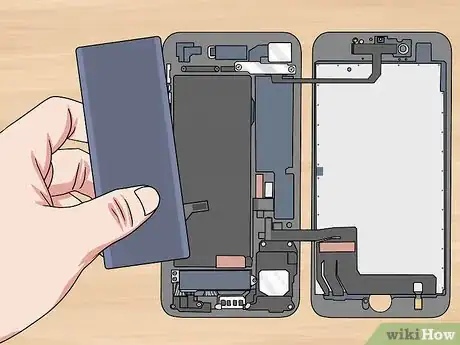
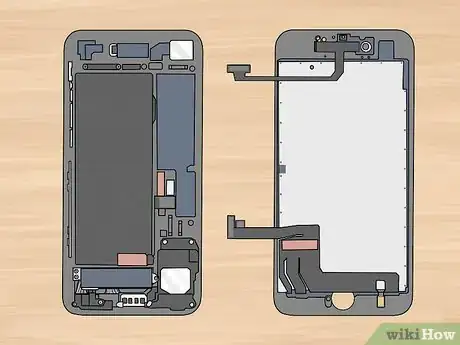
17Remove your screen. The screen should be disconnected, allowing you to remove it and proceed with your tinkering. Your iPhone 7 is now open and ready for exploration!
Advertisement
Method 3
Method 3 of 3:
Opening an iPhone 6S
-
1Remove the two pentalobe screws on the bottom of the iPhone. They're on either side of the charging port. As with any screws you remove during this process, be sure to place them in a bag or bowl when you're done.
-
2Prepare your heat source. If you're using a gel bag or a similar item, heat it up in the microwave per the item's instructions.
- Refrain from using a hair dryer when opening your iPhone.
-
3Place the heat source over the bottom of your iPhone. It should cover the Home button and part of the lower section of screen.
-
4Wait for at least five minutes. The heat source will soften the adhesive that holds the screen in place, which will make it possible for you to lift up the screen.
-
5Attach the suction cup to the bottom of the screen. Make sure the suction cup is firmly fastened before continuing.
- The suction cup must not cover the Home button.
-
6Pull the screen up. Lift the screen up just high enough to create a space between the screen and the iPhone's casing.
-
7Insert a spudger into the space between the screen and the casing. If you're using a different prying device, use that instead.
-
8Slide the spudger up the left side of the iPhone. For best results, twist the spudger from left to right as you slide it up to separate the screen from the phone's casing.
-
9Slide the spudger up the right side of the iPhone. You'll hear several clips detach as you do so.
-
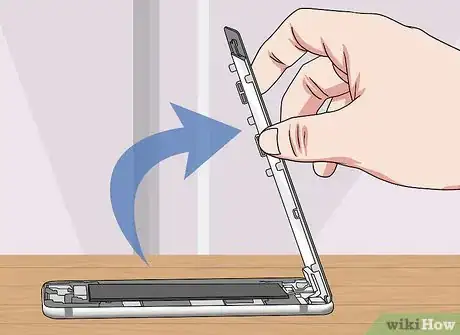
10Swing the screen up. The top of the screen will act as a hinge. Make sure you don't push the top of the screen past 90 degrees.
- If you have a book or a similarly sturdy item, rubber band or tape the screen to it at a 90-degree angle before continuing.
-
11Remove the battery connector bracket. Remove the two Phillips screws on the grey bracket that's near the lower-right corner of the battery, then pull the bracket up.
-
12Disconnect the battery connector. This rectangular box is next to the battery in the section that was covered by the bracket. Use your spudger or prying item to pry up the battery connector.
- Make sure the battery connector is as close to a 90-degree angle to the battery as possible to avoid accidental battery connection.
-
13Remove the display cable bracket. This silver bracket is in the top-right corner of the iPhone's casing. You'll need to remove five Phillips screws to do so.[2]
-
14Disconnect the camera and display connectors. There are three ribbons beneath the silver bracket—one for the camera and two for the display—that are connected to the iPhone's housing by connectors similar to the one you disconnected for the battery. Disconnect these with your spudger.
-
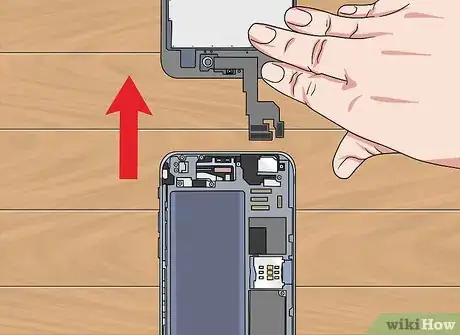
15Remove the screen. Now that the screen is disconnected, simply remove it and place it somewhere safe. Your iPhone 6S is now ready for exploration!
Advertisement
Community Q&A
-
QuestionCan I still open up the iPhone and remove the screen if the screen is cracked?
 Community AnswerYes.
 -
QuestionHow far should I push the paperclip into my phone to remove the SIM card?
 Community AnswerKeeping pushing until the card pops out. You might have to bend the clip into an elbow (90 degrees) for some leverage. As long as you push vertically/straight-in, you shouldn't break anything.
 -
QuestionHow do I unfreeze the initial screen?
 Community AnswerHold the lock and home button down together for 20 seconds.
Advertisement
Warnings
- Opening the iPhone should be exercised with extreme caution, as the phone contains numerous expensive and sensitive electronics, all of which can be easily and unknowingly damaged.⧼thumbs_response⧽
- Opening your iPhone will void the phone's warranty.⧼thumbs_response⧽
- Proceed with caution when applying force to pry open parts of the phone. Too much pressure can scratch, damage or crack pieces of the phone, and even break smaller pieces needed for the phone to operate.⧼thumbs_response⧽
Advertisement
References
About This Article
Advertisement
