This article was co-authored by wikiHow staff writer, Hannah Madden. Hannah Madden is a writer, editor, and artist currently living in Portland, Oregon. In 2018, she graduated from Portland State University with a B.S. in Environmental Studies. Hannah enjoys writing articles about conservation, sustainability, and eco-friendly products. When she isn’t writing, you can find Hannah working on hand embroidery projects and listening to music.
There are 10 references cited in this article, which can be found at the bottom of the page.
The wikiHow Video Team also followed the article's instructions and verified that they work.
This article has been viewed 208,000 times.
Learn more...
The origami star box is a traditional Japanese origami design that can be used to hold small gifts, coins, paper clips, earrings, and more! If you already know a little bit about origami, it won’t take you long at all to make this little treasure box. Try making a few different origami boxes to decorate your desk with, or give them to your friends as a special gift.
Difficulty: Easy.
Steps
Starting the Box
-
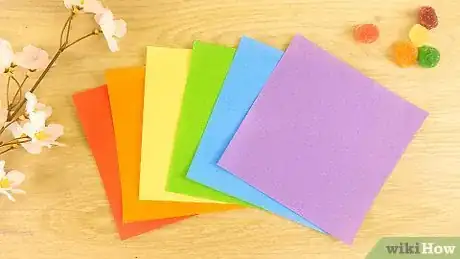
1Pick out a square piece of origami paper. Pick a piece of origami paper that’s already cut into a small square so that it’s easier to fold. Try to use paper that’s made specifically for origami so that it’s lightweight and easy to work with. If you’d like to, choose a piece of paper with color on one side and no color on the other so you can follow the directions easily.[1]
- Classic origami is thin and lightweight, and you can find it at most craft supply stores. Using regular printer paper will be tough, since it’s harder to fold and doesn’t keep its shape as well.
-
2Flip the paper over so the colored side faces up. If you’re using a 2-sided origami paper, flip it over so that the non-colored side is down and the colored side faces you. Angle the paper so it’s in a diamond shape to start with in front of you.[2]
- It may help to work near a flat surface, like a table or countertop, so you can rest the paper on something while you work.
Advertisement -
3Fold the paper in half diagonally. Grab the top point of the diamond and fold it down to meet the bottom point of the diamond. Press down on the fold to crease the paper, but leave the paper on the table to make your next fold.[3]
- This will make a cute, tiny triangle out of your paper.
-
4Fold the left corner over to the right corner. Grab the left corner of the triangle and bring it over to the right corner, folding the small triangle you made in half. Press down on the fold to crease it into place, and leave your paper on the table.[4]
- This fold will make an even cuter and tinier triangle.
-
5Lift the corner of the paper up to separate the layers. Keeping the paper folded into a triangle, lift up the first layer to open up the corners. This will create a small opening in the flap that you can hold open with your fingers.[5]
- Make sure you’re only working with the top 2 layers of paper, and you’re leaving the bottom 2 layers of paper alone.
-
6Press the corner down to flatten it into a square. Still working with only the one flap that you opened up, press it down in the center to flatten it out. Crease the edges with your fingers to make a small square out of half the paper, with the pointed triangle flip still underneath it.[6]
- This will make an abstract shape with a square on top and a triangle on the bottom.
-
7Turn the paper over and lift the left flap up. Grab your origami paper and flip it over so that the shape is resting on top of the small square part. Keep the triangle portion of the paper on top so you can work with it next.[7]
-
8Open the flap and push it downwards to flatten it. Taking the triangle flap that you still have, open it up and push it downward just like you did with the other one. This will create a small square out of your paper that you can work with.[8]
- Be sure you’re creasing the paper really well with your fingers on each fold you make. This will ensure that your box stays intact when you open it up.
- The square that you end up with is also called a “square base.”
Making Squash Folds
-
1Fold the left and right corners in toward the center. Making sure the opening of the square is pointed downward, fold the left and right flaps in. Meet the corners in the center of the square to create 2 small triangles on either side.[9]
- Make sure your paper looks symmetrical at this point so you know you’re folding each side evenly.
-
2Open the left flap and press down to squash fold it. Pull the left flap up and then press down on the bottom part, squashing it into a fold. Crease the edges with your fingers to hold them down.[10]
- The left flap should have a small triangle at the bottom and then be open at the top.
-
3Do the same thing to the right flap. Lift up the right flap and press down on the bottom part to make a squash fold. Again, use your fingers to crease the edges and hold them in their shape.[11]
- Both flaps should be folded the same way, so your paper should be symmetrical at this point. If it isn’t, go back 1 step and try again.
-
4Turn the paper over and repeat on the other side. Flip your square of paper over and fold the left and right corners in toward the center. Pull the left flap up and squash fold it, then pull the right flap up and squash fold it. Make sure you crease the paper every time you fold to hold your box in place.[12]
- Your origami paper won’t be square anymore, but it won’t quite be triangular, either.
Finishing and Opening the Box
-
1Fold the left flap over to the right. Making sure the opening of your paper still faces downard, grab the left flap and fold it over to the right. This should expose a solid piece of paper without any folds or creases in it that hides the folds you just made.[13]
- Your paper still won’t look like a square, but it will be closer to its original shape than what it just was.
-
2Fold both sides in toward the center. Keeping the paper in the same position, grab the right and left corners and fold them in until they meet in the center. The bottom part of the paper will make a pointed triangle.[14]
- At this point, you’re starting to make the base of the box.
-
3Flip the paper over and repeat on the other side. Turn your paper over so you see the other side of the exposed paper without any folds. Now, bring the right and left corners in toward the center to make a pointed triangle base. Your entire paper will look like an ice cream cone with a geometric scoop of ice cream on the top.[15]
- The top portion of the paper will eventually turn into the flat base of the box.
-
4Crease the top layer upwards to make a small triangle. Keeping your paper neatly situated, grab the bottom part of the top layer (the point of the ice cream cone). Lift this flap up until it hits the point that it can’t fold anymore, then press down on the fold to crease it into place.[16]
- You’re almost there! You only have a few more steps until you can unfold your box.
-
5Repeat the last step for the 3 other sides of the paper. Flip the flap over to the left to reveal another side of the origami paper. Fold the point upward to make a triangle on top just like you did in the last step. Flip the flap over and make a triangle on top 2 more times until your paper looks like it has a 4-point star in the center.[17]
- At this point, you might be able to see the box shape come into formation.
-
6Open your box from the top and flatten out the sides. Flip your paper over until the opening faces upwards. Using your fingers, carefully pull the sides apart until they’re flat, with the bottom part of the box flat on the table. Smooth out any creases to watch your box unfold before your very eyes![18]
- To make sure the bottom of the box is completely flat, press it down on the table and run your fingers over the bottom to smooth it out.
Decorating the Star Box
-
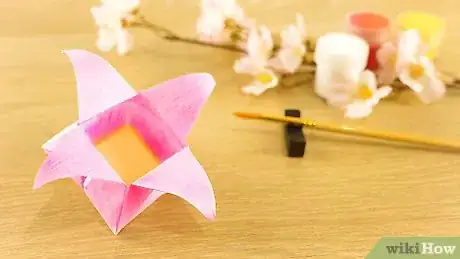
1Use acrylic paint to paint the box a different color. If you aren’t quite happy with how your star box looks, pick out an acrylic paint color and use a paint brush to give it an extra decoration. Try painting the sides one color and the bottom part another for a cool, contrasting effect.[19]
- You can find acrylic paint at most craft stores.
- Try pairing red and pink, green and yellow, or blue and purple.
-
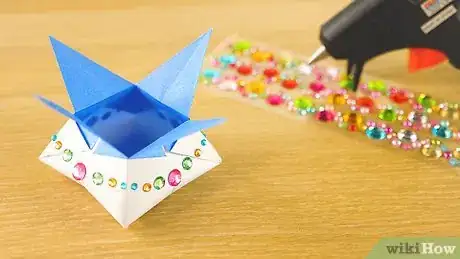
2Glue rhinestones to the outer triangles of the box. Grab a hot glue gun and wait for it to warm up. Add 5 to 6 small dots of hot glue on the outer edges of the box, then use small fake rhinestones to decorate the edges. You can do this to all 4 of the outer triangles, or keep it fancy by just decorating one.[20]
- Use silver rhinestones for a diamond look, or go with brightly colored ones for an eye-catching design.
-
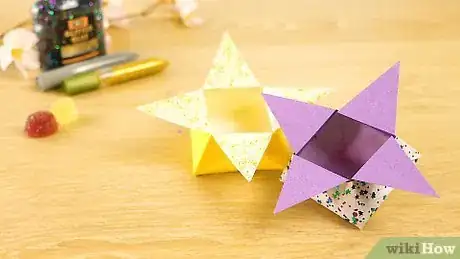
3Make your star box shine with some glitter glue. Hold the point of a glitter glue pen up to your box and gently squeeze it to make the glue come out. Use the glitter glue to add stars, polka dots, or even your name to the outside of your star box. Don’t forget to let the glue dry before you start putting things into your box![21]
- Try picking out your favorite color of glitter glue to personalize the box even more.
- If you don’t have glitter glue, use liquid school glue to make a design on the box, then sprinkle loose glitter on top of it. Be careful with this method, as it can get a little messy.
-
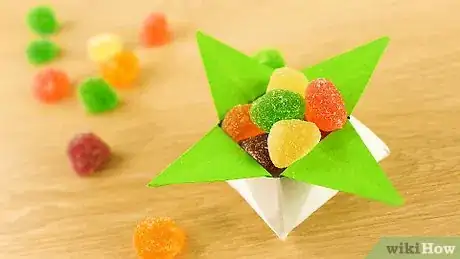
4Store candy, paper clips, earrings, or beads in your star box. Now that your box is done, you can keep it on your desk or dresser to store small items that might get lost. You can keep your jewelry organized, declutter your workspace, or hold craft supplies with your beautiful origami box.[22]
- Try making a few star boxes in different colors to decorate your room and organize your area.
Community Q&A
-
QuestionHow do I close the box?
 Community AnswerPress down the center of your box and bring two edges of the box together on one side, and the remaining two on another side.
 -
QuestionCan I fold the flaps to close this box?
 Community AnswerNo, you cannot, as this will only destroy the model. Instead you can press the model gently with the tip of your finger through the center, then bring two edges of the box together on each side. This returns you to step 14.
 -
QuestionCan you make step 9 more clear for the origami star box?
 Community AnswerThere are 2 flaps on each side. Separate these flaps and press them together on the other side, leaving only color visible. It should be a hexagon.
Things You’ll Need
- Origami paper
- Acrylic paint (optional)
- Rhinestones (optional)
- Hot glue gun (optional)
- Glitter glue (optional)
References
- ↑ https://www.origamiway.com/origami-star-box.shtml
- ↑ https://www.origamiway.com/origami-star-box.shtml
- ↑ https://www.youtube.com/watch?v=Asng00NyrrU&feature=youtu.be&t=61
- ↑ http://www.origami-instructions.com/origami-star-box.html
- ↑ http://www.origami-instructions.com/origami-star-box.html
- ↑ https://www.origamiway.com/origami-star-box.shtml
- ↑ https://www.origamiway.com/origami-star-box.shtml
- ↑ https://www.origamiway.com/origami-star-box.shtml
- ↑ https://www.youtube.com/watch?v=QOBgDGevpos&feature=youtu.be&t=128
- ↑ http://www.origami-instructions.com/origami-star-box.html
- ↑ http://www.origami-instructions.com/origami-star-box.html
- ↑ https://www.origamiway.com/origami-star-box-2.shtml
- ↑ http://www.origami-instructions.com/origami-star-box.html
- ↑ http://www.origami-instructions.com/origami-star-box.html
- ↑ https://www.origamiway.com/origami-star-box-3.shtml
- ↑ https://www.youtube.com/watch?v=QOBgDGevpos&feature=youtu.be&t=302
- ↑ http://www.origami-instructions.com/origami-star-box.html
- ↑ https://www.youtube.com/watch?v=QOBgDGevpos&feature=youtu.be&t=349
- ↑ https://www.origamiway.com/origami-star-box-4.shtml
- ↑ https://www.youtube.com/watch?v=Asng00NyrrU&feature=youtu.be&t=215
- ↑ http://www.origami-instructions.com/origami-star-box.html
- ↑ http://www.origami-instructions.com/origami-star-box.html


-Step-19-Version-4.webp)
