This article was co-authored by wikiHow Staff. Our trained team of editors and researchers validate articles for accuracy and comprehensiveness. wikiHow's Content Management Team carefully monitors the work from our editorial staff to ensure that each article is backed by trusted research and meets our high quality standards.
The wikiHow Video Team also followed the article's instructions and verified that they work.
This article has been viewed 99,022 times.
Learn more...
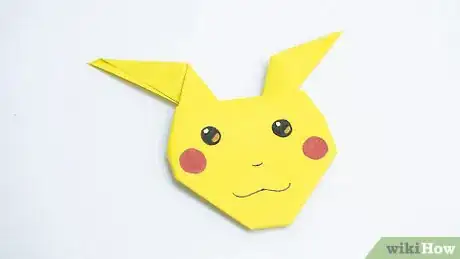
Pikachu is easily the most recognizable character from Pokemon. Use origami paper to create your own Pikachu that you can carry with you everywhere. Make sure to use yellow origami paper to give your Pikachu its signature color, then use black and red markers to draw on the face and other details.
Steps
Folding an Easy Origami Pikachu
-
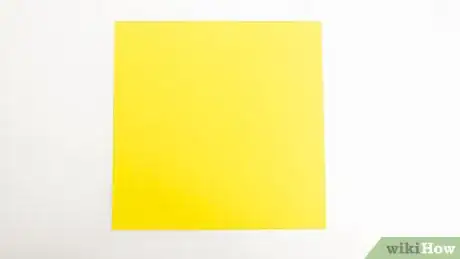
1Place a square piece of origami paper flat and rotate it like a diamond. Use yellow origami paper to create an authentic-looking Pikachu. Place the paper on a flat surface in front of you with the colored side down.[1]
- You can make a square out of normal white printer paper if you don’t have origami paper. Color it yellow before you start folding it to make it Pikachu’s color.
-
2Fold the origami paper in half left to right, then unfold it. Fold the left corner over the right corner and crease the middle. Unfold it into a diamond again so you can see the crease in the middle.[2]
- The crease will help guide your next folds to make your Pikachu.
Advertisement -
3Fold the bottom half of the paper up to the top. Take the bottom corner and fold it up over the top corner. You will now have a yellow triangle with the top point facing away from you.[3]
- Make sure you can still see the crease in the middle to guide your next fold.
-
4Fold the top of the triangle down to the bottom edge. Take both layers of the top point of the triangle and fold it down so the tip touches the bottom edge. Make sure the tip is lined up with the crease in the middle of the triangle.[4]
- The origami should now look like a triangle with the top third of it cut off.
-
5Fold the sides up diagonally towards the center. Fold the left side up so that it creates half of a diamond. Do the same for the right side so you have a diamond with a space down the center.[5]
- Use the part of the triangle that you folded down as a guide for folding the sides up diagonally.
-
6Fold the left and right corners in to the center. Fold the corners in at each side like a paper airplane. This will create Pikachu’s ears that you will fold out next.[6]
- You should have a diamond shape in front of you that is long and narrow at the top, and short and wide at the bottom.
-
7Fold the ears out to the left and right at whatever angle you want. Fold the left and right ears out at different angles to give your Pikachu some personality. Fold them at the same angle if you want your Pikachu to look symmetrical.[7]
- Look at how Pikachu’s ears are in different Pokemon scenes or artwork for inspiration.
-
8Fold in the pointy cheeks and chin of your Pikachu’s face. Fold the bottom point up to flatten the chin. Fold the left and right points in to flatten the cheeks.[8]
- Try to keep the folds symmetrical so that you create an evenly rounded face for Pikachu.
-
9Flip the origami over and draw on Pikachu’s face. Use a black marker to draw the eyes, ears, nose, and the outline of the mouth. Use a red marker to draw the cheeks and color in the mouth.[9]
- You can draw many styles of Pikachu's face on your origami Pikachu. Make Pikachu happy, mad, or even sad! Try making a bunch of these easy origami Pikachus for every mood.
Making an Origami Pikachu Cube
-
1Start with a piece of origami paper flat with the colored side facing you. Place a piece of yellow origami paper on a flat surface in front of you. Align it like a normal square.[10]
- Use a square of normal paper colored yellow if you don’t have origami paper.
-
2Fold the paper in half along both diagonals and horizontally. Fold the top half down over the bottom half and unfold it. Do the same for both diagonal directions.[11]
- You should now have a square in front of you with a horizontal crease and 2 diagonal creases.
-
3Fold the paper inwards along the diagonal creases on the bottom half. Flatten the paper along the creases so you have a triangle with a vertical piece of paper sticking up into the air. Flatten the vertical piece next so that you have 2 triangles.[12]
- It should now look like 2 triangles, 1 on top of the other, with the top point facing away from you and the flat edge closest to you.
-
4Fold the 2 sides of each triangle up so they meet in the middle. Fold the left and right corners of the top triangle upwards towards the point of the triangle. Flip the paper over and repeat this for the bottom triangle.[13]
- You should now have a diamond shape in front of you that has a vertical space running down the middle.
-
5Fold the side flaps in to the middle on each side. Fold the left and right points in so that they meet in the middle where the vertical space is. Flip the paper over and repeat this.[14]
- You will now have a diamond shape with flat sides.
- Fold the top flaps down. Fold the left and right top flaps down in half and slide the tips into the little pockets. Flip over the paper and repeat this for the other side.
-
6Tuck the folded top flaps into the little pockets on each side. Start with the side facing you and tuck the top flaps you folded down into the little pockets that are there. Do the same for the other side.
- This will keep all the top flaps in place once you inflate Pikachu.
-
7Fold the remaining set of top flaps down and to the side to make the ears. Fold the left and right top flaps down and out to the left and right. You will now have what looks like a flattened Pikachu.[15]
- The top half should look like a triangle, with the ears as the left and right sides of the triangle. The bottom half should look like a square with a pointy bottom.
-
8Blow in the tiny hole at the bottom of the origami to inflate it. Pick up the folded origami and look for the tiny hole at the bottom. Blow into it several times until it inflates.[16]
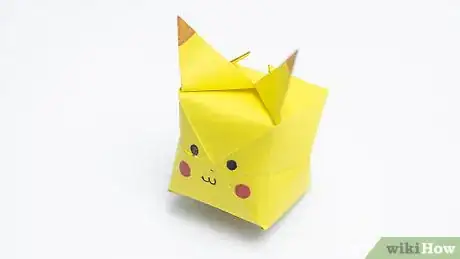
- You should now have a cube with 2 ears.
-
9Draw Pikachu’s face on with markers. Use a black marker to color the tips of the ears and draw on the eyes, nose, and mouth. Use a red marker to make the cheeks and a tongue if you want.[17]
- Perk up the ears to give your Pikachu some character.
Community Q&A
Did you know you can get answers researched by wikiHow Staff?
Unlock staff-researched answers by supporting wikiHow
-
QuestionIs there a Pokemon origami book?
 wikiHow Staff EditorThis answer was written by one of our trained team of researchers who validated it for accuracy and comprehensiveness.
Staff Answer wikiHow Staff EditorStaff Answer
 -
QuestionHow do you make an origami Pokemon ball?
 wikiHow Staff EditorThis answer was written by one of our trained team of researchers who validated it for accuracy and comprehensiveness.
Staff Answer wikiHow Staff EditorStaff AnswerMaking a round origami pokeball is a complex process. You can make a relatively simple cube-shaped one using a similar process to making the 3D Pikachu. You’ll need to use red, white, and black paper, unless you plan to color the paper in after you fold the pokeball. For detailed instructions, check out some of the video tutorials available on YouTube.
 -
QuestionHow do you make an origami Pikachu bookmark?
 wikiHow Staff EditorThis answer was written by one of our trained team of researchers who validated it for accuracy and comprehensiveness.
Staff Answer wikiHow Staff EditorStaff AnswerOne fun option is to make a bookmark that fits over the corner of a page. Fold a square piece of yellow paper in half into a triangle shape, then fold up the corners to make a diamond. Unfold it again and bring down the middle flap (just the top layer) so the point touches the bottom edge of the triangle. Fold up the corners again, but this time fold the top points down and tuck them into the little “pocket” you just made. You now have the basic shape for your bookmark! Cut out some ears to glue on, and draw on Pickachu’s facial features.
Things You’ll Need
- Yellow origami paper
- Red and black markers (optional)
References
- ↑ https://www.origamiway.com/easy-origami-pikachu.shtml
- ↑ https://www.origamiway.com/easy-origami-pikachu.shtml
- ↑ https://www.origamiway.com/easy-origami-pikachu.shtml
- ↑ https://www.origamiway.com/easy-origami-pikachu.shtml
- ↑ https://www.origamiway.com/easy-origami-pikachu.shtml
- ↑ https://www.origamiway.com/easy-origami-pikachu.shtml
- ↑ https://www.origamiway.com/easy-origami-pikachu.shtml
- ↑ https://www.origamiway.com/easy-origami-pikachu.shtml
- ↑ https://www.origamiway.com/easy-origami-pikachu.shtml
- ↑ https://walyou.com/how-to-make-a-pikachu-origami/
- ↑ https://walyou.com/how-to-make-a-pikachu-origami/
- ↑ https://walyou.com/how-to-make-a-pikachu-origami/
- ↑ https://walyou.com/how-to-make-a-pikachu-origami/
- ↑ https://walyou.com/how-to-make-a-pikachu-origami/
- ↑ https://walyou.com/how-to-make-a-pikachu-origami/
- ↑ https://walyou.com/how-to-make-a-pikachu-origami/
- ↑ https://walyou.com/how-to-make-a-pikachu-origami/
About This Article
To make an origami Pikachu, start with a square piece of yellow paper that’s rotated so it looks like a diamond. Fold the right corner of the paper over to the left corner, and unfold. Then, fold the bottom corner to the top corner so you have a triangle. Fold the top of the triangle down to the bottom edge. Next, fold the left point up so it looks like a half diamond. Do the same thing with the right point to make the other half of the diamond. Now, fold the left corner of the diamond in toward the center, and repeat with the right corner. Fold the flaps at the top of the model out to the left and right at an angle to make the ears. Then, slightly fold the 3 remaining points in to round out Pikachu’s face. Finally, flip the model over and use marker to draw Pikachu’s eyes, cheeks, nose, and mouth. For tips on how to draw on Pikachu’s face, keep reading!


-Step-19-Version-4.webp)
