X
wikiHow is a “wiki,” similar to Wikipedia, which means that many of our articles are co-written by multiple authors. To create this article, volunteer authors worked to edit and improve it over time.
This article has been viewed 10,930 times.
Learn more...
Koalas are easily one of the cutest animals known. Use origami to create an origami koala bookmark. These bookmarks can also be used as decoration. Creating this origami piece can also further your origami skills. You may use any origami paper colors, however, make sure both papers used are the same color.
Steps
Part 1
Part 1 of 3:
Making the Head of Koala
-
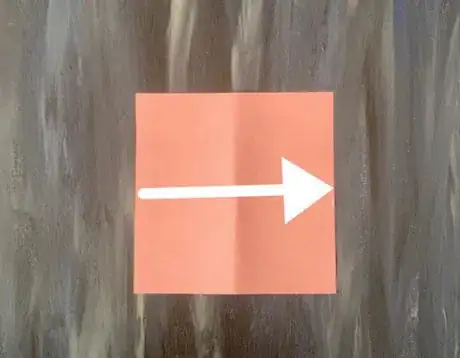
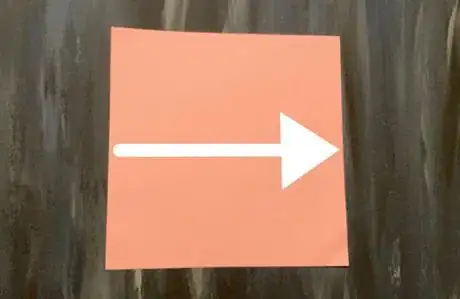
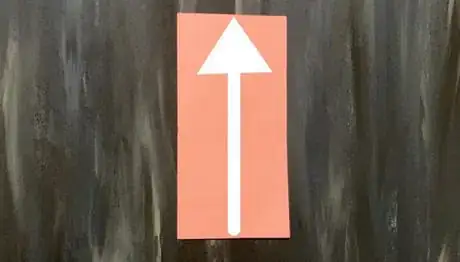
1Fold paper in half into a rectangle.
- Use smaller piece of paper!
- Crease/Press down on the edges with fingers.
-
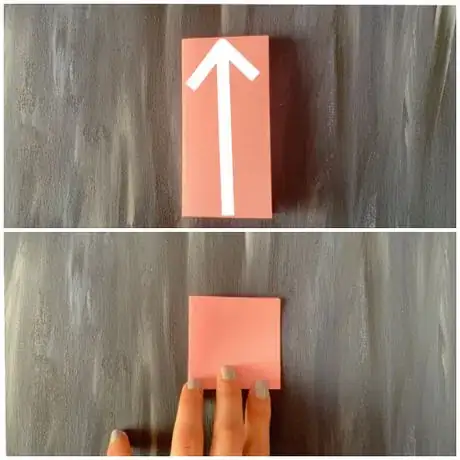
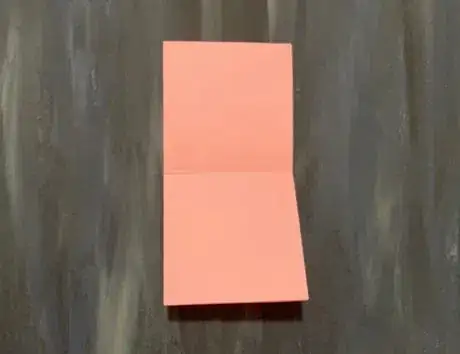
2Fold paper again, up into a square.Advertisement
-
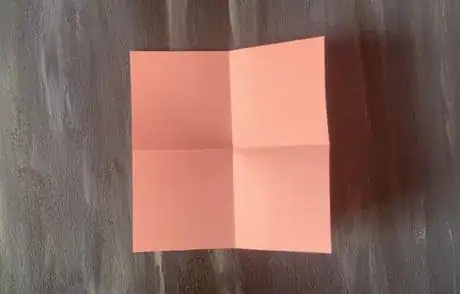
3Unfold the paper all the way.
- There should be four squares formed.
-
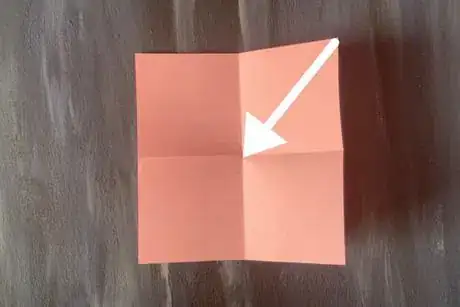
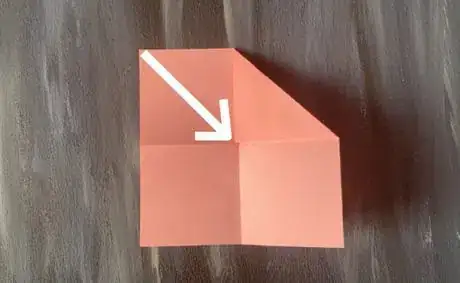
4Fold one of the corner piece into the middle of the paper.
-
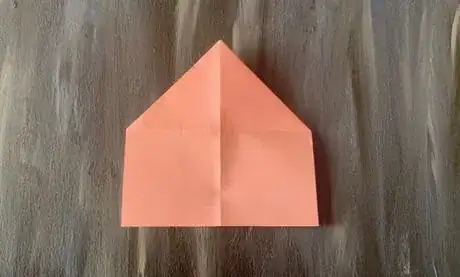
5Fold adjacent corner into the middle of the paper.
-
6Flip paper to backside.
-
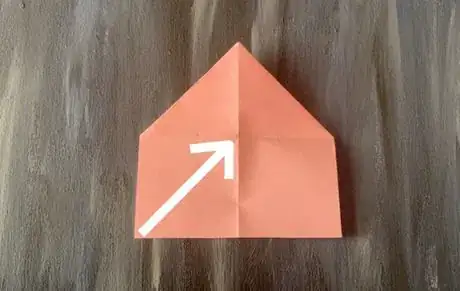
7Fold third corner into the middle of the paper.
- This fold is done on the opposite side of other folds.
-
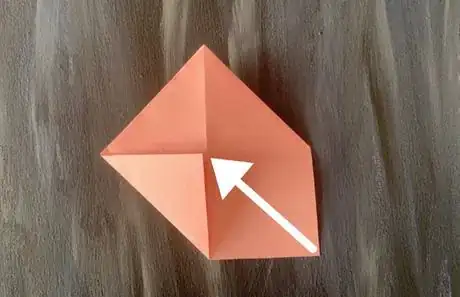
8Fold fourth corner into the middle.
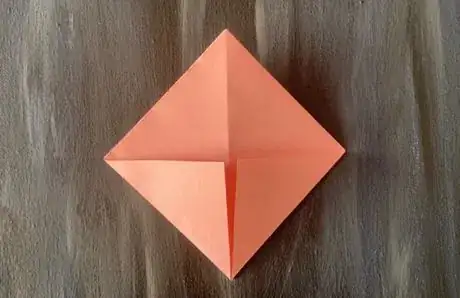
- Now you should have a diamond/square shaped piece again.
- There should be two flaps folded to the middle of the paper on each side of origami piece.
-
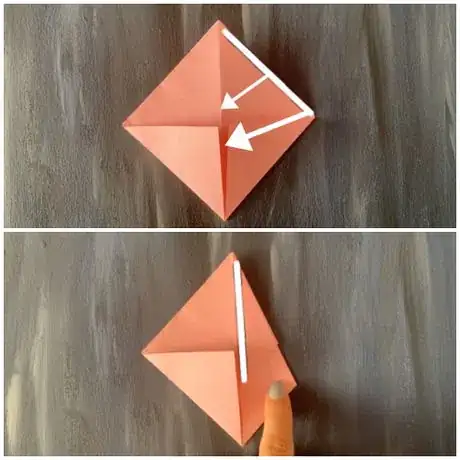
9Pick one side of the origami paper.
- Face the origami piece so that flap open towards you, as shown in picture.
-
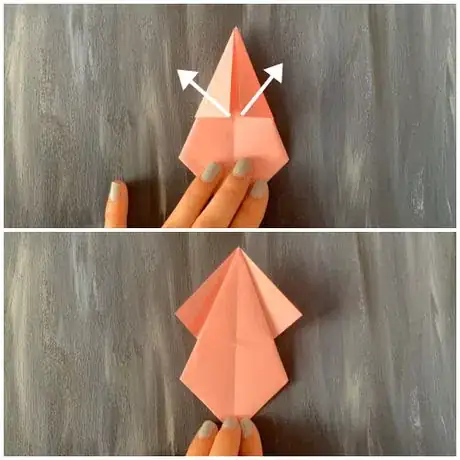
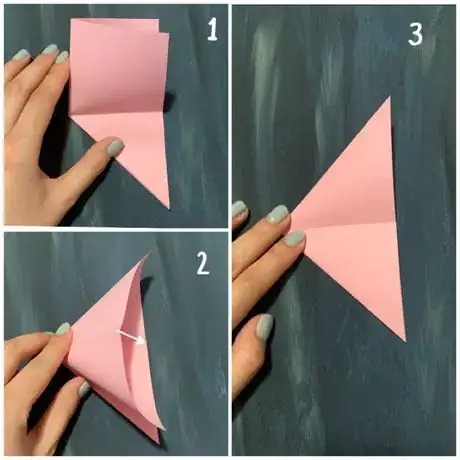
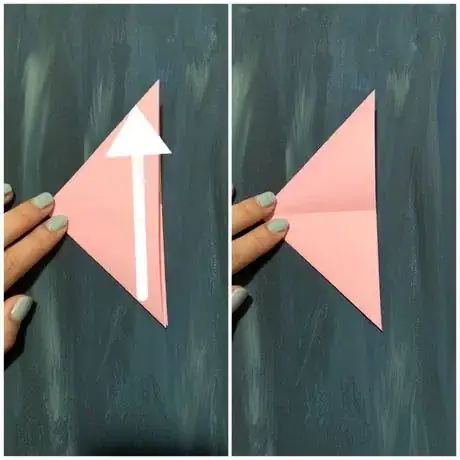
10Fold outer edge of diamond that is highlighted into the middle crease.
- Make sure the sides are exactly aligned with the middle.
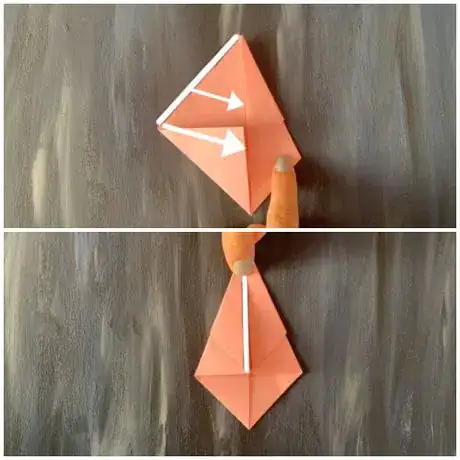
- If lost here, looking at second image of next step may help.
-
11Fold outer edge highlighted of left side into the middle crease.
-
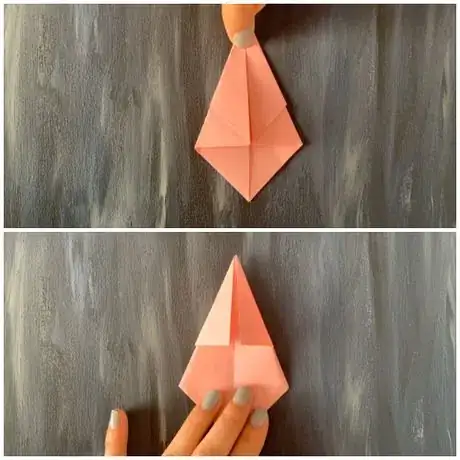
12Flip origami piece to opposite side.
-
13Unfold flaps out as shown in image.
-
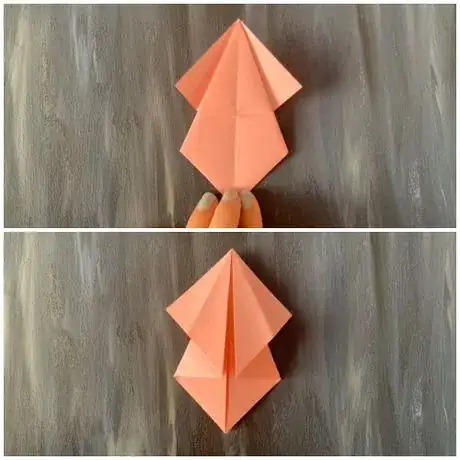
14Flip back to previous side.
-
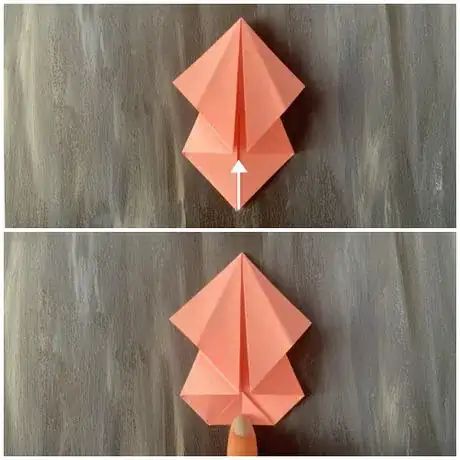
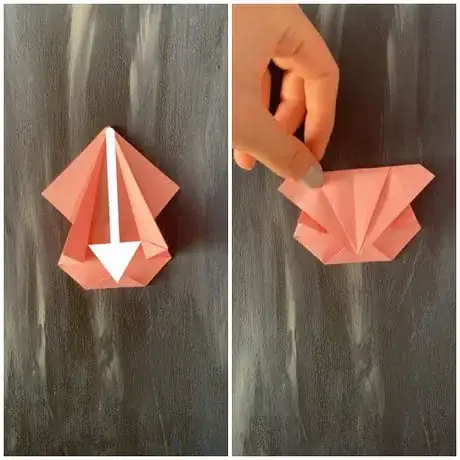
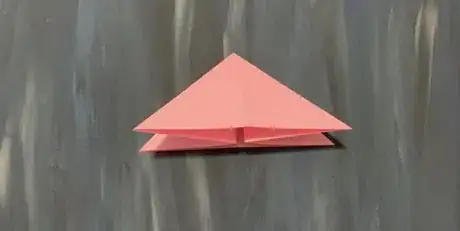
15Fold the bottom corner just below the side flaps.
- The tip of bottom flap should be near the tips of side flaps.
-
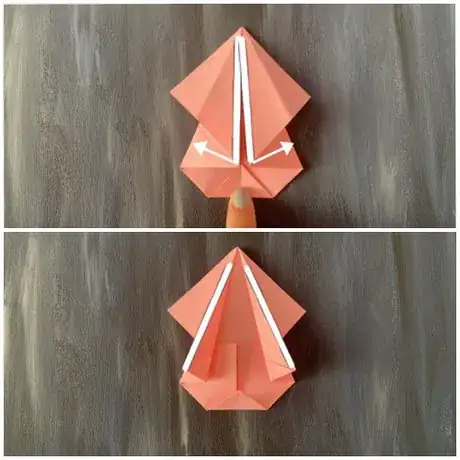
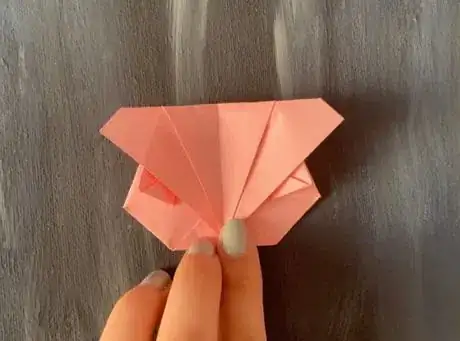
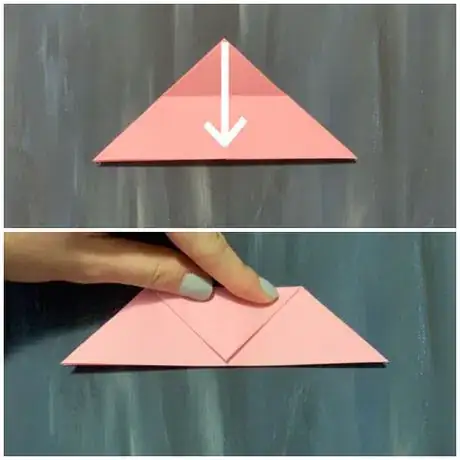
16Fold inner side flaps in half so they touch outer edges.
- Side flaps from the opposite side that were unfolded should still be visible after this fold.
- The end of each side flap is in the middle in the beginning.
- At the end, origami piece should look like second image.
-
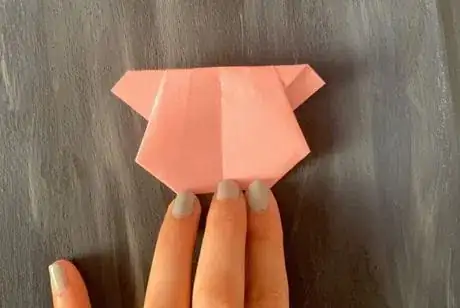
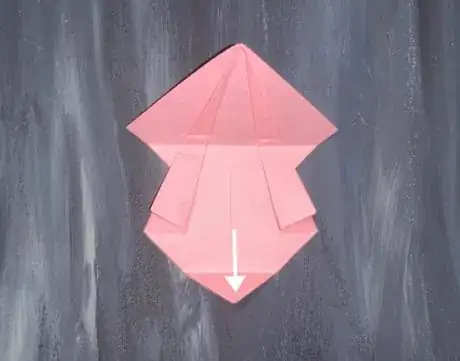
17Fold the top corner of the paper onto the bottom.
- Just a little above the bottom edge of the head piece.
-
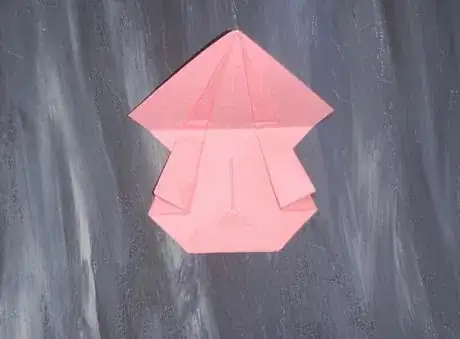
18Finalized koala head piece back.
-
19Finalized koala head piece front.
Advertisement
Part 2
Part 2 of 3:
Making the Body of Koala
-
1Fold in half to form long rectangle.
- Use larger piece of paper (12 cm by 12 cm here)
-
2Fold in half to form a square.
-
3Unfold paper to form long rectangle.
- Two squares should be visible due to crease.
- Make sure the closed end of folded paper is to the left.
-
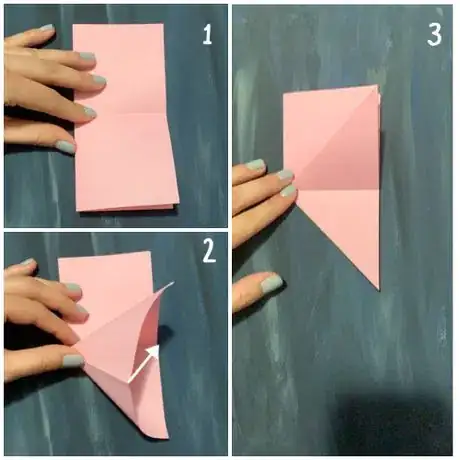
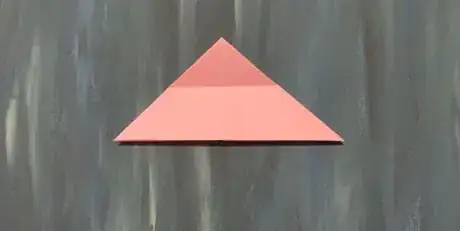
4Press against closed side of square, opening and pressing down to form large triangle.
- Follow images in order.
- A large isosceles triangle forms, with crease in middle showing two smaller triangles.
- One tip of large triangle will face you, one will face away from you.
-
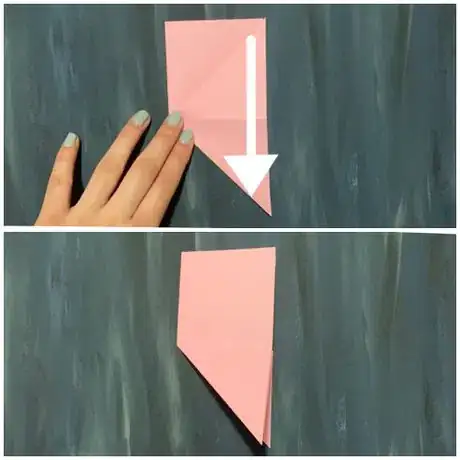
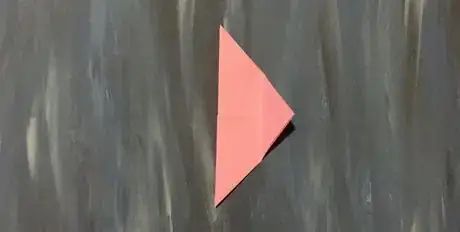
5Fold triangle at top tip of square corner onto bottom triangle piece.
-
6Press against closed side of other square, opening and pressing down to form large triangle.
- Follow images in order.
- A large isosceles triangle forms, with crease in middle showing two smaller triangles.
-
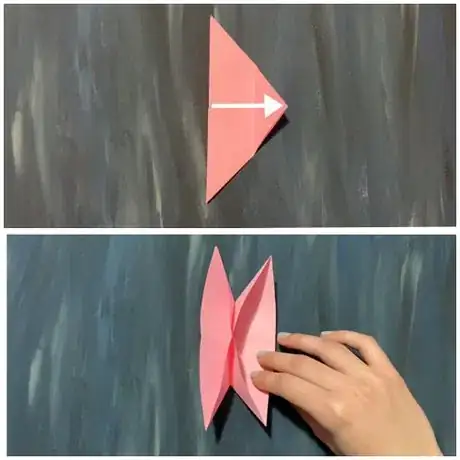
7Fold one small triangle with tip pointing at you up onto other triangle.
- Both top and bottom sides now have two triangles/flaps.
-
8Turn origami piece 45 degrees clockwise.
- Top corner should face away from you.
-
9Fold the top corner of triangle almost all the way to the bottom.
-
10Open up piece.
-
11Turn the origami piece 45 degrees clockwise.
-
12Fold one outer flap down to the corner.
- This will open up origami piece.
-
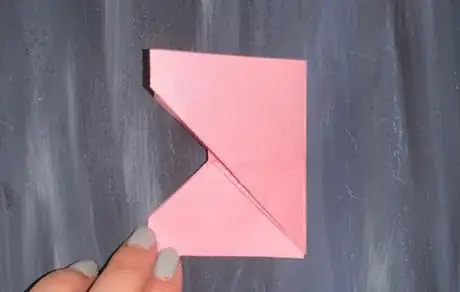
13Press inner flaps down.
- Make sure to press down flaps evenly and neatly.
- Piece should look like second image shown.
-
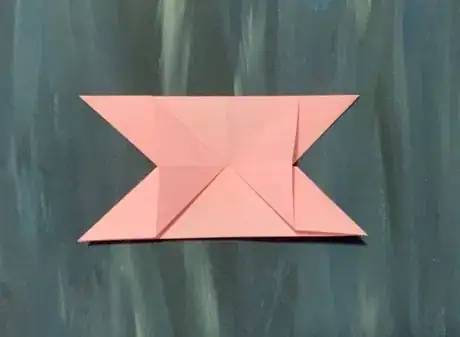
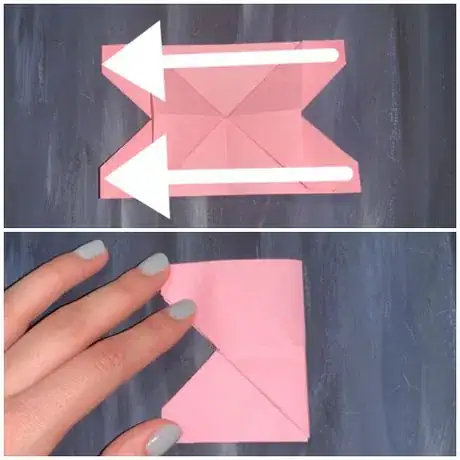
14Turn 45 degrees, so outer corners face sides.
-
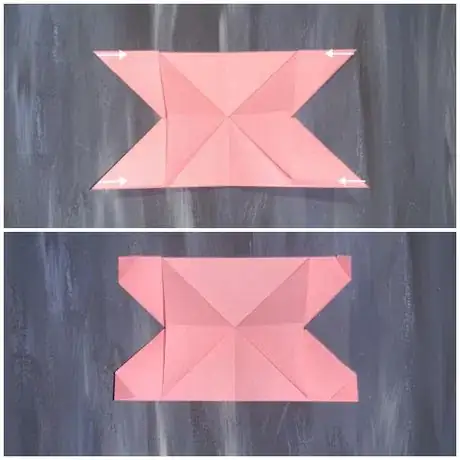
15Fold tips of all corners pieces in as shown
-
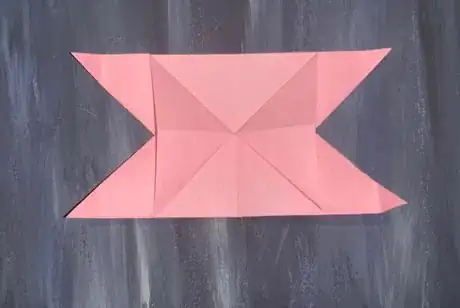
16Open up the folded corners.
-
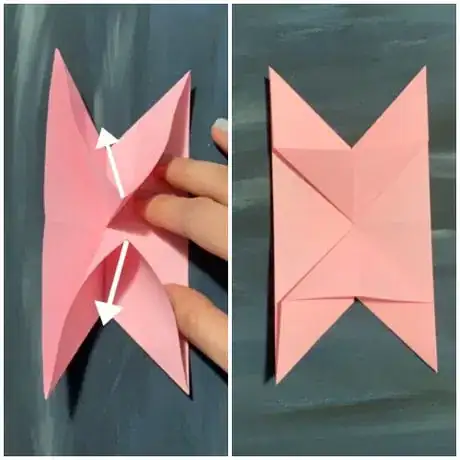
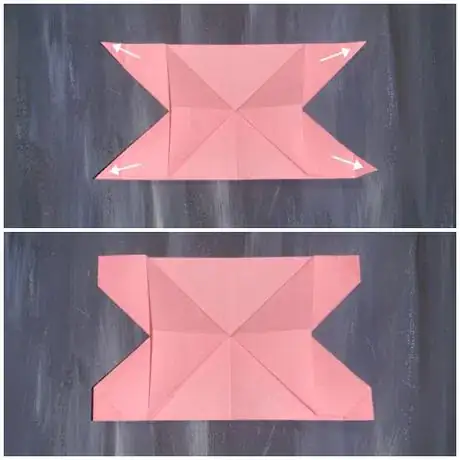
17Glue the corner edges of body piece down.
- These are the four corners that were previously folded and then unfolded.
- Glue areas where arrows are pointing.
-
18Fold paper along the middle line again to show finalized body piece.
- The arms and legs can be seen.
- Make sure to crease the edge of piece with finger.
-
19Finalized body piece.
- May need to flip origami piece over if not exactly like image.
Advertisement
Part 3
Part 3 of 3:
Attach and Decorate
-
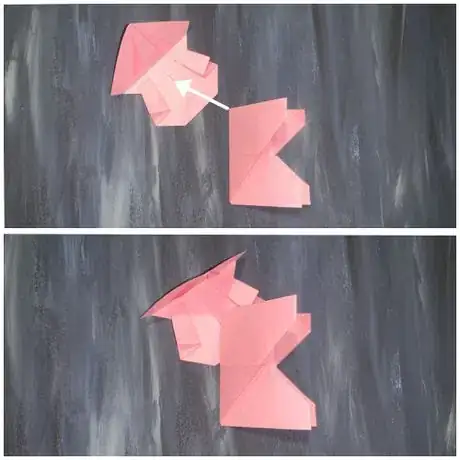
1Glue the inside of bottom fold, for head piece.
- Put glue in area where arrow is pointing.
- Make sure to not glue top fold with it.
-
2Press down fold.
- Do not press down on top flap with bottom flap.
-
3Insert corner of body piece halfway in between head piece flaps.
- Make sure body piece arms and legs point to the right.
- Make sure backside of head piece still faces up.
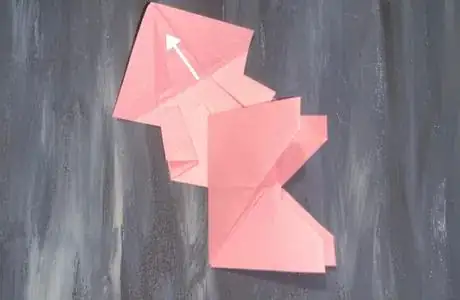
-
4Put glue inside the top fold of head piece.
- Put glue in area where arrow is pointing.
- This step is on backside of head piece.
-
5Press down the top flap of head piece.
- Image shows backside of koala.
-
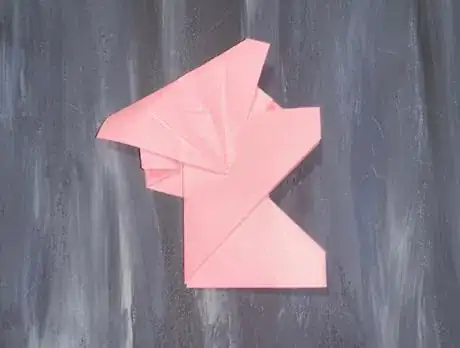
6Flip koala so the front faces you.
-
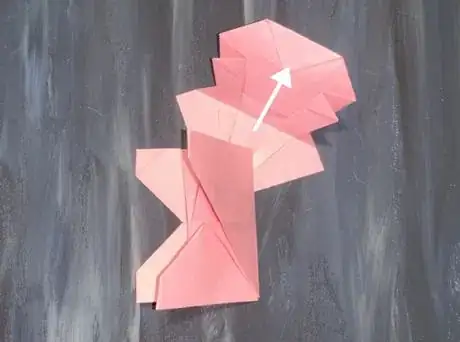
7Put glue on top flap where arrow is pointing.
- This top flap is on the front side of koala head.
-
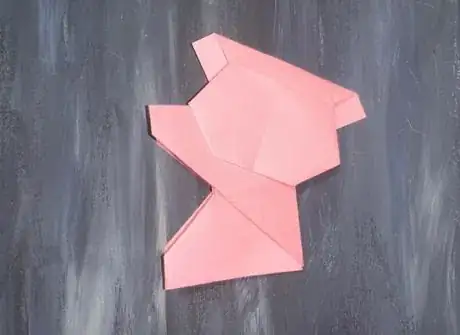
8Press down top flap onto body piece.
- Koala should look like this from the front side.
-
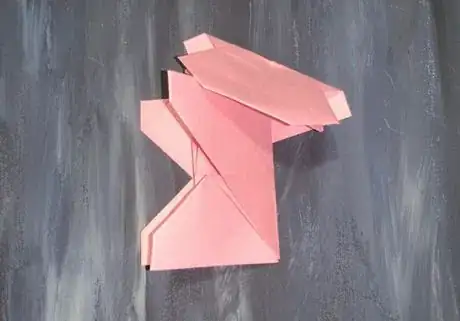
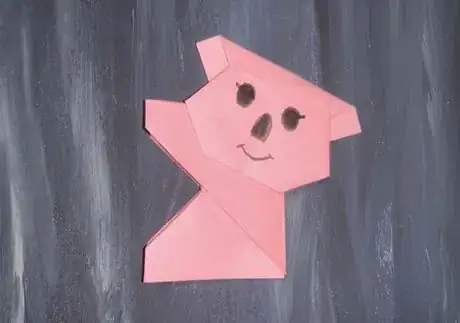
9Decorate finalized koala using black marker.
Advertisement
Things You’ll Need
- 1 (12 cm by 12 cm) paper for body of koala
- 1 paper for head of koala (4 to 6 cm smaller than paper for body piece)
- Glue stick
- Black marker
References
About This Article
Advertisement
