X
This article was co-authored by wikiHow Staff. Our trained team of editors and researchers validate articles for accuracy and comprehensiveness. wikiHow's Content Management Team carefully monitors the work from our editorial staff to ensure that each article is backed by trusted research and meets our high quality standards.
This article has been viewed 29,176 times.
Learn more...
Tissue box covers are a nice way to decorate your tissue boxes. They are a great way of keeping the design consistent as you go through the boxes. Making your own tissue box will ensure that it matches the decor of your home. Tissue boxes come in many different shapes and sizes, and making your own will ensure that the cover fits it perfectly.
Steps
Method 1
Method 1 of 2:
Making an Easy Tissue Box Cover
-
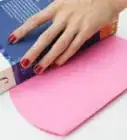
1Take apart an empty tissue box to make your template. Use a box cutter or craft knife to cut out the bottom of the box first, and discard it. Then, cut the corners straight down using a sawing motion. Flatten your box so that you get something that looks like a + sign.[1]
- Pull the plastic out from the tissue slot, if there is any. If your tissue slot is an oval, you might want to stick masking tape across the sides and bottom to make it a rectangle.
-
2Pin your fabric pieces together. Choose two types of fabric, one for the outside of the tissue box cover and one for the lining. Pin them together. You will be tracing and cutting everything all at one time. This way, you can be certain that everything will be even.
- Choose a nice fabric for the outside, such as patterned cotton, linen, or even curtain/upholstery fabric. Choose plain cotton or muslin fabric for the inside.
Advertisement -
3Trace your template onto your fabric. Add ¼-inch (0.64-centimeter) seam allowances to the inside corners. Keep the top, bottom, left, and right edges flush against the template. Finally, trace inside the tissue slot hole, add a ¼-inch (0.64-centimeter) seam allowance.[2]
-
4Trace your template onto your batting. Trace the entire template first, including the tissue slot hole, then take the template off. Next, trace ¼ inch (0.64 centimeter) inside the corners; these will be your new cutting lines and will help reduce bulk. The top, bottom, and side edges should still be flush with the top, bottom, and slide edges on your template.
-
5Cut your fabric and batting out. Keep the fabric pieces pinned together as you cut them, then remove the pins when you are done. This way, both pieces will match up. Cut the batting separately.
-
6Cut ¼-inch (0.64-centimeter) long slits into the corners on the tissue slot hole on both pieces of fabric. Make the slits at 45°. You will eventually be folding the edges in, and these slits will allow you to do so.
-
7Sandwich the batting between the two fabric pieces. Place the lining fabric down first, right-side-down. Place the batting down on top of it, making sure that it is centered. Finally, place the outer fabric on top of it, right-side-up. Pin everything in place.
-
8Sew across each side flap, from upper corner to upper corner. When you look down on top of your tissue box cover, you will see a rectangle, with another rectangle sticking out on each of the four sides. These four rectangles are the side flaps. Use your sewing machine to topstitch across the top of your tissue box cover, right where the side flaps connect to the top panel. This will help the batting fold nicely.
- Use a thread color that matches the outer fabric, and a bobbin color that matches the lining.
-
9Fold the edges in on the tissue slot by ¼-inch (0.64-centimeter). Flip the tissue cover so that the inside fabric is facing you. Fold each of the tissue slot edges in by ¼-inch (0.64-centimeter), and pin them in place. Don't worry, you won't see the hems when you are done.
-
10Pin a ½-inch (1.27-centimeter) bias tape all the way around the edges of the tissue slot. Fold the beginning and end of your bias tape under by ¼-inch (0.64-centimeter) to hide the raw edges. Start pinning the bias tape at one of the corners. Remove the old pins as you go, and use them to hold the bias tape in place.
- Choose a color that goes well with the outside fabric. It can match the print, or contrast it.
-
11Topstitch the bias tape down. Sew ⅛ inch (0.32 centimeter) away from the inside edge, and remove the sewing pins as you go. Backstitch at the start and end of your sewing to prevent the thread from unraveling.
-
12Pin the side flaps together to form a box. Fold the bottom and left flaps together, and pin them together. Repeat for the remaining flaps until you get a box shape. The seams should be on the same side as the inside fabric.
- The batting is cut smaller than the fabric pieces. You won't be able to pin it; try to keep it sandwiched between the inner and outer fabric pieces.
-
13Sew the flaps together using a ¼-inch (0.64-centimeter) seam allowance. Remove the pins as you sew. When you are done sewing, snip the seams at the corners to reduce bulking, and turn the tissue over right-side out.
- Again, the batting is cut smaller. You won't be able to catch it with your needle. This is fine because it reduces bulk.
-
14Fold a ½-inch (1.27-centimeter) wide bias tape all the way around the bottom of the box. Secure the bias tape with sewing pins. As before, fold the beginning and end of the bias tape under by ¼-inch (0.64-centimeter) to hide the raw edges.
- Match this color to your first bias tape color.
-
15Topstitch the bias tape down, ⅛ inch (0.32 centimeter) from the inside edge. Match the thread color to the bias tape, and remove the pins as you go. Do this for both pieces of bias tape.
- Backstitch a few times at the start and end of your sewing. This will prevent the thread from unraveling.
-
16Use your tissue box cover. Slide it over the top of your tissue box, and pull the first tissue out through the slot.


Advertisement
Method 2
Method 2 of 2:
Making a Tissue Box Cover
-
1Measure your tissue box and add your seam allowances. Add 1 inch (2.54 centimeters) to the length and width of the top panel. For the side panel: add 1 inch (2.54 centimeters) to the width, and 1½ inches (3.81 centimeters) to the height.[3]
- If your box is a square, then you only need to measure one of the side panels. If your box is a rectangle, then you need to measure one of the shorter panels, and one of the longer panels.
-
2Cut your fabric and interfacing according to your measurements. Choose a nice, medium-weight fabric, such as home decor fabric or quilting cotton. Pin your fabric and interfacing together as you cut them. This way, you will save time, and ensure that everything is even. Here are the pieces you need to cut:[4]
- 4 pieces of fabric and interfacing for the side panels.
- 2 pieces of fabric and 1 piece of interfacing for the top panel.
-
3Pin your interfacing to the wrong-side of each fabric panel, and iron it in place. Each of the side panels will get a piece of interfacing. Only one of the top pieces will get interfacing; the other one will be bare.
-
4Draw a 2 by 3-inch (5.08 by 7.62-centimeter) rectangle in the middle of you top panel. Take the top panel that has the interfacing on it, and turn it so that the interfacing is facing you. Draw a rectangle in the center of it. Use a ruler to measure from the edges of the fabric to ensure that the rectangle is centered.[5]
-
5Pin the other piece of fabric to the top panel. Flip the top panel over so that the fabric side is facing you. Place the other (bare) top fabric piece on it, right-side-down.
-
6Topstitch along the lines that you drew, then cut the rectangle out. Turn the top panel over so that the interfacing is showing and so that you can see the lines you drew. Sew right on top of the lines.
-
7Cut the rectangle out, about ⅛-inch (0.32-centimeter) from the stitching. Once you are done, cut little slits going towards the corners. This will prevent bulk and bunching.[6]
-
8Turn the panel inside out, and press it with an iron. Take the bare piece of fabric, and pull it through the rectangle. Now, you should have a top panel that is fabric on both sides with interfacing sandwiched inside. Smooth the fabric out, then iron it flat.
-
9Pin the fabric in place, then topstitch around the rectangle hole as well as the outer edges of the panel. Sew around the hole first, then remove the pins, and smooth the fabric towards the outside edges. Pin the fabric in place again, and sew around the edges of the panel, using a ¼-inch (0.64 centimeter) seam allowance.
- Remove the pins as you sew.
- Iron the entire panel once again when you are done. This will help "relax" the stitching.[7]
-
10Sew the side panels together with the right sides facing in. Use a ½-inch (1.27-centimeter) seam allowance. Start sewing ½-inch (1.27 centimeters) down from the top, and sew all the way down to the bottom edge. This will allow you to attach the top panel.
- Press the seams open when you are done.
-
11Pin the top panel to the side panel loop, and sew it in place. Make sure that the bare, non-interface side of the top panel is facing you. Use ½-inch (1.27-centimeter) seam allowances. When you get to the corners, do not sew all the way to the edge of the fabric; instead, stop ½-inch (1.27-centimeter) away from the edge. This will help create nice, crisp seams.[8]
- Sew each of the four sides separately; backstitch at the front and start of your sewing to prevent the thread from unraveling.
-
12Trim the seams at the corners down to ⅛-inch (0.32-centimeter). Each corner will have three seams. Trim these seams down at an angle where they intersect to create a fine point. This will help further reduce bulking.[9]
-
13Turn the bottom edge up twice to create the bottom hem. Turn the bottom edge up by ½ inch (1.27 centimeters) and press it flat with an iron. Turn it up by another ½ inch (1.27 centimeters), and press it flat again. If you need to, pin the hem in place.
-
14Topstitch the hem down. Sew as close as you can to the inside folded edge. Be sure to use a thread color that matches your fabric, and to remove any sewing pins as you go.
-
15Turn your cover right-side out. Your tissue box cover is now ready to use. If you'd like the edges to be nice and crisp, press the cover flat at each side seam, and iron it flat.


Advertisement
Things You'll Need
Making a Single-Piece Tissue Box Cover
- Fabric, 2 different colors/prints, about 13 by 17 inches (33.02 by 43.18 centimeters)
- Thin quilt batting, about 13 by 17 inches (33.02 by 43.18 centimeters)
- ½-inch (1.27 centimeter) double-fold bias tape, about 40 inches (101.6 centimeters)
- Thread
- Sewing machine
- Sewing pins
- Fabric scissors
- Craft knife
- Tailor's pen
Making a Multi-Piece Tissue Box Cover
- ¼ yard (0.23-meter) fabric
- ¼ yard (0.23-meter) fusible interfacing
- Thread
- Sewing machine
- Sewing pins
- Fabric scissors
- Tailor's pen
- Iron and ironing board


References
- ↑ http://www.craftbuds.com/fabric-tissue-box-cover/
- ↑ http://www.craftbuds.com/fabric-tissue-box-cover/
- ↑ http://www.designsponge.com/2010/03/sewing-101-tissue-box-cover.html
- ↑ http://www.designsponge.com/2010/03/sewing-101-tissue-box-cover.html
- ↑ http://www.designsponge.com/2010/03/sewing-101-tissue-box-cover.html
- ↑ http://www.designsponge.com/2010/03/sewing-101-tissue-box-cover.html
- ↑ http://www.designsponge.com/2010/03/sewing-101-tissue-box-cover.html
- ↑ /http://www.designsponge.com/2010/03/sewing-101-ottoman-slip-cover.html
- ↑ http://www.designsponge.com/2010/03/sewing-101-ottoman-slip-cover.html
About This Article

wikiHow Staff
wikiHow Staff Writer
This article was co-authored by wikiHow Staff. Our trained team of editors and researchers validate articles for accuracy and comprehensiveness. wikiHow's Content Management Team carefully monitors the work from our editorial staff to ensure that each article is backed by trusted research and meets our high quality standards. This article has been viewed 29,176 times.
Co-authors: 12
Updated: November 30, 2022
Views: 29,176
Categories: Paper Box Crafts | Sewing Crafts
Advertisement