This article was co-authored by Daniela Gutierrez-Diaz. Daniela Gutierrez-Diaz is a professional pattern maker and clothing designer at DGpatterns in Vancouver, Canada. With over 5 years of experience, Daniela creates modern and unique silhouettes that are suitable for a busy everyday life. Her blog, On the Cutting Floor, contains sewing tips and PDF sewing patterns for a variety of projects and designs.
This article has been viewed 62,389 times.
If you have a loose, baggy T-shirt, don't throw it away. Turn it into a chic T-shirt dress instead! The options are limitless, from a simple dress with a cinched waist to a fitted dress. If you have a fitted shirt, you can add a gathered skirt at the bottom to make it into a bodice-type dress instead.
Steps
Making a Simple T-shirt Dress
-
1Find a large T-shirt. This dress will have an elastic sewn into the waistband, giving it a vintage-like cinch. The shirt needs to be baggy, not a fitted style. It also needs to be long enough to wear as a dress—at least mid-thigh length. Men's shirts are great for this!
-
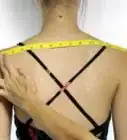
2Put the shirt on and make a mark where your waist is. Turn the shirt inside out first. This will keep the outside clean. Put the shirt on, and make a mark where your waist is. You can use a pin or a dressmaker's chalk or pen. Take the shirt off when you are done.[1]Advertisement
-
3Draw a line across the front and back of the shirt. Spread the shirt on a flat surface. Use a straight edge to draw a line across it from side to side. Use the mark that you made earlier as a guide. Flip the shirt over, and draw another line on the back. This line will be the guideline for the elastic.[2]
- Use a dressmaker's chalk for dark colored shirts and a dressmaker's pen for light colored shirts.
-
4Cut your elastic. Measure around your waist. Cut a piece of ⅜-inch (9.5-millimeter) elastic according to that measurement.[3] Use black elastic for dark-colored shirts and white elastic for light colored shirts. If you can find a matching color elastic, that's even better!
-
5Pin the end of the elastic to the shirt. Fold the shirt's right side seam towards the back so that it lays flat. Pin one end of the elastic over the seam, aligning the raw edges. Make sure that the elastic is level with the line that you drew. Do not pin the rest of the elastic.[4]
-
6Begin sewing the elastic to the shirt. Clamp the foot and needle down over the shirt and elastic. Give the elastic a tug, stretching it out. Backstitch once, then sew forward using a narrow zigzag stitch. Keep the elastic pulled taut as you sew. The fabric will gather as you sew.[5]
- Make sure that you are sewing the elastic over the line that you drew.
- Make sure that your thread color matches the shirt material.
-
7Continue sewing the elastic to the shirt, flatting the left seam as you go. When you reach the left side of the shirt, press the seam down against the fabric. Sew right across the seam. Keep the elastic pulled taut.
-
8Overlap the elastic when you reach the end. Continue sewing across the back of the shirt. When reach the right side seam again, overlap the ends of the elastic by ½ inch (1.27 centimeters). Sew back and forth across the two ends a few times.
-
9Snip off the excess elastic. Knot the loose threads, then trim them down. Discard any leftover elastic.
-
10Consider modifying the collar. This is not really necessary, but it will give your dress a nicer look. Cut the ribbed collar off first. Next, cut the front part of the collar into a V-neck or scoop-neck. T-shirt material does not fray, but you can bind the raw edges off with bias tape or jersey fabric, if you'd like.[6]
-
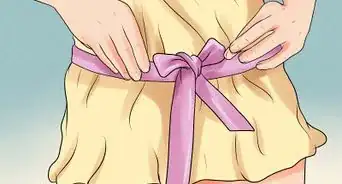
11Turn your dress right side out. Your dress is now ready to wear! For a cutter look, wear a wide belt over it to hide the waist seam.


Making a Fitted T-shirt Dress
-
1Find a fitted shirt and a large, baggy shirt.[7] The fitted shirt will be your template, so make sure that it fits you well. The baggy shirt will eventually turn into your dress. Make sure that it is at least mid-thigh or longer, or it will be too short.
- Men's large shirts work especially well for this.
-
2Fold both shirts in half lengthwise. Turn the larger shirt inside out first. Next, fold both shirts in half lengthwise. If you want your new dress to be sleeveless, tuck the sleeves of the fitted shirt inside so that they are out of the way.
-
3Place the fitted shirt on top of the large shirt. Make sure that both of the long, folded edges are aligned. The shoulders and collars of both shirts should match up.[8]
-
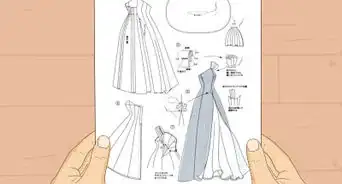
4Trace ½ inch (1.27 centimeters) around the sides of the fitted shirt. This extra space will be your seam allowance.[9] You want to trace around the sleeves/arm holes and side edges. Stop when you get to the bottom of the fitted shirt. Do not draw across the bottom hem.
- Use a dress maker's pen of light colored fabrics and a dress maker's chalk for dark.
-
5Extend the line to the bottom corner of the large shirt. Place a long ruler or straight edge on top of your large shirt. Angle it so that it connects with the bottom corner of the fitted shirt and the bottom corner of the large shirt. Draw along that line, then remove the ruler.
-
6Cut along the lines that you drew. Take the fitted shirt off first and put it away. Use a pair of fabric scissors to cut along the lines that you drew. Be sure to cut through all four layers of fabric.
-
7Unfold the shirt and pin the edges. Keep the right sides facing in as you pin along the two side edges. Do not pin along the armholes or sleeve ends.
-
8Sew the side seams. Use a ½-inch (1.27-centimeter) seam allowance and a narrow zigzag stitch. If you added sleeves, be sure to sew along the top and bottom edges of the sleeves, but not the openings.[10]
-
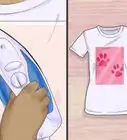
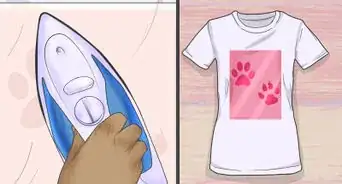
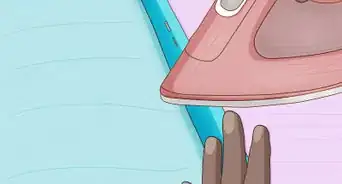
9Hem the dress, if desired. T-shirt fabric does not fray, but this will give your dress a more professional finish. Fold the bottom hem up by ½ inch (1.27 centimeters). Press it flat with an iron, then sew around it using a narrow zigzag stitch, ⅛ inch (0.32 centimeters) away from the inside edge.
- You can also hem the sleeves or armholes in a similar fashion.
-
10Consider modifying the collar. Most baggy T-shirts have a boring collar. Step things up by cutting the collar off first. Next, trim the front of the collar down into a V-neck or a scoop-neck. Fold the edges down by ½ inch (1.27 centimeters) and stitch them in place using a zigzag stitch. Alternatively, you can bind them with bias tape or extra ribbed/jersey fabric.
-
11Turn the dress right side out. It is now ready to wear! If the dress flares out too much for your liking, turn it inside out and sew the bottom edges narrower so that they don't angle as much.


Making a Bodice T-shirt Dress
-
1Choose your shirt and skirt material. This style of dress has a bodice and a gathered skirt. Choose a fitted T-shirt that fits you well without stretching too much. Next, choose a material for the skirt. You can use matching cotton fabric, jersey fabric, or a large, baggy T-shirt. The colors and patterns can match, or they can be different.
- For an interesting look, try a solid-colored shirt with pattered cotton for the skirt.
-
2Make a mark on the shirt where you want the bodice to end. Turn your shirt inside out and put it on. Decide where you want the bodice part of the dress to end and the skirt to begin. This is typically just below the bust or right at the waist. Make a mark using a pin or a dress maker's chalk or pen. Pull the shirt off when you are done.
- Use chalk for dark colored fabric and pen for light colored fabric.
-
3Cut across the shirt, ½ inch (1.27 centimeters) below the mark. If you need to, use a ruler and a dress maker's chalk or pen to draw a line across your shirt. Cut through both layers of fabric ½ inch (1.27 centimeters) below that line. This will be your seam allowance.[11]
-
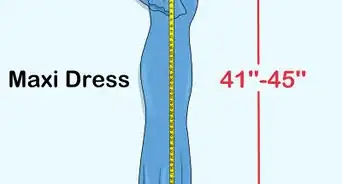
4Decide how long you want the skirt to be. Use a measuring tape to measure down from where you want the bodice to end and the skirt to begin. Add ½ inch (1.27 centimeters) for the top seam and 1 inch (2.54 centimeters) for the bottom hem. The skirt part can be as long or as short as you'd like.
-
5Cut the fabric. It needs to be the same length you want it to be, plus the additional 1½ inch (3.81 centimeters), and at least four times wider than the width of your shirt. The wider the fabric is, the fuller the skirt will be!
-
6Sew the side edges to make a tube. Fold the skirt material in half with the right sides facing in. It should still be the same length you want it to be. Sew it along the edge using a ½ inch (1.27 centimeters) seam allowance and a straight stitch.
- If you are using stretchy fabric for the skirt, use a narrow zigzag stitch instead.
-
7Sew two rows of basting stitches across the top of your fabric. The first row should be ½ inch (1.27 centimeters) away from the top edge, and the second row should be ¾ inch (1.91 centimeters) away from the top edge. You can make a basting stitch by using a long stitch length and a low/loose stitch tension.[12]
- You will eventually be pulling these threads out, so the color does not matter. In fact, a contrasting color will help you find them later on.
-
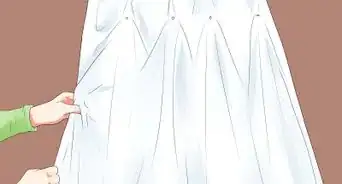
8Pull on the bobbin threads to gather them. The bobbin threads will be on the back side of your fabric. Make sure that you are pulling on both threads at the same time. This will keep your gathering more even. Stop pulling when the top of the skirt is the same width as the bottom of your bodice.[13]
-
9Pin the shirt to the skirt. Turn the shirt right side out. Tuck it into the top of the skirt. Align the bottom/cut edge of the shirt with the gathered top edge of the skirt. The shirt should now be inside the skirt. Make sure that the skirt's seam is centered on the back of the shirt. Pin the two together with sewing pins.
-
10Sew the shirt to the skirt. Use a narrow zigzag stitch, a stretch stitch, or a serged stitch. Sew with a ½ inch (1.27 centimeters) seam allowance.[14]
-
11Measure and cut your elastic. Measure around your chest or torso (wherever it was that you wanted the bodice to end and the skirt to begin). Cut some ⅜-inch (9.5-millimeter) elastic according to that measurement.[15] Use white elastic if your dress is light colored and black elastic if it is dark colored.
-
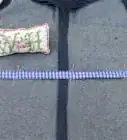
12Sew the elastic into the hem. Pin the end of the elastic to the center back of your dress, right into the joining seam. Sew the elastic to the hem using a zigzag stitch, a stretch stitch, or a serged stitch. Pull the elastic taut as you sew. This will gather the dress some more and allow it to stretch when taking it on and off.[16]
-
13Finish sewing the elastic. When you are back to where you started, overlap the elastic by ½ inch (1.27 centimeters). Sew back and forth across the elastic a few times, then cut off the excess. Knot your thread and trim it down.[17]
-
14Pull out the gathering threads. Remember those threads that you used to gather your skirt? Now is the time to pull them out. Find the ends, and pull on them until the threads come out.[18]
-
15Fold and press the bottom edge of the dress twice to make the hem. Fold the bottom edge of the dress up by ½ inch (1.27 centimeters), all the way around. Press it with an iron. Fold it up by another ½ inch (1.27 centimeters) and press it again. Insert some sewing pins, if necessary.
-
16Sew the hem. Sew ⅛ inch (0.32 centimeters) away from the inside edge of the hem. Use a thread color that matches the skirt fabric. Backstitch at the start and end of your sewing, and remove any pins as you sew.
-
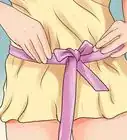
17Turn the dress inside out. If you'd like, you can embellish it further by adding a sash to the waistband or stitching pretty appliqué to the shoulders of collar.


Expert Q&A
Did you know you can get expert answers for this article?
Unlock expert answers by supporting wikiHow
-
QuestionWhat if my T-shirt is too short to be a dress?
 Daniela Gutierrez-DiazDaniela Gutierrez-Diaz is a professional pattern maker and clothing designer at DGpatterns in Vancouver, Canada. With over 5 years of experience, Daniela creates modern and unique silhouettes that are suitable for a busy everyday life. Her blog, On the Cutting Floor, contains sewing tips and PDF sewing patterns for a variety of projects and designs.
Clothing DesignerIf your shirt is too short, you can add some more fabric to it and make a band on the dress so it's long enough.
Support wikiHow by unlocking this expert answer.
-
QuestionHow do I give an oversized T-shirt a nicer shape so I can wear it as a dress?Daniela Gutierrez-DiazDaniela Gutierrez-Diaz is a professional pattern maker and clothing designer at DGpatterns in Vancouver, Canada. With over 5 years of experience, Daniela creates modern and unique silhouettes that are suitable for a busy everyday life. Her blog, On the Cutting Floor, contains sewing tips and PDF sewing patterns for a variety of projects and designs.
Clothing DesignerYou can taper into the waist length to add some more shape to the shirt so you can wear it as a dress.Support wikiHow by unlocking this expert answer.
-
QuestionCould I sew an old T-shirt into a skirt to make a dress?
 Community AnswerYes, you could. But, make sure they match or look good together. You don't want a bronze skirt with a baby pink shirt. Make it look nice. Also, sew the inside so people can't see that it is a shirt or skirt. Or, you could use the same colored thread.
Things You'll Need
Making a Simple T-shirt Dress
- Large T-shirt
- Dressmaker's chalk or pen
- Straight edge (ie: ruler or cardboard)
- Fabric scissors
- ⅜-inch (9.5-millimeter) elastic
- Sewing pins
- Sewing machine
- Thread
Making a Fitted T-shirt Dress
- Large T-shirt
- Fitted T-shirt (template)
- Dressmaker's chalk or pen
- Straight edge (ie: ruler or cardboard)
- Fabric scissors
- Sewing pins
- Sewing machine
- Thread
Making a Bodice T-shirt Dress
- Fitted T-shirt
- Cotton fabric
- Dressmaker's chalk or pen
- Fabric scissors
- ⅜-inch (9.5-millimeter) elastic
- Sewing pins
- Sewing machine
- Thread
- Iron

References
- ↑ https://www.cutoutandkeep.net/projects/diy-couture-tshirt-dress
- ↑ https://www.cutoutandkeep.net/projects/diy-couture-tshirt-dress
- ↑ https://www.cutoutandkeep.net/projects/diy-couture-tshirt-dress
- ↑ https://www.cutoutandkeep.net/projects/diy-couture-tshirt-dress
- ↑ https://www.cutoutandkeep.net/projects/diy-couture-tshirt-dress
- ↑ https://www.cutoutandkeep.net/projects/diy-couture-tshirt-dress
- ↑ http://www.happytogetherbyjess.com/roses-and-ruffles-t-shirt-to-toddler/
- ↑ http://www.happytogetherbyjess.com/roses-and-ruffles-t-shirt-to-toddler/
- ↑ http://www.happytogetherbyjess.com/roses-and-ruffles-t-shirt-to-toddler/
- ↑ http://www.happytogetherbyjess.com/roses-and-ruffles-t-shirt-to-toddler/
- ↑ http://www.itsalwaysautumn.com/2015/06/05/how-to-make-cap-sleeve-maxi-dress-30-minutes.html
- ↑ http://www.itsalwaysautumn.com/2015/05/25/cute-shirt-cute-fabric-easiest-dress-ever.html
- ↑ http://www.itsalwaysautumn.com/2015/05/25/cute-shirt-cute-fabric-easiest-dress-ever.html
- ↑ http://www.itsalwaysautumn.com/2015/05/25/cute-shirt-cute-fabric-easiest-dress-ever.html
- ↑ http://www.itsalwaysautumn.com/2015/05/25/cute-shirt-cute-fabric-easiest-dress-ever.html
- ↑ http://www.itsalwaysautumn.com/2015/06/05/how-to-make-cap-sleeve-maxi-dress-30-minutes.html
- ↑ http://www.itsalwaysautumn.com/2015/06/05/how-to-make-cap-sleeve-maxi-dress-30-minutes.html
- ↑ http://www.itsalwaysautumn.com/2015/05/25/cute-shirt-cute-fabric-easiest-dress-ever.html
About This Article

To make a t-shirt dress, start by putting a large t-shirt on inside-out and marking where your waist is. Then, take off the shirt and draw a horizontal line across the front and back of it where you marked your waist. Next, measure your waist and cut a piece of elastic to the same size, pinning the elastic to the line you drew across the shirt. Finally, use a sewing machine to sew the elastic to the shirt to create a cinched waist, and cut the collar and sleeves to your desired shape. To learn how to make a fitted t-shirt dress, scroll down!