This article was co-authored by wikiHow Staff. Our trained team of editors and researchers validate articles for accuracy and comprehensiveness. wikiHow's Content Management Team carefully monitors the work from our editorial staff to ensure that each article is backed by trusted research and meets our high quality standards.
There are 11 references cited in this article, which can be found at the bottom of the page.
The wikiHow Video Team also followed the article's instructions and verified that they work.
This article has been viewed 187,468 times.
Learn more...
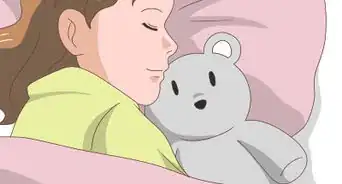
Stuffed animals provide companionship and foster creativity for children.[1] They are both playmates and bedroom decorations. From sea monsters to dogs and stuffed toy cats, most animals can be made into plush toys. With a little creativity of your own, you can inexpensively make a custom stuffed animal toy.
Steps
Assembling Your Stuffed Animal Without Sewing
-
1Line up your fabric. You want the best sides of your fabric turned inwards to face each other. If you’re not sewing your stuffed animal, you don’t need to pin the sides together.
- Remember: for this method, thicker, stronger fabrics work better.
-
2Attach your sides together. The two easiest no-sew ways to attach them are with hot glue or with staples. If your stuffed animal is for a small child, choose glue. Staples can be choking hazards or cause cuts.
- If you’re using hot glue, run a thin line of glue along the sides of your animal a quarter to one-half inch away from the edge. Press the sides together, and let the glue dry and cool completely before moving on.[2]
- To staple, just staple around the sides leaving, again, a quarter to one-half inch of space at the edge. Place the staples close together without leaving gaps in between.
- In both methods, leave about an inch open so that you’ll be able to stuff your animal.
- Alternatively, you can use fabric glue in place of hot glue. You’ll simply need to let it dry for several hours before manipulating it.
Advertisement -
3Flip your fabric inside out. Through the gap you left in the side, you should pull the fabric through. Be especially careful not to pull out any of your staples or put holes in your hot glue edge.
- When you turn your animal inside out, the raw edges will be hidden, and the good side of your fabric will now be visible.
-
4Stuff your animal. Once you turn your fabric, you’ll need to begin filling your animal. You want to fill it without straining the staples or glue. For this project, you can find stuffing at local craft stores.
- Use your hands to push the stuffing in as much as you can, and use the end of a wooden spoon, a dowel, or a chopstick to help push the stuffing into all the hard-to-reach corners of your animal.[3]
-
5Close up the gap. After you’ve stuffed your animal, you’ll want to use a few staples or another line of glue to seal up the small hole in your animal. Even if you used staples around the perimeter of your animal, consider using glue for this small hole so that you won’t have any visible staples.
- Tuck the raw edges of the fabric in so that they don’t show.
-
6Decorate your stuffed animal. After you’ve finished the basics, you can add more character to your creation to make it unique and special. Decorations come in all kinds of forms and can be made from fabric scraps, things you have around the house like buttons, or even just drawn on with markers.
- Glue on buttons or googly eyes.[4] Again, be careful with these around small children, as they can be choking hazards.
- Use a fabric paint or fabric markers to draw on other features.
- You can even use scrap fabric to hot glue or staple together clothes for your stuffed animal.


Preparing Your Pattern and Fabric
-
1Choose a fabric for your stuffed animal. You can go with realistic coloring, like browns and greys, or pick a fun pattern like polka dots. Keep in mind that some types of fabric are easier to work with than others.[5]
- Great fabrics for beginners include cotton quilting fabric, which comes in many fun patterns, and felt. Felt works especially well if you don’t want to sew your stuffed animal.
- If you choose patterned fabric for your project, pick a pattern that looks nice when connected randomly. Sometimes patterns like stripes or chevron can be difficult to line up.
- You can buy fabric at most craft and hobby stores.
- If you’d rather not go out and buy fabric, consider repurposing some old fabric. You could easily use an old dress shirt, tablecloth, or towel to create your stuff animal.[6]
-
2Pick an animal. Before you begin creating your pattern, you’ll want to decide what animal you want to create. As you are brainstorming, try to choose an animal that has a distinct shape and a simple silhouette.[7]
- Some possible options include: a cat, a bear, a rabbit, a monkey, an owl, or a fish.[8]
- You can also make things that aren’t animals like flowers or stars.
-
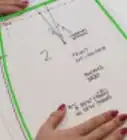
3Make your pattern. For this simple project, feel free to use any type of paper that you have on hand. Since you will only have two pieces of fabric to connect, your pattern is basically just a simple template for cutting out those pieces.
- Decide how large you want your stuffed animal to be when it’s finished. You’ll need to make your pattern one-half to one inch larger all the way around.
- Simply draw a two-dimensional outline of your animal.[9]
- If you’d rather not freehand your pattern, you can find many free, printable animal patterns online.[10]
- Once you’ve drawn your pattern, cut it out along the edges.
-
4Prepare your fabric. After you’ve made your pattern, you’ll need to transfer it onto your fabric.[11] Make sure the fabric you’re using is ironed or steamed and free from creases. This will make it much easier to work with.
- Lay your pattern on top of your fabric. Draw around its online with a dark marker or a piece of white chalk. Do this twice, one for each side of your stuffed animal.
- Cut your fabric along the line you drew. It’s best to use sharp sewing scissors to cut fabric, if you have them.


Sewing and Stuffing Your Animal
-
1Pin your fabric together. Before you begin to sew your animal, you’ll want to use straight sewing pins to pin your two pieces of fabric to each other. This ensures your fabric pieces stay lined up correctly as you begin to sew.
- Pin your fabric inside out. This means that you’ll want the two finished sides of the fabric facing inward toward each other.
- Use the pins horizontally around the perimeter of your animal. You want your pins to be about half an inch apart all the way around.
-
2Sew your sides. You can make your homemade stuffed animal either with a sewing machine or with basic hand stitching. Before you begin to sew, thread a needle, and knot the end of your thread. Use thread that is the same color as your fabric or use a contrasting color for decoration.
- Sew about a quarter of an inch to a half-inch from the edge of the fabric.
- Whether you are hand sewing or using a machine, leave about an inch left unsewn so that you can stuff your animal. This often works well at the end of a leg.
- After you finish sewing, remove all the straight pins from the perimeter of your animal.
-
3Turn your animal inside out. Using the hole that you left unsewn, pull your fabric through, and turn it inside out. It may take a bit of work to pull all of the fabric through your whole.
- When you turn it inside out, the raw stitching should be hidden, and the good side of your fabric will now be visible.
-
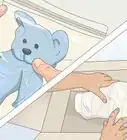
4Stuff your animal. Once you turn your fabric, you’ll need to begin filling your animal. You’ll want to make sure it’s full but that there is no strain on the stitching. You can find stuffing at local craft stores.
- Use the end of a wooden spoon, dowel, or chopstick to help push the stuffing in all the corners of your animal.[12]
-
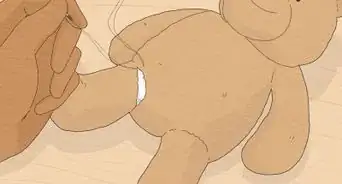
5Close up your hole. After you’ve stuffed your animal, you’ll want to sew up the small hole you used to put in the stuffing. Doing this should not take very much thread. Use the same thread that you used for the perimeter of your animal.
- Knot the end of your last stitch so it stays in place. Trim any excess threads.
-
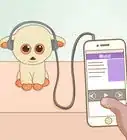
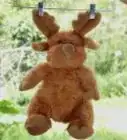
6Embellish your creature. Once you finish sewing your stuffed animal, you can add more character with various kinds of decorations. These will make you animal come alive. Feel free to use items you have on hand, or pick some decorations up at a craft store.
- Sew buttons on for eyes or a nose. If you are giving your animal to a small child, be wary of buttons, as they can become choking hazards.
- Use fabric paints or markers to draw in details. This can be a good option for smaller children, as they can’t pull off small pieces of decoration.


Expert Q&A
-
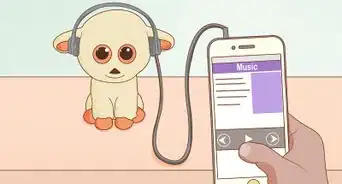
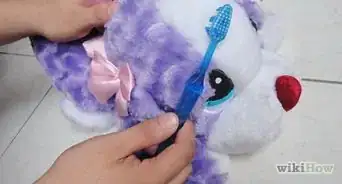
QuestionHow do you clean stuffed animals?
 Claudia & Angelo ZimmermannClaudia and Angelo Zimmermann are the founders of Everneat, an Eco-Friendly Cleaning Service based in New York City and in Connecticut. They are also the founders of Clean Code, a DIY 100% natural cleaning product line.
House Cleaning ProfessionalsSpot clean the surface with soapy water and a microfiber cloth. Then, remove the soap residue with a damp microfiber cloth with only warm water. Let it air dry completely or tumble dry it at a low temperature. -
QuestionWhat materials do you need to make stuffed animals?
 wikiHow Staff EditorThis answer was written by one of our trained team of researchers who validated it for accuracy and comprehensiveness.
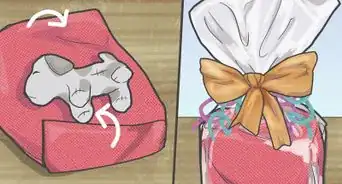
Staff AnswerwikiHow Staff EditorStaff AnswerAt minimum, you’ll need some type of fabric (felt works well, but you can also use household items, like an old t-shirt or pillowcase), stuffing material (such as cotton wool or polyester fiber filling), and something to help the parts of your stuffed animal stick together (such as fabric glue or needle and thread). You might also want decorative materials, such as buttons, ribbons, or fabric paint. -
QuestionWhat is the easiest stuffed animal to make?wikiHow Staff EditorThis answer was written by one of our trained team of researchers who validated it for accuracy and comprehensiveness.
Staff AnswerwikiHow Staff EditorStaff AnswerOne of the easiest stuffed animals you can make is the classic sock monkey. All you need is 2 socks, buttons for the eyes, a pair of scissors, a needle and thread, and some kind of stuffing. In a pinch, you could even stuff the monkey with crumpled paper or rolled up socks. For a pattern and detailed instructions, check out our “How to Make a Sock Monkey” article.
Things You'll Need
- Sewing needles
- Sewing pins
- Fabric (any color)
- Thread (the same color as the fabric)
- Paper and pencil or pen (for pattern)
- Chalk or marker
- Scissors
- Stuffing
References
- ↑ http://www.creativechild.com/articles/view/5-educational-benefits-of-stuffed-animal-toys
- ↑ http://blog.consumercrafts.com/craft-basics-main/how-to-hot-glue-tips/
- ↑ http://www.sew4home.com/tips-resources/sewing-tips-tricks/pillow-personality-fairfield-processing-pillow-stuffing-tips
- ↑ http://stuffedparty.com/how-to-make-eyes-for-stuffed-animals/
- ↑ http://blog.creativelive.com/pick-the-right-fabric-for-your-sewing-projects/
- ↑ http://www.tipjunkie.com/post/how-to-repurpose-fabric/
- ↑ http://electricquilt.com/wp-content/uploads/2013/09/AppliqueDrawing_SampleLesson.pdf
- ↑ https://www.etsy.com/c/toys-and-games/toys/stuffed-animals-and-plushies?page=2
- ↑ http://www.wedrawanimals.com
About This Article
To make a stuffed animal, first use a washable fabric marker to outline your design on the non-patterned side of 2 pieces of fabric. Then cut out your outlines, 1 for the front of your animal and 1 for the back, and decorate them as you like. Next, pin and sew the 2 outlines together, leaving a 2- or 3-inch gap in your stitching. You can then remove the pins and sew on any accents, like ears or a snout. Finish your animal by feeding stuffing through the gap in your stitching before you sew the gap shut. To learn how to make a stuffed frog or a stuffed cat, keep reading!