This article was co-authored by wikiHow staff writer, Kyle Hall. Kyle Hall works on the content team at wikiHow. He helps manage our team of editors and creates content for a variety of wikiHow projects. Kyle continually looks for new ways to improve the content at wikiHow and make it more helpful and enjoyable for readers. He graduated from Eckerd College in 2015, where he majored in Political Science.
There are 9 references cited in this article, which can be found at the bottom of the page.
The wikiHow Video Team also followed the article's instructions and verified that they work.
This article has been viewed 266,483 times.
Learn more...
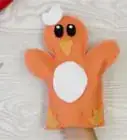
Making your own paper puppets is super easy—and super fun! All you’ll need to get started is a piece of construction paper and some glue. Fold and glue the paper so that it slips onto your hand, then decorate it however you’d like, whether you want a doll, a dog, or even a monster. You can also use a paper lunch bag for your puppet for an even simpler option. When you’re finished, gather up your creations and put on a show for your friends or family. Break a leg!
Steps
Creating a Folded Paper Hand Puppet
-
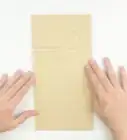
1Fold a piece of construction paper into 3rds lengthwise. Use construction paper that's 12 by 18 in (30 by 46 cm). First, take one of the longer edges of the paper and fold it up a third of the way. Then, repeat with the opposite long edge. Fold the paper so that you have 3 equal sections.[1]
- Don’t worry if your folds aren’t perfectly equal. Since 1 flap will be at the bottom of the puppet, no one will notice if the edges don’t align exactly.
-
2Glue the top flap down to hold the folds in place. Open up the top fold and squirt glue along the entire inside of the flap. Then press it down onto the other folded third so that the folds won’t come undone. The paper should now look like a long, narrow rectangle.[2]
- Squeeze the glue in dots or thin lines down the length of the paper. Avoid using too much or applying a thick layer or it will make the paper soggy.
- You can use white school glue or a glue stick to make your paper hand puppet.
Advertisement -
3Rotate the rectangle so it's vertical. After you rotate it, the short sides of the rectangle should be at the top and bottom. Keep the paper rectangle oriented like this as you continue to fold it.[3]
-
4Fold the rectangle in half, bringing the 2 short edges together. Pull one of the shorter edges up so that it aligns with the other short edge. Crease the paper at the fold to hold it in place.[4]
- To avoid any sloppy seams from showing on your puppet, fold the paper so that the glued edge is on the inside of the folded paper, not the outside.
-
5Fold each flap down so the edges line up with the center fold. After you’ve folded the rectangle in half, bring one of the flaps back down. Align the edge with the bottom fold, then crease the fold so the paper stays down. Repeat with the other side.[5]
- Try to line up the edges as perfectly as possible so your puppet isn’t crooked.
Tip: To check that you made your folds correctly, look at your folded paper from the side. It should look like an “M” or a “W.”
-
6Glue the 2 outside folds down. Squirt dots or a thin line of glue around the inside of the 2 flaps you just folded. Press the flaps down firmly once you’ve applied the glue to secure them in place. The side view of your folded paper should now look like a “V.”[6]
- Hold the paper down for about 20 seconds to let it dry before you remove your hand.
- Leave the very center fold of the paper unglued. This will be the mouth of your puppet.
-
7Decorate the puppet however you’d like. Use crayons, markers, or paint to add colorful designs to the puppet, for instance. You can also glue on 3D decorations like ribbon, paper, or googly eyes.[7]
- If you’re using heavier decorations, like gems or popsicle sticks, consider gluing them on with hot glue instead of school glue. Hot glue will hold better.
-
8Place your fingers in the 2 openings to use your paper puppet. First, put your thumb in one of the openings along the outside of the center crease. Then, insert the rest of your fingers into the other opening next to it. Your thumb should be in the bottom opening, your other fingers should be in the top opening. To open and close your puppet’s mouth, simply open and close your hand while your fingers are inside the paper.
- Keep in mind that it’s easier to use the puppet with your dominant hand. For example, if you’re right-handed, put your puppet on your right hand.
Making a Paper Bag Puppet
-
1Get a paper lunch bag to use as your puppet. The color of the bag doesn't matter (you can paint it a different color later if you'd like), but make sure it's big enough for your hand to fit inside of it and not so big that it's really loose on your hand.
- With a paper bag puppet, you don't need to fold or cut anything to use your puppet. Just stick your hand into it and use your fingers to move the bottom of the bag up and down like it's a talking mouth.
-
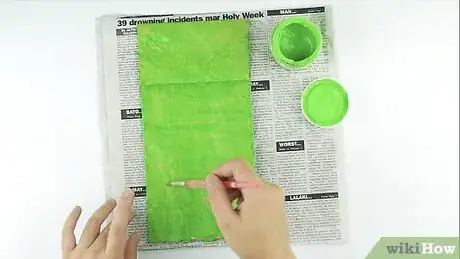
2Paint the entire bag with acrylic paint if you want it to be a different color. Apply 1-2 layers of acrylic paint using a paintbrush. Cover the whole bag, including the bottom, with thin layers that won’t make the bag soggy.[8]
- Let the paint dry for at least 30 minutes before gluing on decorations. If it’s still wet, the glue won’t stick.
- You can also use spray paint to coat the paper bag instead of brushing it on.
-
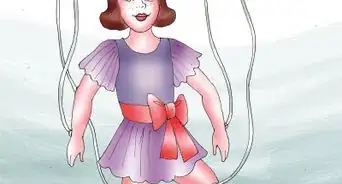
3Use googly eyes and yarn if you want to make a doll puppet. To turn your paper puppet into a person, glue googly eyes on top of the puppet (the bottom of the paper bag) along with strands of yarn for hair. You can also draw on a nose and lips, glue paper ears on the side, or design an outfit on the bottom half.
- If you don’t have yarn, you can use ribbon or fabric for the hair. To make braids, cut strips of fabric and weave them together just like you were braiding real hair.
- For clothes, glue on things like fabric scraps, buttons, or a paper bow tie. Make jewelry, like a necklace, out of string and beads.
-
4Make a dog or cat puppet if you love animals. Use construction paper to cut out pointy ears for cats or big floppy ears for dogs. Glue them on the top of the puppet along with eyes and a nose. Then, glue a tail made from paper or pipe cleaners onto the back.[9]
- You can also add a big white circle to the front of the bag for your pet’s stomach.
- To make a collar, use a piece of ribbon with a bead or draw it on with markers.
Tip: You can make any kind of animal you want, like an alligator, owl, or bunny. Start with ears, eyes, and a tail, then add any extras like a beak or teeth.
-
5Create a monster puppet if you want something spooky or silly. Decorate the front of the bag in bright colors or patterns, like stripes and polka dots, using paint or markers. Then glue on oversized eyes and pointy fangs cut out of construction paper. You can also add ears, horns, or a long tongue.[10]
- Don’t be afraid to get creative and imaginative with your designs and decorations. Use things like glitter, feathers, or pieces of wrapping paper to make your puppet more unique and creative.
Community Q&A
Did you know you can get answers researched by wikiHow Staff?
Unlock staff-researched answers by supporting wikiHow
-
QuestionHow do you make a puppet with a stick?
 wikiHow Staff EditorThis answer was written by one of our trained team of researchers who validated it for accuracy and comprehensiveness.
Staff Answer wikiHow Staff EditorStaff Answer
 -
QuestionHow do you make a finger puppet out of paper?
 wikiHow Staff EditorThis answer was written by one of our trained team of researchers who validated it for accuracy and comprehensiveness.
Staff Answer wikiHow Staff EditorStaff Answer
 -
QuestionHow do you make a puppet talk?
 wikiHow Staff EditorThis answer was written by one of our trained team of researchers who validated it for accuracy and comprehensiveness.
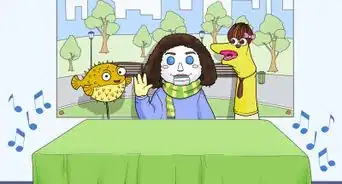
Staff Answer wikiHow Staff EditorStaff AnswerIf your puppet has a mouth that moves, you can use your hand to move the mouth and make the puppet look like it’s talking. At the same time, use your voice to say whatever you want your puppet to say. The audience will be distracted watching the puppet move and “talk,” so it will seem like the voice is coming from the puppet! Even if your puppet doesn’t have a moving mouth, you can make it seem like it’s talking by bobbing it around and moving its body along with your voice.
Things You'll Need
Creating a Folded Paper Hand Puppet
- 12 by 18 in (30 by 46 cm) piece of construction paper
- Washable glue
- Decorations (optional)
Making a Paper Bag Puppet
- Paper bag
- Acrylic paint
- Paintbrush
- Googly eyes
- Markers
- Paint
- Yarn
- Colored construction paper
- Glue
References
- ↑ https://youtu.be/xCHU6qGREIo?t=48
- ↑ https://youtu.be/xCHU6qGREIo?t=98
- ↑ https://youtu.be/xCHU6qGREIo?t=98
- ↑ https://youtu.be/xCHU6qGREIo?t=136
- ↑ https://youtu.be/xCHU6qGREIo?t=156
- ↑ https://youtu.be/xCHU6qGREIo?t=214
- ↑ https://youtu.be/xCHU6qGREIo?t=280
- ↑ https://www.realsimple.com/holidays-entertaining/gifts/wrapping/diy-gift-bags
- ↑ https://youtu.be/3689ZY-RKVc?t=3
About This Article
To make a simple paper puppet, start by folding a piece of construction paper in thirds lengthwise. Then, glue down the top fold so the paper looks like a long rectangle. Next, fold the rectangle in half so the 2 short ends meet before folding each flap down so the edges meet the center. After that, glue down the 2 outer flaps, and decorate the puppet however you like. Finally, stick your fingers into the 2 holes created by the folds to use your puppet. For tips on how to make a puppet out of a paper bag, keep reading!
