This article was co-authored by wikiHow Staff. Our trained team of editors and researchers validate articles for accuracy and comprehensiveness. wikiHow's Content Management Team carefully monitors the work from our editorial staff to ensure that each article is backed by trusted research and meets our high quality standards.
The wikiHow Video Team also followed the article's instructions and verified that they work.
This article has been viewed 142,888 times.
Learn more...
Cocktail umbrellas are a great way to bring a tropical theme to any drink. They can be difficult to find, but luckily, they are easy to make. While they won't open and close like the store-bought umbrellas, you will be able to choose the exact color and pattern you want.
Steps
Making a Simple Umbrella
-
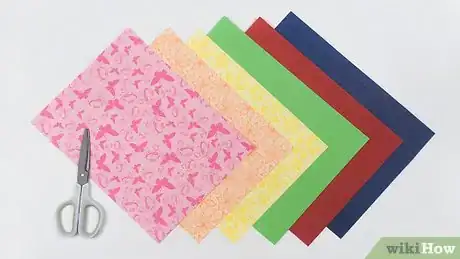
1Choose some colorful paper for your umbrella. Solid-colored cardstock or construction paper would work great for this, but you can also use patterned scrapbooking paper as well. Another option is to use wrapping paper.
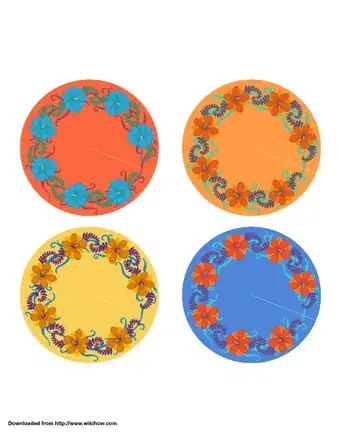
- If you want a traditional cocktail umbrella pattern, print the templates included at the bottom of this tutorial.
-
2Cut a 3 in (7.6 cm) circle out of the paper. Use a pencil to trace the circle onto the back of the paper. Cut the circle out with scissors, then erase any pencil marks.[1]
- Use a glass, can, or small lid to trace your circle. A compass will also work.
- The measurement does not have to be exact; 3 inches (7.6 cm) is just the most common size.
Advertisement -
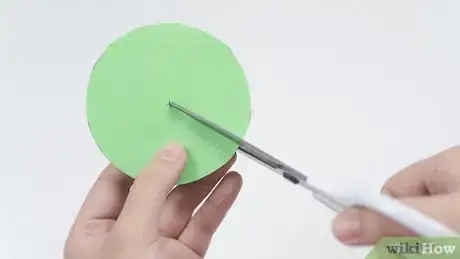
3Cut a slit going towards the middle of the circle. Find the middle of the circle, either by measuring it or drawing an X across the back. Cut a slit going from the outer edge of the circle to the middle.[2]
- Don't fold the circle to find the middle; you don't want any creases in this design.
-
4Overlap the cut edges to form a shallow cone. Take the edges of the slit, then overlap them until the paper starts to form a cone shape. You want to create a shallow cone, so something between 1⁄4 to 1⁄2 inch (0.64 to 1.27 cm) would be ideal.
-
5Secure the cone with tape or glue. A small amount of tacky glue would work the best, but you will have to wait for it to dry. You can also use a glue stick instead. A strip of tape is another option, but you'll have to put it inside the cone so that it won't be visible.[3]
- If you are using glue, use a clothespin to hold the cone in place until the glue dries.
-
6Hot glue the cone to a skewer or toothpick. Flip the cone over so that you can see the inside, then place a drop of hot glue into the middle. Quickly press the end of a toothpick or a skewer into the glue, then wait a few minutes for it to set.[4]
- Most skewers will be too long for cocktail umbrellas. It would be a good idea to cut yours a little shorter.
- If you don't want to use glue, just poke the end of the toothpick or skewer through the paper.[5]
Making a Fancy Umbrella
-
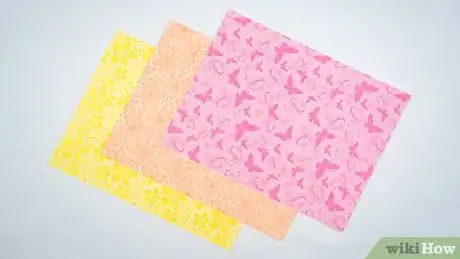
1Choose colorful paper for your umbrella. Patterned scrapbooking paper is a great choice for this, but you can also use cardstock, construction paper, or even wrapping paper. Another option is to print the templates included at the end of this tutorial.
- Tissue paper may work with this method, but only if you add the toothpick spokes.
-
2Trace a 3 in (7.6 cm) circle onto the back of the paper. The circle doesn't have to be exactly this size; 3 inches (7.6 cm) is simply the most common size. Use a coaster or glass to make the circle nice and neat.[6]
- Use a pencil to trace the circle so that you can erase the marks later.
-
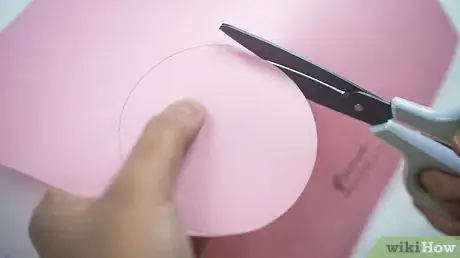
3Cut the circle out with scissors. You can also use a craft blade if you are careful. Alternatively, you can use scissors with a scalloped edge to cut the circle out. This will give you a fancier edge.[7]
- If you use scissors with a scalloped edge, you won't have to cut scallops later on. Keep in mind that these scallops won't match up with the creases you'll add later.
-
4Fold the circle into eighths. Rather than folding the circle all at once, make each crease separately. Fold the circle in half vertically, then unfold it. Next, fold the circle in half horizontally, then unfold it. Keep folding and unfolding until you have 8 segments.[8]
- Make all of the folds on the same side. If your paper is blank on 1 side, make the folds on the blank side.
- Run your fingernail across each fold to make the crease nice and sharp.
-
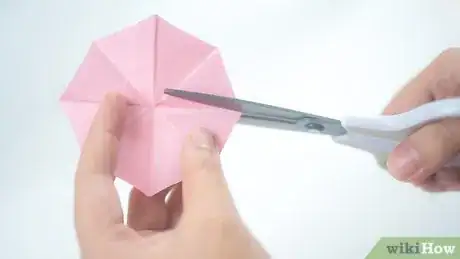
5Cut a scalloped edge into the circle. Fold the circle into eighths using the original creases as a guide. Once you have a skinny triangle, cut a semi-oval or semi-almond shape into the curved edge. Unfold the circle to reveal a scalloped edge.[9]
- If you used scalloping shears earlier, then you don't have to do this.
-
6Cut a slit along 1 of the creases towards the middle of the circle. The slit needs to go from the outer edge of the circle all the way to the middle. Use 1 of the creases as a guide.[10]
- You should use a regular pair of scissors for this, even if you used a scalloped pair in the previous step.
-
7Overlap the cut edges, then secure them with tape or glue. Cover the top of the left segment with glue or a piece of double-sided tape. Overlap the right segment onto it, then press it down. Make sure that the cut edges of both segments align with the adjacent creases.[11]
- Your umbrella will have 7 segments after this.
- You can use tacky glue or a glue stick for this. If you are using tissue paper, however, a glue stick will work the best.
-
8Cut toothpicks into spokes, then glue them to the umbrella, if desired. Cut both ends off of 8 toothpicks until they are a little longer than the radius of the umbrella. Glue the toothpicks to the creases on the underside of the umbrella.[12]
- The ends of the toothpicks should stick out from under the umbrella, just like real umbrella spokes.
- Use tacky glue or super glue for this. Hot glue is too thick.
-
9Glue a toothpick or skewer to the middle of the umbrella. Cut the tip off of a toothpick or skewer until you get the length you want. Flip the umbrella over, then place a drop of hot glue or tacky glue into the middle. Press the cut end of your toothpick or skewer into the glue.
- If you did not add the wooden spokes, you can just poke the toothpick or skewer through the paper.
- If you used tacky glue, stand the umbrella upright and stick it into a ball of clay or poster putty until it dries.[13]
Printable Paper Umbrellas
Community Q&A
-
QuestionWhat kind of paper is best used?
 Community AnswerCard stock is best, as it does not get wet as easily and it is sturdier. It also comes in a variety of colors.
 -
QuestionCan I use it for toys, like LPS?
 Faiza TalukderCommunity AnswerOf course you can! But remember not to get it wet, since it's made of paper.
 -
QuestionDo I need glue to make the simple version?
 Community AnswerYes, you will need a little glue.
Things You'll Need
Making a Simple Umbrella
- Colored paper
- Pencil
- Scissors
- Tape or glue
- Toothpick
Making a Fancy Umbrella
- Colored paper
- Pencil
- Scissors
- Tape or glue
- Toothpicks
- Hot glue
References
- ↑ https://www.nelliebellie.com/drink-umbrella/
- ↑ https://www.nelliebellie.com/drink-umbrella/
- ↑ https://www.nelliebellie.com/drink-umbrella/
- ↑ https://www.nelliebellie.com/drink-umbrella/
- ↑ https://food52.com/blog/10085-diy-drink-umbrellas
- ↑ https://food52.com/blog/10085-diy-drink-umbrellas
- ↑ https://www.youtube.com/watch?v=Yu257zh26Gw&feature=youtu.be&t=19s
- ↑ https://food52.com/blog/10085-diy-drink-umbrellas
- ↑ https://food52.com/blog/10085-diy-drink-umbrellas
