This article was co-authored by Bess Ruff, MA. Bess Ruff is a Geography PhD student at Florida State University. She received her MA in Environmental Science and Management from the University of California, Santa Barbara in 2016. She has conducted survey work for marine spatial planning projects in the Caribbean and provided research support as a graduate fellow for the Sustainable Fisheries Group.
There are 12 references cited in this article, which can be found at the bottom of the page.
wikiHow marks an article as reader-approved once it receives enough positive feedback. This article has 23 testimonials from our readers, earning it our reader-approved status.
This article has been viewed 1,103,132 times.
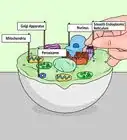
Making a model of DNA is a great way to learn about how this magnificent structure builds our genes and determines our genetic makeup. DNA is made up of sugars and phosphates[1] that control the color of our eyes, our height, and so much more. Using common household materials, you can make your own model combining science and crafts for a great project.
Steps
Making a Model Using Beads and Pipe Cleaners
-
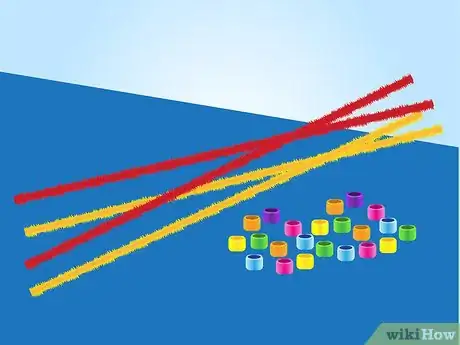
1Gather your supplies. You will need at least 4 12 in (30 cm) cleaners, and assorted beads in at least 6 colors.[2]
- Plastic pony beads work best for this project, although you can use any kind of beads that have a hole wide enough to fit over the pipe cleaners.
- Each of the 2 pairs of pipe cleaners should be a different color, giving you 4 total pipe cleaners preferably black and orange. One pair will be the phosphate and the other pair will be the deoxyribose.
-
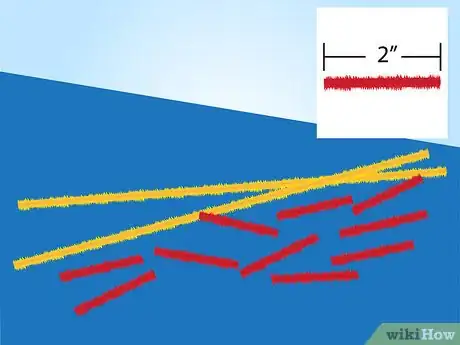
2Cut the pipe cleaners. Take 2 pipe cleaners of the same color, and cut them into strips that are 2 inches (5.1 cm) long. You will use these to string your C--G and T--A pairs of beads on. Leave the other 2 pipe cleaners at their full length.Advertisement
-
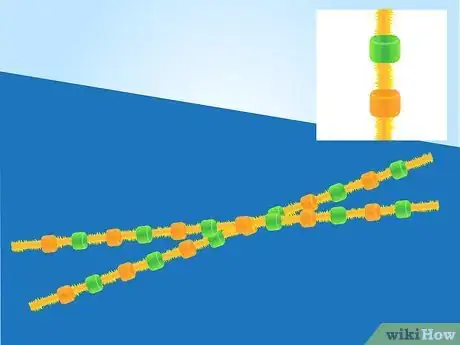
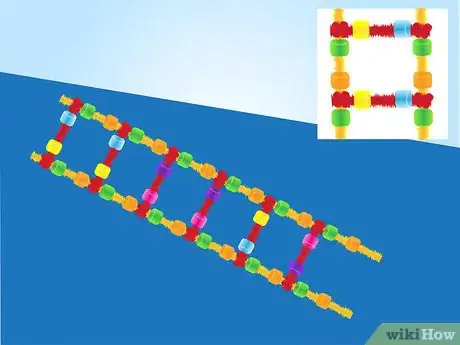
3Bead the pipe cleaners for the double helix. Use 2 different colors of beads to represent the sugar and phosphate groups, and bead them in alternating colors down each of the full-length pipe cleaners.
- Be sure that the 2 long strands that form the double helix match up, so that the beads are in the same order.
- Leave about 1⁄2 inch (1.3 cm) of space between each bead to allow room to attach the other pieces of pipe cleaner.
-
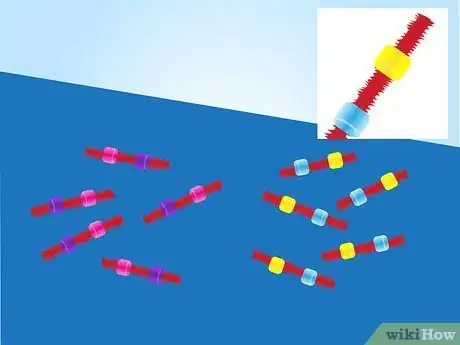
4Bead your nitrogenous bases. Take the other 4 colors of beads, and pair them together. The same 2 colors must always go together, to represent the pairs of cytosine and guanine, and thymine and adenine.[3]
- Place 1 bead from each pair at the ends of the 2 in (5.1 cm) sections of pipe cleaners. Leave a little room at the ends to wrap around the double helix strands.
- It doesn't matter what order the beads are placed on the pipe cleaners, as long as they are in the correct pairs.
-
5Attach your beaded pipe cleaners together. Take the now beaded 2 in (5.1 cm) sections of pipe cleaner and wrap the ends around the long double helix strands.
- Space each small piece so they are always attached above a bead of the same color on the side. You should be skipping every-other bead on the double helix strands.
- The order of small pieces does not matter, it is up to you what way you would like to organize them on the double helix strands.
-
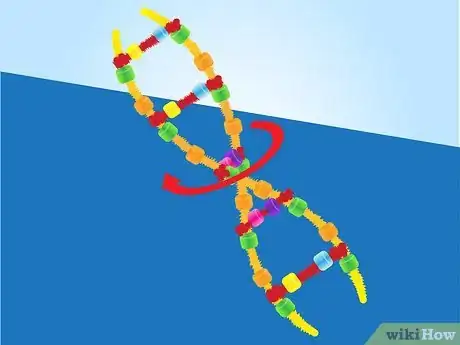
6Twist the double helix. Once all of the small sections of beads have been attached, twist the ends of the double helix in a counter-clockwise direction to give the appearance of a true strand of DNA. Enjoy, your model is complete![4]
Making a Model Using Styrofoam Balls
-
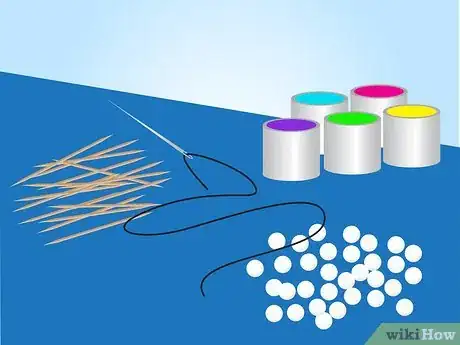
1Gather your supplies. For this version of the project, you will need small styrofoam balls, a needle and thread, paint, and toothpicks.[5]
-
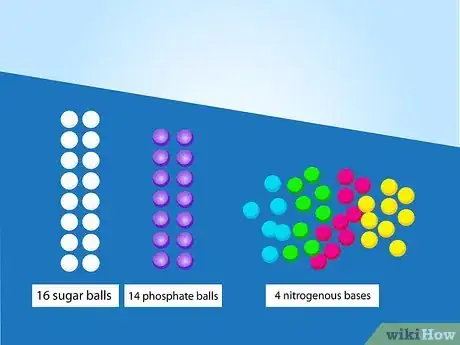
2Paint your styrofoam balls. Choose 6 different colors to represent the sugar and phosphate groups, and the 4 nitrogenous bases. They can be any 6 colors of your choice.[6]
- You will need to paint 16 sugar balls, 14 phosphate balls, and 4 different colors for each of the nitrogenous bases (cytosine, guanine, thymine, and adenine).
- You could choose to have one of the colors be white, so that you don't have to paint some of the styrofoam. This might be easiest for the sugar balls, as it will greatly reduce your total amount of work.
-
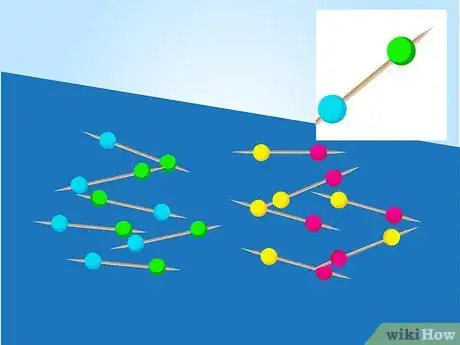
3Pair off the nitrogenous bases. Once the paint has dried, designate 1 color for each of the nitrogenous bases, and then pair them with their matching base. Cytosine always goes with guanine, and thymine always goes with adenine.[7]
- The order of the colors does not matter, as long as they are in the correct pairs.
- Stick a toothpick between each of the pairs, leaving a little extra space at the sharp ends of the toothpicks.
-
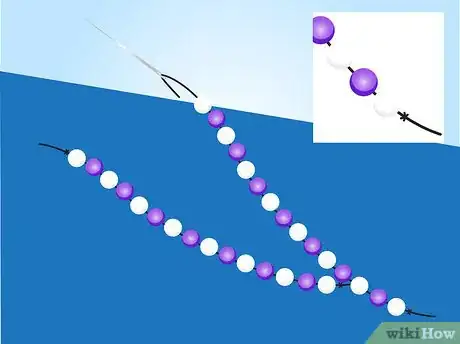
4Make the double helix. Using the needle and string, cut a piece that is long enough to go the length of 15 styrofoam balls. Tie a knot at one end of the string, and thread the needle on the other.[8]
- Line up the styrofoam sugar and phosphate balls, so that they alternate in sets of 15. There should be more sugar balls than phosphate balls.
- Make sure that the 2 strands of sugar and phosphate are in the same order, so that they line up when placed next to each other.
- Thread through the centers of each alternating string of styrofoam sugar and phosphate balls. Tie the string off at the end of each strand, to prevent the balls from sliding off.
-
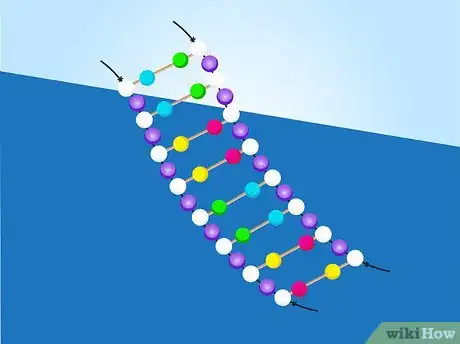
5Attach the nitrogenous bases to the double helix strands. Take the toothpicks with your pairs of nitrogenous bases, and stick the sharp end to the matching sugar balls on each long strand.
- Only attach the pairs to the styrofoam balls representing sugar, as this is how DNA is attached in real life.
- Make sure that enough of the toothpick is attached to the strands that the pairs of bases will not fall off easily.
-
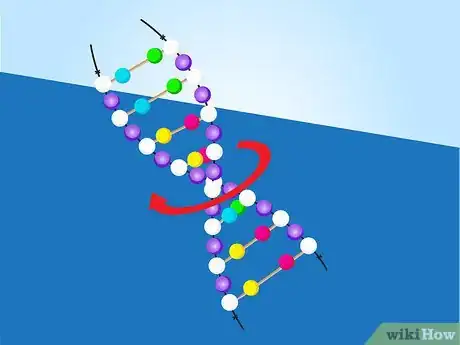
6Twist the double helix. Once all the pairs of toothpick bases have been attached to the sugar, twist the double strands in a counter-clockwise direction to mimic the appearance of a true double helix. Your model is now complete![9]
Making a Model Using Candy
-
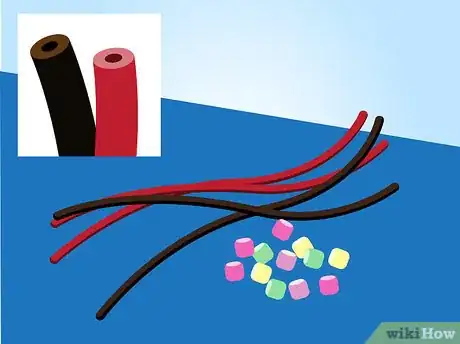
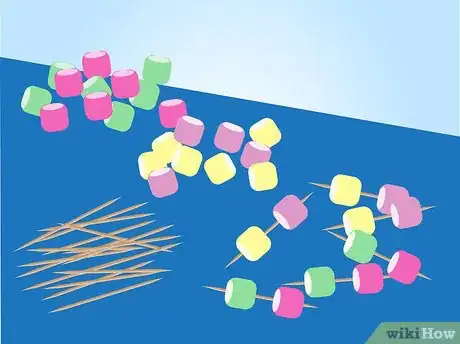
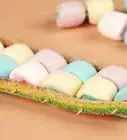
1Select your candy. To make the sugar and phosphate sides, use strands of black and red licorice that have a hollow center. For the nitrogenous bases, use 4 different colored gummy bear candies.
- Whatever candy you use, make sure that it is soft enough to allow a toothpick to puncture it.[10]
- If you have them on hand, colored marshmallows are a great substitute for gummy bears.
-
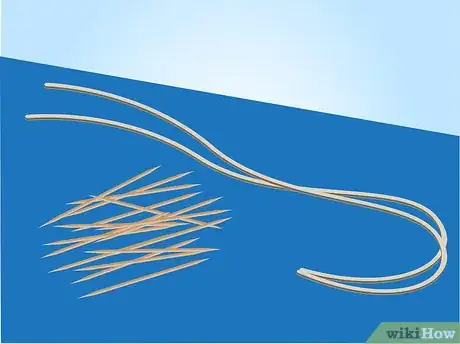
2Prepare your other supplies. Gather string and toothpicks to be used in creating the model. The string should be cut to be about 1 foot (30 cm) long, although you can make it longer or shorter based on your preferred size of DNA model.[11]
- Use 2 pieces of string that are the same length to make the double helix.
- Make sure you have at least a dozen toothpicks, although you may need a few more or less depending on how large you make your model
-
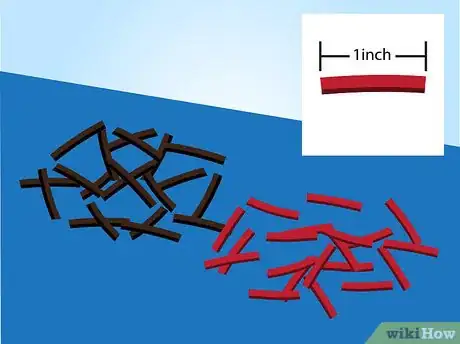
3Cut the licorice. These will be strung on your string in alternating colors and should be cut to 1 inch (2.5 cm) long.
-
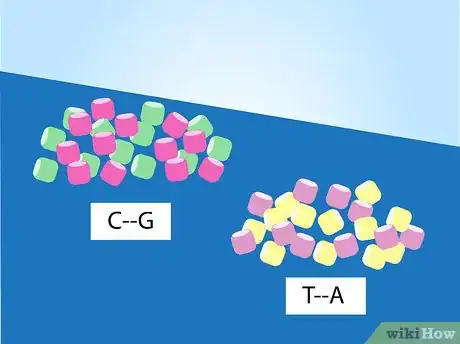
4Pair off your gummy bears. In a DNA strand, pairs of cytosine and guanine (C and G) are paired together, while pairs of thymine and adenine (T and A) are paired together. Choose 4 different colored gummy bears to represent these nitrogenous bases.[12]
- It doesn't matter if a pair goes C--G or G--C, as long as those are always the two in a pair.
- You cannot mix colors between pairs. For example, you cannot combine T--G or A--C.
- The colors you choose are completely arbitrary and are entirely based on personal preference.
-
5String your licorice. Take the 2 pieces of string and tie a knot in the bottom of each to prevent the licorice from slipping off. Then, thread the string through the hollow centers of the licorice in alternating colors.
- The 2 colors of licorice symbolize the sugar and phosphate that make up the double helix strands.
- Choose one color to be the sugar group; your gummy bear nitrogenous bases will be attaching to this color of licorice.
- Make sure that your 2 strands have licorice in the same order so that they line up when placed next to each other.
- Tie another knot to the other end of the string once you have finished adding all your licorice pieces.
-
6Attach your gummy bears with toothpicks. Once you have paired off all your gummy bears in the C--G and T--A groups, use a toothpick and stick 1 bear from each pair at the ends of the toothpicks.
- Push the gummy bears far enough on each toothpick that at least 1⁄4 inch (0.64 cm) of the sharp end is still sticking out.
- You can have more of some pairs than others; the number of pairs in real life DNA determines differences and changes in the genes they form.
-
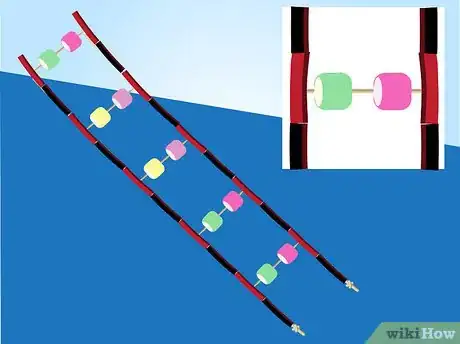
7Attach your gummy bears to the licorice. Lay out your 2 licorice strands flat on a smooth surface, and then attach the gummy bear toothpicks to the licorice by inserting the sharp ends into the licorice.
- You should be attaching the toothpicks only to the “sugar” molecules that you decided on. These are all the pieces of licorice in the same color (for example, all the red pieces).
- Use all your gummy bear toothpicks, don't worry about saving any.
-
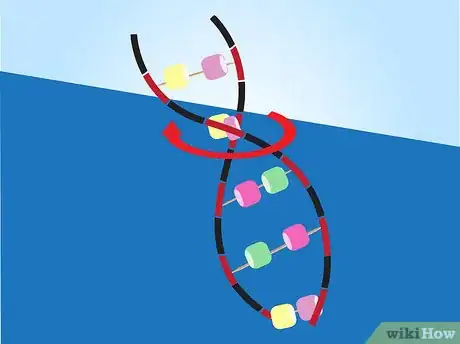
8Twist your double helix. Once you have attached all your gummy bear toothpicks to the licorice, twist the strands in a counter-clockwise direction to give the spiral appearance of a true double helix. Enjoy your completed DNA model![13]
Community Q&A
-
QuestionWhat string should I use to make a DNA model using Styrofoam balls?
 Community AnswerIt doesn't matter. You can use any kind of string.
 -
QuestionWhat do I need to make the DNA stand upright?
 Community AnswerTry and use wire instead of string and make sure you have a base made of wood. Drill holes into the wood and put the wire there and hot glue it if it is still unstable.
 -
QuestionHow can I make my pipe cleaner DNA model 3D?
 Community AnswerIt already is 3D if it's made out of pipe cleaners. There isn't anything else you have to do to it.
References
- ↑ https://opentextbc.ca/biology/chapter/9-1-the-structure-of-dna/
- ↑ https://www2.nau.edu/lrm22/lessons/dna_model/dna_model.html
- ↑ https://sciencing.com/what-four-nitrogenous-bases-dna-4596107.html
- ↑ https://www.amnh.org/explore/ology/genetics/make-a-dna-model2
- ↑ https://www.youtube.com/watch?v=zWRHs8y0lxo
- ↑ https://sciencing.com/make-model-using-styrofoam-balls-6120499.html
- ↑ https://sciencing.com/make-model-using-pipe-cleaners-4745268.html
- ↑ https://sciencing.com/make-model-using-styrofoam-balls-6120499.html
- ↑ https://www.miniscience.com/kits/dnamodel/index.html
About This Article
To make a DNA model using supplies you probably already have, take 4 pipe cleaners and cut 2 of them into 2-inch strips. Then, add beads in 2 alternating colors down the length of the full-length pipe cleaners, leaving ½ inch spaces. Next, choose colors to represent cytosine, guanine, thymine, and adenine. Add cytosine-guanine beads to half of the short pipe cleaners, and add the thymine-adenine beads to the other half. Finish by attaching the short pieces to the long pipe cleaners in a ladder shape, then twisting the ends into a helix. To learn how to make a DNA model out of candy, keep reading!
