This article was co-authored by Jessie Antonellis-John. Jessie Antonellis-John is a Math and Science Instructor who teaches at Southwestern Oregon Community College. With over 10 years of experience, she specializes in curriculum development. Jessie earned her PhD in Teaching & Teacher Education from the University of Arizona, her Master of Education from Western Governors University, and her BS in Astrophysics from Mount Holyoke College. She’s also co-authored several peer-reviewed journal articles in professional publications.
There are 18 references cited in this article, which can be found at the bottom of the page.
This article has been viewed 70,728 times.
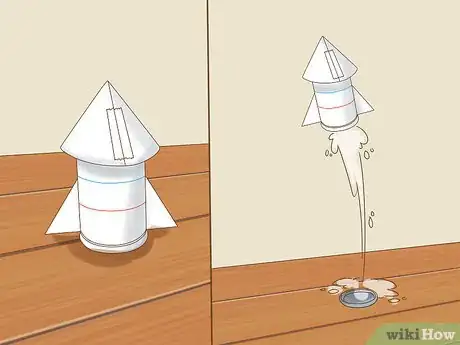
Building a miniature rocket is a fun and exciting project that anyone can easily do at home using a few simple materials. There are foil rockets, paper rockets, and even antacid rockets which don’t require lighting. Each of these works by using combustion or pressure to build up enough force to send the tiny rocket zooming off of its makeshift launchpad.
Steps
Putting Together a Fun Antacid Rocket
-
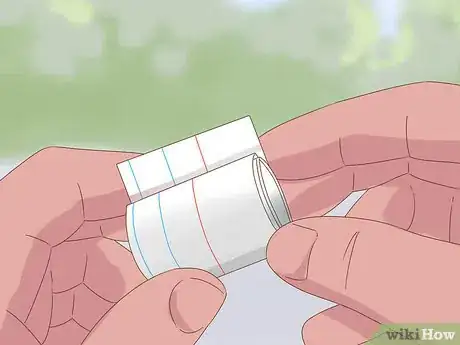
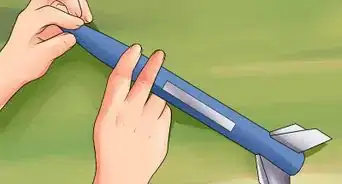
1Cover an empty film canister with paper. Wrap an index card or sheet of heavy-duty construction paper around the canister and tape the edges to hold it in place. Use a pair of scissors to snip off the extra paper around the ends.[1]
- You can pick up a package of cheap plastic lidded canisters like the kind used for this experiment at the supermarket or dollar store.[2]
-
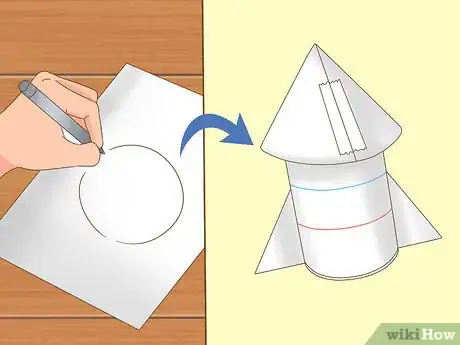
2Fashion paper fins and a nose cone to make a more realistic rocket. On your leftover paper, trace 2-3 simple triangular fins and a circle that’s 2 in (5.1 cm) in diameter. Carefully cut out each piece. To complete the nose cone, cut a thin wedge shape out of one half of the circle, twist the edges together, and tape them down.[3]
- Use a glue stick to attach your paper pieces to the body of your rocket.[4]
- Be sure to put the nose cone on the opposite end of the canister as the lid. You’ll be using the lid to load your fuel and send your rocket into orbit.
Tip: The fin and nose cone won’t actually aid in flight, but they can add some fun visual appeal and give your rocket a more finished look.
Advertisement -
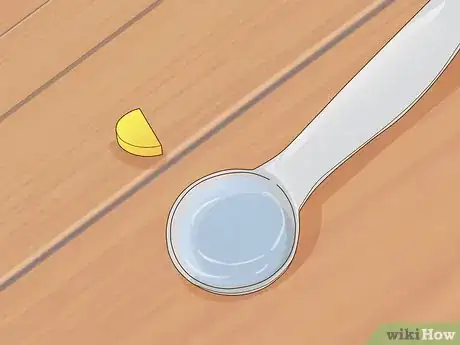
3Have half an antacid tablet and 1 teaspoon (4.9 mL) of water on standby. Cut or break an effervescent antacid down the middle—half a tablet will be more than enough to power your rocket. For ease of access, add your water to a small measuring cup or another container with a pour spout.[5]
- It’s not necessary to measure out 1 teaspoon (4.9 mL) of water exactly. Just eyeball it and use about as much as would take to fill the film canister up halfway.[6]
-
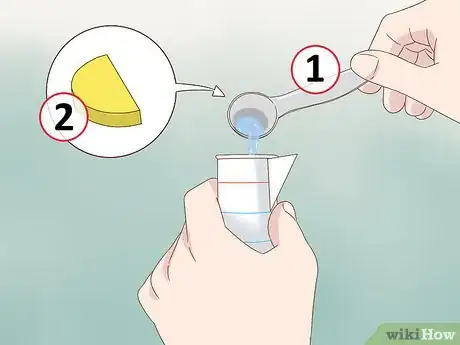
4Hold your rocket upside down and add the water and antacid. Flip open the lid and pour in your water first, followed by the half antacid tablet. As soon as the antacid is inside the canister, close the lid and make sure it’s secure.[7]
- Antacid tablets are designed to start dissolving as soon as they come in contact with water, so you’ll need to perform this step quickly in order for your launch to be a success.
-
5Turn the rocket back over and set it down on a flat, stable surface. Once the rocket is out of your hand, back up a few feet. After 5-10 seconds, you’ll hear a loud pop as the pressure of the fizz builds up inside the canister and sends it whizzing upwards. Mission accomplished![8]
- Antacid rockets don’t require lighting, so you won’t have to worry about a blast. Still, it’s a good idea to stand clear—your rocket is likely to make a mess as it completes its flight![9]
- Be sure to take your rocket outside to test it. Not only is this safer, it will also make cleanup a lot easier afterwards.
Making a Simple Matchstick Rocket
-
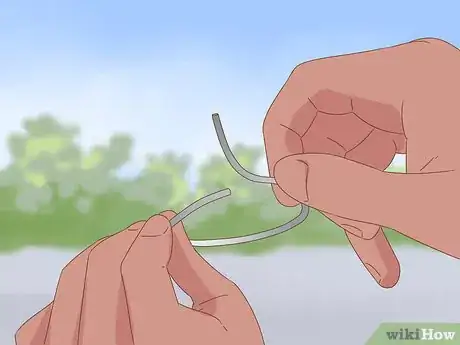
1Bend a paperclip into a curly-cue shape with one end pointing up. Wind the bottom of the paperclip around your finger so that it forms a circle. Continue wrapping the upper end around in a spiral until it sticks out at roughly a 45-degree angle, then slide the paperclip off of your finger carefully.[10]
- The bent paperclip will serve as a makeshift launchpad. The circular part will be the base, and the angled end is where the rocket itself will be positioned.[11]
- If you don’t have a paperclip handy, see if you can find a similar type of thin wire, such as a coat hanger or metal twist tie.
-
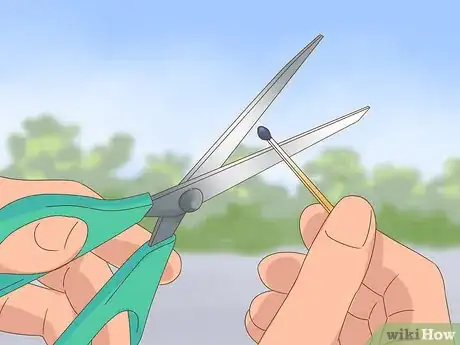
2Snip the head off of a match with a pair of scissors. Cut as close to the match head as you can without damaging it. If you plan on making multiple rockets, go ahead and remove all of your match heads at once to save time.[12]
- The loose match head will be pretty small, so be careful not to drop it or you may lose it and have to start over.
- The more wood there is attached to the match head, the more unnecessary weight it will add to your rocket.
-
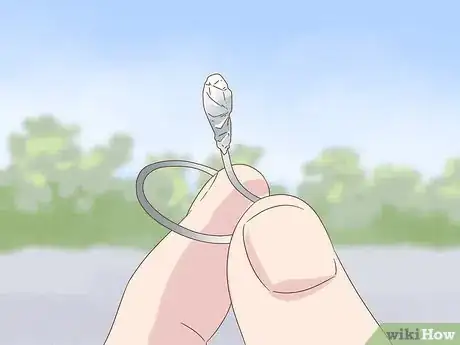
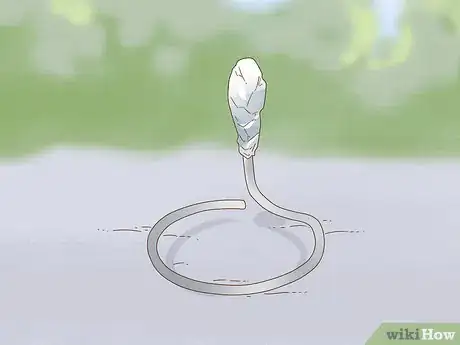
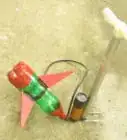
3Wrap the match head and the tip of the paperclip in a small piece of foil. Place the match head in the center of the foil and crumple it loosely so it doesn’t fall out. Slide the end of the paperclip into the foil up against the match head, then bundle the foil around both pieces.[13]
- The finished product will look a little bit like a popper, with a round bulb on one end and a long, winding trail coming out of the other.
- It's important for the tip of the paperclip to be touching the match head in order for it to transfer enough heat to cause ignition.
Tip: Once you’ve wrapped the match head and paperclip together, take a moment to smooth out the foil to ensure that it’s packed as tightly as possible.
-
4Prop the rocket up on its base. Set the circular end of the paperclip against a flat surface so that the rocket is tilting upwards at a slight angle. Be sure to handle your launchpad carefully to keep it from tipping over.[14]
- Make sure your rocket isn’t pointed towards another person or any nearby objects.
-
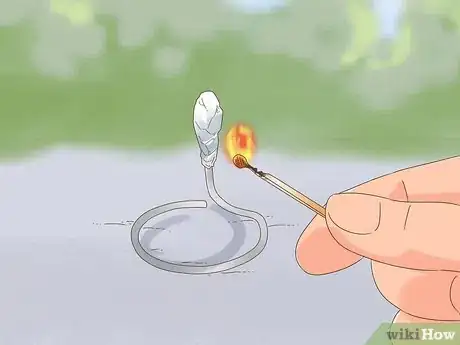
5Light your rocket by holding a flame to the wire just below the foil. Use a match or long-handled lighter to heat the bottom of the rocket for 3-5 seconds. When the foil gets hot enough, it will cause the match head to ignite, propelling the rocket off of the paper clip.[15]
- For your own safety, take a few steps back after lighting your rocket. The blast it makes won’t be very big, but it could still be enough to cause burns if you’re not careful.
- You can make a simplified version of this type of rocket using a whole matchstick. Just wrap the match head in foil and prop it up against a paperclip bent at a 45-degree angle.[16]
Building a Powerful Foil-and-Fuse Rocket
-
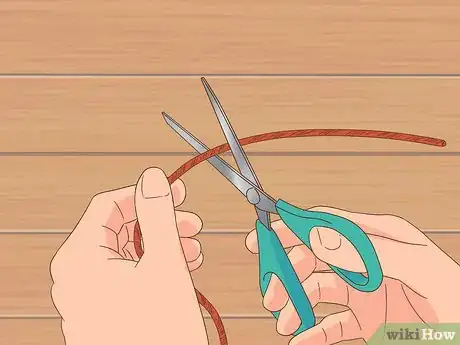
1Cut a length of fuse into six short sections and one slightly longer one. Snip each section straight across so that the ends are flush. For this project, you’ll need six 3 in (7.6 cm) pieces and one 5 in (13 cm) piece. Use a ruler for reference while you’re cutting the fuses to make sure they’re all the right length.[17]
- In many places, you can buy lengths of uncut fuse at fireworks shops. You may also be able to find them at stores that specialize in magic supplies.
Warnings: Handle your fuses carefully. They’re combustible, which means they could catch fire if they get too close to an open flame or other heat source.[18]
-
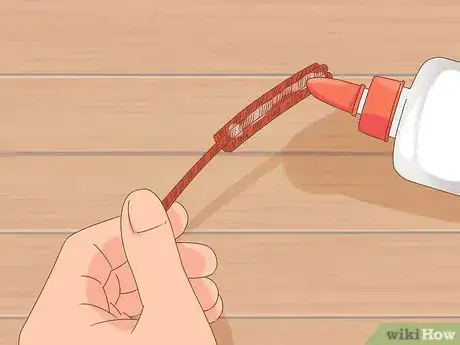
2Glue the 3 in (7.6 cm) fuse sections around the 5 in (13 cm) section. Line the short sections up with the end of the longer section and glue them into place one at a time. When the glue dries, you’ll have a bundle of fuses, with one long fuse emerging the center.[19]
- It may be easiest to use super glue or another type of fast-drying adhesive so you won’t have to hold the fuses together for a long time waiting for them to dry.
-
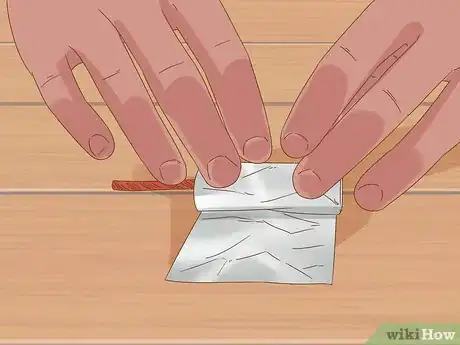
3Wrap the bundled fuses in aluminum foil. Start by folding a 4 in (10 cm) x 4 in (10 cm) square of foil in half once. Lay your fuses on one end of the folded foil with the long fuse sticking out and fold down the excess foil so that it covers the bundled fuses. Then, roll the fuses up tightly in the remaining foil.[20]
- When it comes time to light your rocket, the foil will trap the energy released by the burning fuses, which will cause the rocket to sail into the air.
-
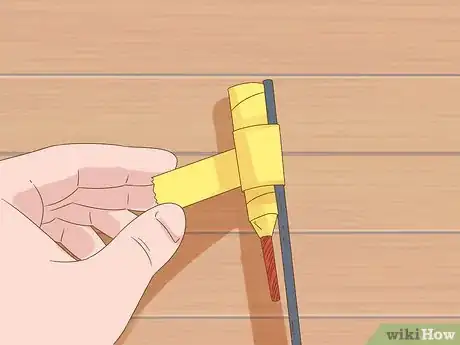
4Cover the foil in tape. Wind a roll of tape around the foil-covered fuses from top to bottom. Make sure to fold a strip over the top of the bundled end, as well. You shouldn’t be able to see any of the foil peeking through.[21]
- Wrap the fuses as smoothly as you can. Bubbles or wrinkles in the tape may create wind resistance that could slow your rocket down.
- A thick, grippy tape like duct tape or masking tape will work best. Avoid using clear tape, as it won’t be strong enough to hold your rocket together.
-
5Tape a thin wooden skewer to the side of the rocket. Adjust the skewer so that the blunt end is flush with the top of your rocket. Wrap a single strip of tape around the outside of the rocket and skewer to hold them together.[22]
- The skewer will provide just enough weight to stabilize your rocket in flight and help it travel straighter. It will also double as a convenient launchpad.
-
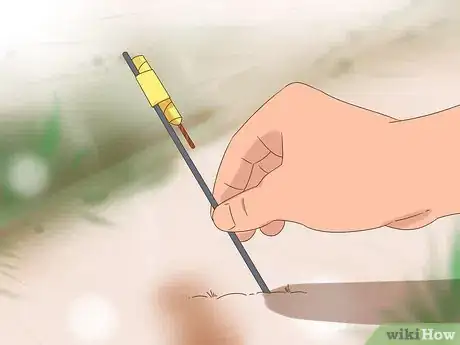
6Stick the rocket into the ground at an angle. Insert the sharp end of the skewer deep enough into the ground to prevent the rocket from falling over. For best results, your rocket should be pointing at a 50-60 degree angle.[23]
- Look around for a nice soft patch of grass or dirt where you can safely set up your rocket.
- If the angle is too low, your rocket will simply shoot forward. If it’s too high, it will blast straight up, then get caught by the wind and drift back to the ground.
-
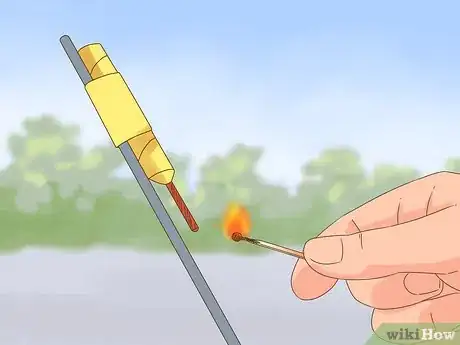
7Light the exposed fuse to make your rocket blast off. Hold a long-handled lighter or lit match to the end of the fuse and wait for it to catch. When it does, take a few steps back to get clear of the burning fuse. After 2-3 seconds, the bundled fuses will ignite and send your rocket zooming into the sky![24]
- Be sure to keep your distance from the rocket until it has left the ground. If you get too close, you could accidentally get burned.
- After your rocket touches down again, douse it with water to make sure the fuses are completely out.[25]
Warnings
- Never launch your homemade mini rockets indoors. If it’s poorly aimed, it could easily hurt someone or cause damage.⧼thumbs_response⧽
Things You’ll Need
Putting Together a Fun Antacid Rocket
- Lidded plastic film canister
- Index card or construction paper
- Scissors
- Tape
- Glue stick
- ½ of an effervescent antacid tablet
- 1 teaspoon (4.9 mL) of water
- Measuring cup or similar container
Making a Simple Matchstick Rocket
- Paperclip
- Wooden or matchbook match
- Scissors
- Aluminum foil
- Long-handled lighter or match
- Coat hanger, metal twist tie, or similar thin wire (optional)
Building a Powerful Foil-and-Fuse Rocket
- 24–25 inches (61–64 cm) of firework fuse
- Scissors
- Fast-drying glue
- Aluminum foil
- Sturdy tape
- Wooden skewers
- Long-handled lighter or match
- Water (for dousing spent rockets)
References
- ↑ https://www.imaginationstationtoledo.org/educator/activities/rockets
- ↑ https://littlebinsforlittlehands.com/alka-seltzer-rocket-activity-kids/
- ↑ https://www.imaginationstationtoledo.org/educator/activities/rockets
- ↑ https://www.popsci.com/diy/article/2013-01/build-and-launch-mini-rocket
- ↑ https://sciencebob.com/build-a-film-canister-rocket/
- ↑ https://www.popsci.com/diy/article/2013-01/build-and-launch-mini-rocket
- ↑ https://littlebinsforlittlehands.com/alka-seltzer-rocket-activity-kids/
- ↑ https://sciencebob.com/build-a-film-canister-rocket/
- ↑ https://www.imaginationstationtoledo.org/educator/activities/rockets
- ↑ https://www.instructables.com/id/Match-Rockets-1/
- ↑ https://www.grc.nasa.gov/www/k-12/TRC/Rockets/match_rocket.html
- ↑ https://youtu.be/90F7ISbLAX0?t=12
- ↑ https://youtu.be/90F7ISbLAX0?t=59
- ↑ http://www.matchstickrockets.com/howto.html
- ↑ https://www.grc.nasa.gov/www/k-12/TRC/Rockets/match_rocket.html
- ↑ http://www.physicscentral.com/experiment/physicsathome/match-rocket.cfm
- ↑ https://www.youtube.com/watch?v=qnXYmpmmxGM&feature=youtu.be&t=11
- ↑ https://kidshealth.org/en/parents/fireworks.html
- ↑ https://youtu.be/qnXYmpmmxGM?t=18
- ↑ https://youtu.be/qnXYmpmmxGM?t=31
- ↑ https://youtu.be/qnXYmpmmxGM?t=56
- ↑ https://youtu.be/qnXYmpmmxGM?t=68
- ↑ https://youtu.be/qnXYmpmmxGM?t=83
- ↑ https://youtu.be/qnXYmpmmxGM?t=86
- ↑ https://kidshealth.org/en/parents/fireworks.html
About This Article
To make a mini rocket, you’ll need a paperclip, a match, scissors, and foil. Start by bending the paperclip into a spiral around your finger and leaving one end pointing up. Once you’ve done that, cut the head off the match with the pair of scissors. Next, wrap the match head onto the tip of your paperclip with foil so that they're touching each other. When you’ve wrapped the match end and paperclip together, set the circular end of the paperclip on a flat surface and aim it at a slight angle away from you. To launch your mini rocket, make sure no one’s standing nearby and hold a flame to the paperclip just underneath the foil for 3-5 seconds. Then, stand back and watch your mini rocket launch into the air. For more tips, including how to make a mini rocket using a fuse and foil, read on!
