This article was co-authored by wikiHow Staff. Our trained team of editors and researchers validate articles for accuracy and comprehensiveness. wikiHow's Content Management Team carefully monitors the work from our editorial staff to ensure that each article is backed by trusted research and meets our high quality standards.
This article has been viewed 149,886 times.
Learn more...
Katniss Everdeen’s side swept French braid is an iconic look because of the Hunger Games movies. The braid is a practical hairstyle, but this braid has a sophisticated look, so you can also wear it for more formal occasions, such as weddings, dances, and special dates. If you want to create your own Katniss inspired braid, there is a simple strategy that you can use.
Steps
Making Sure Your Hair Will Hold a Katniss Braid
-
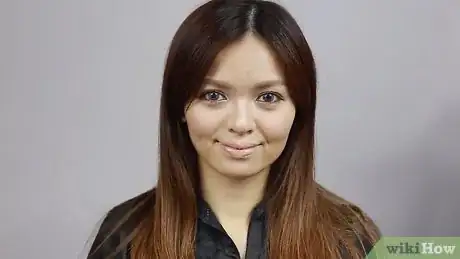
1Gather the items you will need. Creating a Katniss inspired braid is easier than you might think. It is like a French braid, but it starts lower, wraps around the side and back of your head, and looks messier. To create the look, you will need:[1]
- shampoo and conditioner
- comb and/or brush
- anti-frizz or leave in conditioning spray (optional)
- a crimper or texturizing spray
- extensions (optional)
- bobby pins
- a rubber band
- curling iron (optional)
-
2Start with clean, dry, tangle-free hair. Wash and dry your hair first and then brush and/or comb through it until it is completely tangle-free. You can use an anti-frizz serum or a leave in conditioner if you like.
- Some people find braiding easier with damp hair, but it depends on the texture of your hair. If you have fine, thin hair, then starting with damp hair is a good idea. However, if you have thick hair that is also curly or wavy, then you should start with dry hair.
Advertisement -
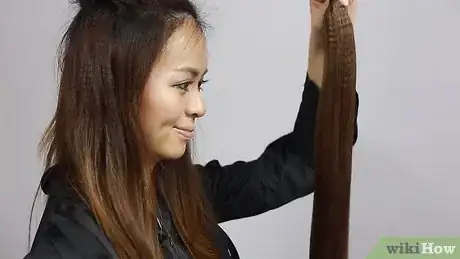
3Add texture to your hair. If your hair is textured, then it will have more volume and look more impressive. You can texturize your hair with a crimper or using some texturizing spray, which is what the Hunger Games hair stylist used when she created Katniss' braid for the films.[2]
- To crimp your hair, start near your roots and then crimp across your hair down to the ends. Hold the crimper for a few seconds on each section.[3]
- To use a texturizing spray, pour a small amount onto the palm of your hand or spray it directly onto your hair. Then use your hands and fingers to work the texturizing spray through your hair so that the strands are evenly coated. If you prefer, you can use mousse or gel instead of texturizing spray.
-
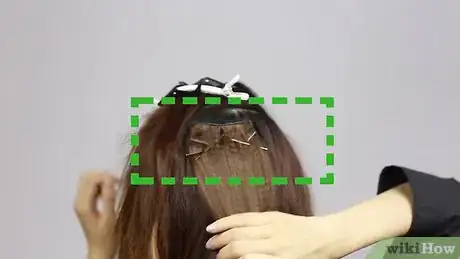
4Consider using extensions if your hair is not long enough. If your hair is thin or too short to complete the braid, then you may want to add some extensions to your hair. Choose extensions that are about the same color as your hair so that they will blend in.[4]
- To put in the extensions, lift up a section of your hair on the back of your head.
- Then, place the extensions on back of your head and secure the extensions with bobby pins. Tug on the extensions to ensure that they are tight and will not fall out.
- Then, unclip the section of hair above the extensions and let it fall over the extensions.
Braiding Your Hair Like Katniss
-
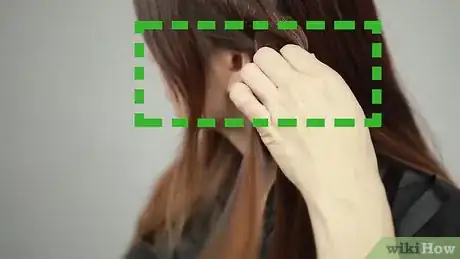
1Start braiding the hair behind your ear. Katniss’ braid starts just behind and slightly above her left ear. Take the hair from this area and divide it into three equal-sized strands. Then, begin braiding your hair by crossing the sections over each other, but do not go too far. Just cross over the first three strands.[5]
- If your hair tangles easily, then you may want to brush it again before you start braiding.
-
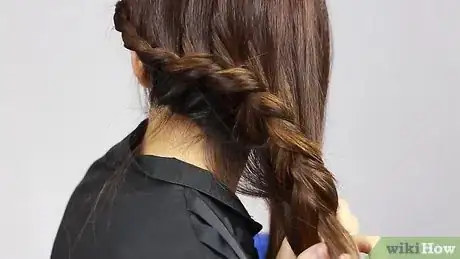
2Add more hair as you braid. Katniss’ braid wraps around the side and back of her head. To achieve this effect, you will need to add hair to the braid as you braid. After you cross the first three strands, take a piece from behind your left ear and pull it into one of the strands. Then, cross the strands again.[6]
- Continue to pull a piece of hair into the braid every time you cross the three strands.
-
3Wrap the braid around the back of your head. You will need to continue braiding towards the back of your head so that the braid will be able to wrap around the back of your head. Use the same braiding technique as you used for the side of your head. Keep adding in hair as you go.[7]
- Make sure that the braid stays above the hairline on your neck.
- Keep the ends taut as you braid to ensure that there will not be any bumps weak spots in the braid.
-
4Finish with a normal three strand braid. When you get to the right side of your head, just behind your right ear, you can begin to braid downwards. Do a normal three strand braid for the rest of your hair. Then, secure the end of the braid with a hair tie.[8]
- Make sure that you grab any remaining long strands of hair before you start braiding and add them to the braid.
Finishing Your Katniss Braid
-
1Add bobby pins to secure any loose back pieces. If you notice any spots around the back of your braid that look loose or in danger of falling out of the braid, then you might want to reinforce them with a couple of bobby pins.
- To use a bobby pin, open up the bobby pin and then slide it over the loose piece and connect it to some of the hair on your scalp. You will probably need a couple of bobby pins for each loose strand.
- It is okay if the braid looks messy with a few loose strands near the front, but you don’t want it coming undone completely.
-
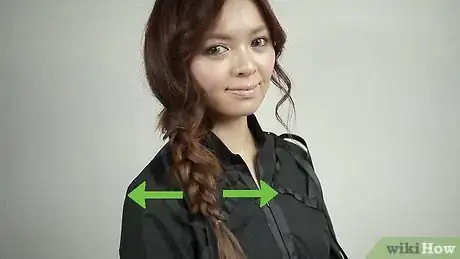
2Tug the sides of the braid to widen it. If your braid looks a little thin, then you can gently tug on the sides of your braid to widen it. Start near the top the braid and grab a couple of pieces on opposite side of the braid and pull them apart slightly.
- Do not pull too hard or you may undo part of the braid. Just pull enough to make the braid look a little wider and looser.
-
3Curl loose pieces. If your hair is naturally wavy or curly, then you do not have to worry about doing anything with the loose pieces in front. But if you have really straight hair, then curling these pieces is a nice finishing touch.[9]
- Make sure that the curling iron is hot before you use it. Turn it on about 15 minutes before you want to use it.
- Starting at the end, clamp a piece of hair and wrap it around the curling iron barrel until you are an inch or two away from your scalp. Do not allow the curling iron to touch your scalp or it will burn you.
- Then, unravel the curling iron and release the hair.
- Repeat the same process for the other pieces.
-
4Spray on some hair spray. If you want your Katniss braid to last all day, then finish it with an all over mist of strong hairspray. Spray the braid, back of your head, sides, and loose pieces.
- Make sure that you close your eyes and hold the can about 12 to 18 inches from your head.
Community Q&A
-
QuestionEvery time I try to do this braid, I always grab the wrong piece of hair because I can't see what I am doing. How can I fix that?
 Community AnswerTry placing one mirror in front of you and another mirror behind you so that you can see your hair from all angles. Or, you can always ask a friend to braid your hair for you if seeing the hair does not work. This braid can be a bit challenging though, so you might need to practice it several times before you get it right. Try not to get too frustrated!
 -
QuestionIt always looks messy, and I can't keep my hair over my hairline. Any suggestions?
 Community AnswerTry washing it first, then separate the sections with a comb and spray your hair with hairspray before doing the braid.
 -
QuestionCan I use these tips on a Barbie doll?
 Community AnswerYes, you can.
References
- ↑ https://www.youtube.com/watch?v=cEKegUWSADQ
- ↑ http://www.cosmopolitan.com/style-beauty/beauty/advice/a6787/hair-secrets-from-behind-the-scenes-of-the-hunger-games-movie/
- ↑ https://www.youtube.com/watch?v=cEKegUWSADQ
- ↑ https://www.youtube.com/watch?v=cEKegUWSADQ
- ↑ https://www.youtube.com/watch?v=cEKegUWSADQ
- ↑ https://www.youtube.com/watch?v=cEKegUWSADQ
- ↑ https://www.youtube.com/watch?v=cEKegUWSADQ
- ↑ https://www.youtube.com/watch?v=cEKegUWSADQ
- ↑ https://www.youtube.com/watch?v=cEKegUWSADQ
- Videos provided by Lynette Tee
-Out-of-Your-Hair-Without-Washing-It-Step-2.webp)
