X
This article was co-authored by Lois Wade. Lois Wade has 45 years of experience in crafts including sewing, crochet, needlepoint, cross-stitch, drawing, and paper crafts. She has been contributing to craft articles on wikiHow since 2007.
wikiHow marks an article as reader-approved once it receives enough positive feedback. In this case, 100% of readers who voted found the article helpful, earning it our reader-approved status.
This article has been viewed 155,635 times.
Do you need to recycle your left over bits of fabric? Is your fabric stash outgrowing its allotted storage space? This is an opportunity to up-cycle those fabric leftovers and decorate for holidays at the same time!
Steps
Part 1
Part 1 of 2:
Preparing the Scrap Fabric
-
1Sort through your fabric stash.[1]
- Coordinate the scraps by their color.
- Determine how much yardage you have. You will be able to make approximately 30 inches (76cm) of garland per yard (91cm) of fabric you have on hand.
- Choose 2 to 4 coordinating fabrics to use for your garland.
-
2Prepare the fabric.
- If needed, wash the fabric. This step may only be needed if the intended fabric is dirty or smelly--such as those that are musty or reek of mothballs. Stained fabric usually can be used as the stained parts are usually simply not included.
- If needed, press the fabric smooth. This project will work with fabric that is not perfectly smooth, but creates a different look.
Advertisement -
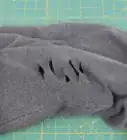
3Cut the fabric into strips. The strips should measure five inches long by one inch wide (12.5cm x 2.5cm). You can cut them longer if you wish, but you will need to cut them all the same length for best results.[2]
- A rotary cutter and mat make this part of the project a breeze.
- You will need approximately 24 strips per linear feet of finished garland.


Advertisement
Part 2
Part 2 of 2:
Making the Garland
-
1Find the end of the twine. Tie a knot around 10 inches (25cm) from the end.
-
2Select a fabric strip. Place it under the twine, ready for tying.
-
3Tie the fabric strip to the twine on the side of the knot (described above) that is away from the end.[3]
- Use a simple overhand knot for best results.
-
4Slide the tied fabric gently against the knot in the twine. Then reach for your next piece of fabric and repeat.[4]
-
5Continue to tie strips down the length of the twine. Tie until you have reached the length you like or until you run out of fabric.[5]
-
6When you're satisfied with the length, simply tie a knot in the twine at the end of your fabric strips. Finish by cutting the end of the twine long enough to facilitate hanging.[6]

Advertisement
Warnings
- Use appropriate caution with edged tools.⧼thumbs_response⧽
Advertisement
Things You'll Need
- Fabric, preferably cottons
- Rotary cutter and mat (optional, but they make the job a lot easier!)
- Household cotton or jute twine. Rough texture is actually an advantage for this project, so don't pay extra for the smoother cordage.)
- Scissors for cutting the twine


References
- ↑ https://www.handmadecharlotte.com/diy-fabric-scrap-garland/
- ↑ https://www.handmadecharlotte.com/diy-fabric-scrap-garland/
- ↑ https://thecraftymiddlesister.com/how-make-fabric-garland/
- ↑ https://thecraftymiddlesister.com/how-make-fabric-garland/
- ↑ https://www.littlemissmomma.com/2013/07/diy-fabric-garland.html
- ↑ https://www.littlemissmomma.com/2013/07/diy-fabric-garland.html
About This Article

Lois Wade
wikiHow Crafts Expert
This article was co-authored by Lois Wade. Lois Wade has 45 years of experience in crafts including sewing, crochet, needlepoint, cross-stitch, drawing, and paper crafts. She has been contributing to craft articles on wikiHow since 2007. This article has been viewed 155,635 times.
Co-authors: 17
Updated: February 13, 2022
Views: 155,635
Categories: Featured Articles | Fabric and Clothing Reuse
Advertisement