wikiHow is a “wiki,” similar to Wikipedia, which means that many of our articles are co-written by multiple authors. To create this article, 62 people, some anonymous, worked to edit and improve it over time.
This article has been viewed 763,745 times.
Learn more...
Flying a remote-controlled airplane can be a fun hobby, but it can also get expensive. Building your own plane from scratch is a fun way to cut the costs.
Steps
Preparing the Parts
-
1Prepare the airplane's body. On a piece of cardboard, use a pencil to trace out the shapes you will need for the airplane's body.[1] Use a protractor or an object with a squared edge, like a small book, to get 90 degree angles. Use a ruler or other flat edge to help you draw straight lines. Then, cut out the shapes you've created. You will need to trace and cut out the following shapes:
- 2 right triangles measuring 15 by 15 by 21.5 inches (38.1 × 38.1 × 54.6 cm).
- 1 square that measures 10.6 by 10.6 inches (26.9 cm × 26.9 cm).
-
2Cut out the elevon parts. The elevon combines the functions of the elevators and the ailerons in tailless aircraft. That is, they control the airplane's pitch and roll. They are the two little tabs at on the back of the wings that rotate up and down. Just as you did for the airplane's body, trace and cut out the following shapes for the elevons:
- 2 rectangles that measure 1.5 by 14.5 inches (3.8 cm × 37 cm).
- 2 squares measuring 1.5 by 1.5 inches (3.8 cm × 3.8 cm).
Advertisement -
3Assemble the elevons. With the two rectangles that you made in the previous step placed side by side, glue the two smaller squares to one end of each of the rectangles, lining up with the corners. The two squares will also hold the control horns.
-
4Cut out the vertical stabilizer. The vertical stabilizer gives the airplane stability in the air. The shape of this piece is a bit odd. To make it, start with a square that measures 6 by 6 inches (15.2 cm × 15.2 cm). Then, do the following:
- Mark one inch inward from the top right and bottom left corners.
- Draw a diagonal line between the two points and cut along the line.
- Keep one half of the square.
-
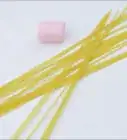
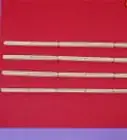
5Make the control horns. The control horns attach the movable parts of the airplane to the remote-control system. Align two Popsicle sticks together and drill a hole through one end of them.[2] Lop the ends off the sticks so that you are left with two small pieces of Popsicle sticks with holes in them.
-
6Attach the control horns to the elevons. In order to fit the edges of your homemade control horns to the elevons, you'll need to cut a slot for them. At a 45-degree angle, notch a groove into each of the reinforced patches (squares.) Make sure the control horns fit into the grooves, then glue them in. In other words, the straight edges of the Popsicle sticks will stick into the reinforced ends of the elevons.
- The edge with the hole should be facing up.
Building the Plane
-
1Build the body. Place the two large right triangles side by side. The right-angle corners should be touching. You should now have a larger isosceles triangle, with its point facing away from you. Tape the two right triangles together, stretching the tape as you place it across the cardboard for a strong, tight hold. Once you've done this, flip the triangle over.
- Make sure to tape along the bottom edges of the triangles and across the middle where the two pieces join.
-
2Glue the large square piece to the triangle. Using hot glue, generously smear it over one side of the square. Align one corner of the square with the point of the larger triangle you just created, and then press the square piece down over it. The square will be halfway on each smaller triangle piece. The square and 2 triangles, all glued together, make up the body of the airplane.
-
3Attach the elevons. Lay your plane and elevons flat on your worktable, with the control horns sticking up. Align the two elevons against the bottom edge of the plane. Make sure that the reinforced sides face the middle. Tape each elevon to the body, making sure to cover the full length of each with the tape. If needed, cut away the excess tape from the outer corners.
- Stand the plane up on its nose and bend the elevons forward without crushing your control horns. Put a piece of tape along the join of the bent elevons. This will give the hinge added strength.
- Work it back and forth to make it flexible enough for the small motor controls to control.
-
4Attach the vertical stabilizer. Draw a vertical line measuring six inches in the bottom middle of the airplane's body. It should also be flush with the reinforced ends of the two elevons. Using it as a guide, cut a groove along this line. After testing to make sure it fits, slot in the vertical stabilizer, one straight edge down into this groove. Glue it in place, making sure to smear some of the glue on either side of the stabilizer for the strongest hold.
- Make sure that the vertical stabilizer is in straight, otherwise your plane will turn.


Mounting the Electronics
-
1Mount the motor. Mark off an area aft of the nose for the motor. You can use the motor itself as a guide for its dimensions. Just behind this area, cut a notch across the body of the airplane for your propeller. Then, mount the motor in the area you've marked off.
- You can also attach the propeller to the motor at this time.
-
2Attach the other components. The other components include the speed controller, receiver, and the battery pack. Carefully glue these items into place, keeping an even weight distribution in mind. Although they may not weigh much, except for the battery pack, you'll want to keep their weight balanced so that the plane doesn't favor one side when it is in the air.
-
3Attach the servos. The servos house the gears that control the moving parts of the airplane. On either side of the vertical stabilizer and forward of the elevons, mark off a spot for each of the servos.[3] Then, cut a hole in the spots you've marked. Insert each servo into the holes and secure them to the body of the plane with glue.
-
4Connect the wiring. Begin by attaching the servos to the control horns. You'll need two push rods to move the elevons up and down, which you'll screw into the control horns.[4] The other ends will attach to the servos. Finally, hook everything into the receiver.
- Glue or tape down the wires so they don't hang off the plane.
Community Q&A
-
QuestionCan I use thermacol instead of cardboard?
 Community AnswerThermacol is too light if you consider its volume-to-weight ratio or density. If a plane is made from thermacol then you cannot have a control on it, as the direction of it will be easily changed. Also, thermacol is less durable compared to cardboard.
 -
QuestionWhere do I get all the items?Community AnswerHave a look online at plane building kits.
-
QuestionWhat is the name of the material used for making the plane?
 Community AnswerYou may use foam board which is accessible in 3 or 5 or more thicknesses. It's cheap and can be cut easily with a cutter. You may use polycarbonat sheets as well, though they are a little heavy, so the plane may need a stronger motor to fly.
Things You'll Need
- Cardboard sheet
- Hot glue
- Box cutters.
- Popsicle sticks
- 2 servos.
- 2 push rods
- Brushless 20-amp motor
- Speed controller
- 9x6 propeller
- Battery pack
- Radio receiver
- Radio controller
- Packing tape

References
About This Article
If you want to make a flying model plane from scratch, first trace the shapes for the airplane on a thick piece of cardboard and cut them out. Assemble the pieces using strong glue. Next, you’ll attach the motor and the propeller to the body of the plane. Attach the servos and the other electronic components to the plane and connect the wiring, keeping in mind that the plane should have an even distribution of weight. To find exact measurements for your model plane, keep reading!