wikiHow is a “wiki,” similar to Wikipedia, which means that many of our articles are co-written by multiple authors. To create this article, 22 people, some anonymous, worked to edit and improve it over time.
There are 10 references cited in this article, which can be found at the bottom of the page.
This article has been viewed 82,821 times.
Learn more...
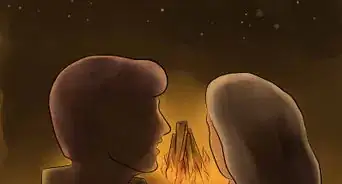
Fire is the source of life. Humans and animals cannot live without it because it provides light, heat, and energy. If you are in a situation where it is essential for you to have a fireplace in order to survive, then these skills are going to be worth a lot.
Note: It is assumed you are in a forest with ample wood available. It is also assumed you are in possession of a pocket knife, as you should not enter a forest without one, but a sharp rock such as broken flint will suffice if needed.
Steps

Setting Up
-
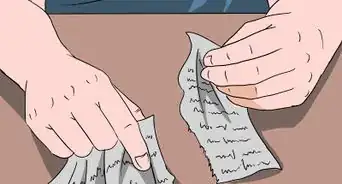
1Gather wood for the fire. You have to have enough tinder, kindling, and fuel wood. The wood should not be wet or live. Using wet or live materials for fire starting will result in more smoke than fire, so leaves should be avoided at all costs. To test whether the wood is good for fire or not, make sure that when you break the wood, it breaks cleanly. If the wood bends, it is not good for burning.[2]
-
2Clear the ground in a large circle where your fire will be. The circle should be at least a 2 meter (6.6 ft) circle away from trees.
-
3Place rocks in a small circle in the center to make the fire ring. They should be big rocks, about 2-4 times larger than your fist. These will prevent the fire from spreading. When you make an outdoor fire, rocks should always be placed around it.[3]
-
4Place a large bed of tinder in the center ready to take an ember.
-
5Put a small amount of kindling in order to retain the flame once tinder is lit.[4]


Creating an Ember
-
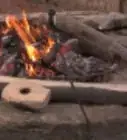
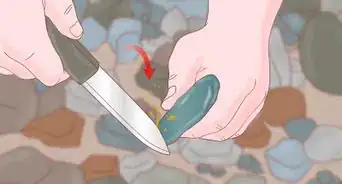
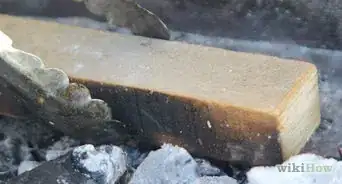
1Find a plank shaped piece of wood.
-
2Carve a dime sized bowl near the edge of the plank.
-
3Cut a V shaped notch from the bowl to the edge of the plank.[5]
-
4Find a very long rod shaped branch with an end compatible to your bowl and notch on the plank, this will be your spindle.
-
5Place your best tinder under the notch, this is where the ember will form.
-
6Place the end of the spindle in the notch.
-
7Spin the spindle using a back and forth motion between both hands.
-
8Continue until an ember is seen (30+ minutes straight is not uncommon). Once smoke is seen you must continue vigorously until an ember is seen in the tinder. This is the around the point of exhaustion, but you must not stop otherwise you might have to start again.[6]


Using the Bow and Handle Method
- Note: This method is preferred over the previous one because it only involves one arm at a time with an easier motion, and your hands do not become blistered due to the friction involved.
-
1Collect the equipment you will need for the Bow Drill:[7]
- A short spindle should be used due to the downward pressure that will be applied, so that it does not bend or break.
- A top handle that has another bowl carved out of it will be held in your left hand for stability.
- A bow with the string wrapped once around the spindle will be used to do the back and forth motions.
- A string. A boot's shoelace works very well for this application, due to the standard sizes being very long.
-
2Set up the Bow Drill. The setup should not differ very much from the one in this image. Wrap the string around the spindle once. Tie the ends of the shoelace to the ends of the bow. Place the spindle on the piece of wood which you will make the ember on, and place a piece of small wood on top of the spindle for stabilization.[8]
-
3Move the bow back and forth while pushing downward on the spindle to create friction and make an ember.[9]


Starting a Fire
-
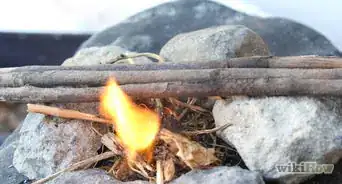
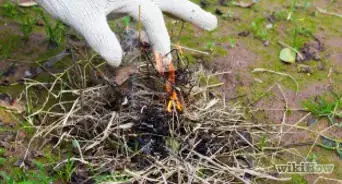
1Blow on the ember in the tinder cluster until it catches fire, this may take several minutes. It will smoke more and more until it catches fire. Make sure not to blow too hard though, you don't want to have to make another one.
-
2Place the tinder cluster in the fire circle to light the tinder and kindling previously arranged.
-
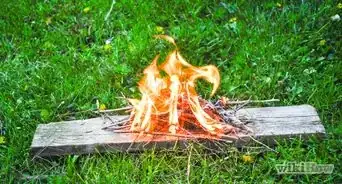
3Continue to add kindling until it burns easily.[10]
-
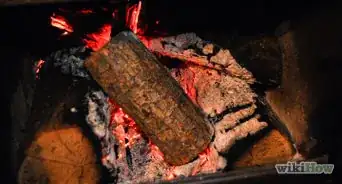
4Slowly add fuel wood until it burns easily. At this point the fire is ready for cooking and signaling. Before this it was not hot enough to cook, and signaling would put out the fire.
-
5Add fuel wood to the fire every few hours to keep fire burning through the night.
-
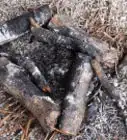
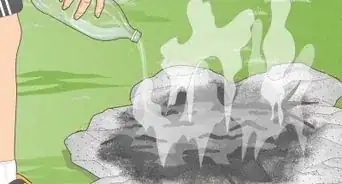
6Put out your fire. When you are finished with the fire and ready to move on, smother the fire completely so it is cool to the touch. Disassemble the fire ring and return the area as close as possible to how it was before you arrived.[11]


Cooking
-
1Making a tripod. Ideally, if a string is available, lash a tripod and hang a pot from it over the fire.[12]
-
2Balance your pot on flat wood. If there is no string available, lay a bed of fuel wood flat enough so that a pot can be balanced on top. Make sure that the fire still touches the pot
-
3Use a rock if you don't have a pot. Leave a large piece of flat rock on the fire to heat up, and then use it as a frying pan


Signaling
-
1Add a living branch of wet leaves to the fire once it is fully self-sustaining to produce a large cloud of smoke, but only attempt this after the fire has been started and is strong, so it is not extinguished.
-
2Prepare a signaling system for emergency. Have leaves attached to a branch, so they can all be removed and added at once if needed. If you know Morse Code, signal it in puffs of smoke.[13]


Warming Up
-
1Dry all your clothes that are wet. This is very important because even with snow on the ground, it is better to be naked in front of a fire then with wet clothes on. Wet cotton is the worst of the fabrics (especially sweaters and sweat pants), and will sap all warmth out very quickly.
-
2Build a drying place for your clothes. If you want to, you can just hold them but be sure not to let the soles of your shoes or any other part of clothing catch fire or melt.


Community Q&A
-
QuestionWhat do I do if I accidentally catch myself on fire?
 Community AnswerLay down on the floor and roll around. Take off your clothes while doing so if possible/necessary.
 -
QuestionCan I start a fire with a battery?
 Community AnswerYou can, and 9 volt batteries work great for this. Just press steel wool onto the terminals and voila, fire. Be sure to have your tinder, kindling, and other fuel ready to go. The steel wool burns very quickly. It is helpful to build up your fuel around the steel wool before ignition and leave enough room to press the battery into the wool. Do not burn the battery, as the chemicals within are toxic. This can be done with jumper cables off of a car battery, as well. Keep in mind that car batteries produce a lot more current and great caution should be used. Also, with car batteries, they can ignite other fuel sources from the sparks they generate.
 -
QuestionWhat is the easiest way to start a fire from everyday material?Community AnswerUse steel wool and a 9-volt battery. Put the wood and steel wool in a fireplace, then use the battery to make sparks on the wool. You can also use matches to burn wood.
Things You'll Need
- Pocket Knife
- Wood
Warnings
- Fire spreads easily with wind, so be sure to clear the ground within several feet of the intended fire ring in all directions. If rocks are available use them to help contain the fire.⧼thumbs_response⧽
- Carve the notches with care, as the pocket knife is the most important tool in a survival scenario, but also the most dangerous. (Be careful not to hurt yourself or damage the knife).⧼thumbs_response⧽
References
- ↑ https://www.almanac.com/content/best-firewood-heat-values-wood-burning-tips
- ↑ https://www.youtube.com/watch?v=gS16ilySoao
- ↑ https://www.youtube.com/watch?v=nHuu6aInr1w
- ↑ https://www.artofmanliness.com/articles/how-to-build-a-roaring-campfire/
- ↑ https://www.artofmanliness.com/articles/9-ways-to-start-a-fire-without-matches/
- ↑ https://www.artofmanliness.com/articles/9-ways-to-start-a-fire-without-matches/
- ↑ https://www.youtube.com/watch?v=ETzcTwxLx3M
- ↑ https://www.youtube.com/watch?v=ETzcTwxLx3M
- ↑ https://www.artofmanliness.com/articles/9-ways-to-start-a-fire-without-matches/