This article was co-authored by wikiHow staff writer, Amber Crain. Amber Crain has been a member of wikiHow’s writing staff for the last six years. She graduated from the University of Houston where she majored in Classical Studies and minored in Painting. Before coming to wikiHow, she worked in a variety of industries including marketing, education, and music journalism. She's been a radio DJ for 10+ years and currently DJs a biweekly music program on the award-winning internet radio station DKFM. Her work at wikiHow supports her lifelong passion for learning and her belief that knowledge belongs to anyone who desires to seek it.
There are 14 references cited in this article, which can be found at the bottom of the page.
The wikiHow Video Team also followed the article's instructions and verified that they work.
This article has been viewed 30,138 times.
Learn more...
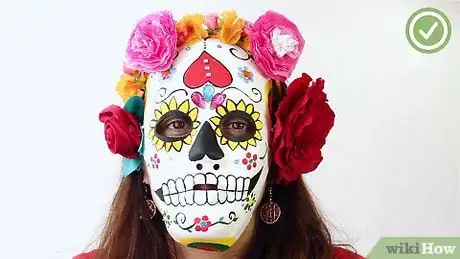
Day of the Dead is a Mexican holiday honoring lost loved ones that's celebrated around the same time as Halloween. Making a Day of the Dead mask is a great way to teach kids about the holiday while also passing a fun afternoon making crafts. The easiest solution, especially if you’re doing this with young children or as a classroom activity, is to print out skull templates and make paper masks. Just cut them out and decorate them however you’d like! If you're creating a costume, grab a plain white plastic mask from a craft store and decorate it with traditional Day of the Dead designs.
Steps
Creating a Simple Paper Mask
-
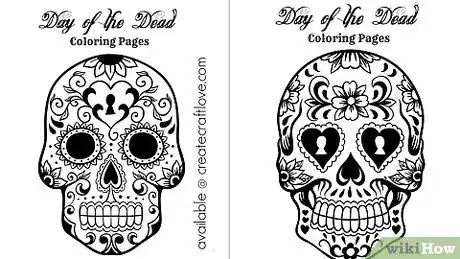
1Search for a Day of the Dead skull shape template online. You can find a lot of cool Day of the Dead mask templates online. If you have small children or are planning this as a classroom activity, this is a great option. Run a search for “Day of the Dead mask template” or “calavera template” and browse through the available options.
- If you’re having trouble finding templates, check out the 4 printable options here: https://drive.google.com/file/d/0B95QypGcCj4ZT2x5NnBNb2VUd00/edit
- You can find another template option here: https://www.triedandtrueblog.com/triedandtrue/wp-content/uploads/2012/10/diadelosmuertos_printable_heart1.pdf
- You can also check your local craft store for wooden skull masks or Day of the Dead skull coloring pages.[1]
-
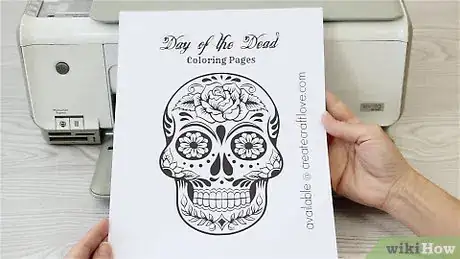
2Print out the template on regular printer paper or cardstock. Regular white printer paper will work just fine for this, but if you want something sturdier, use construction paper or cardstock for your mask. You don’t need any colored ink for this—black ink works perfectly and creates an authentic look.[2]
- Don’t worry—you'll be decorating the mask later, so you can make it as colorful as you like at that point.
- Many templates have designs on the skull already, which makes it super easy to create an authentic-looking mask. You can choose a blank skull template and draw in your own designs if you prefer, though.
Advertisement -
3Cut around the perimeter of the skull to create the base of the mask. Printable templates have easy-to-follow lines that you or your child can easily cut out. Use a pair of sharp scissors to cut out the skull template and toss the excess paper in the trash.[3]
- Cut out the eye holes if you want a mask you can see through. You don’t have to do this, but it can make the masks more fun and interactive.
-
4Draw in traditional Day of the Dead designs with a Sharpie, if desired. The easiest templates already have authentic details and designs included on the skull face. If you printed out a blank skull template, use a permanent black marker to draw on flowers, hearts, animals, curlicue shapes, and other traditional Day of the Dead designs.[4]
- It can help to look at traditional designs online and mimic them if you aren’t sure what to draw on your skull.
-
5Use markers or crayons to color in the designs any way you’d like. Day of the Dead skulls are traditionally quite colorful, so feel free to use any colors that you’d like to fill in the designs. Bright colors like orange, yellow, and aqua are common, but you can really go with any color palette you want. Encourage the kids to get creative![5]
-
6Add fun accents like glitter, sequins, or stick-on rhinestones, if desired. Feel free to customize your mask any way you’d like. Glitter glue is an easy, no-mess way to add some sparkle. Stick-on rhinestones and other cool stickers are great options. Gluing felt designs onto the face or a plastic flower at the temple can also look really cool.[6]
- Use hot glue to attach felt, sequins, or plastic flowers securely to the mask. If you’re working with small children, you might want to handle this part yourself.
-
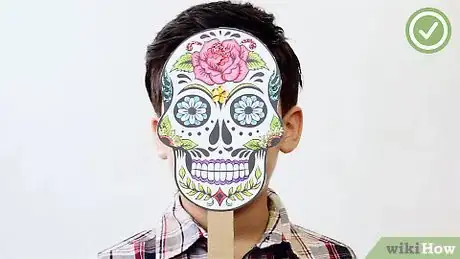
7Glue the paper mask to the top of a wooden popsicle stick. Add a dab of hot glue to the end of a wooden popsicle stick or craft stick. Then, press the chin area of the mask carefully onto the glue to attach the wooden stick. Give the glue a few minutes to dry and hold up your Day of the Dead mask to your face.[7]
- School glue or super glue will also work.
-
8Talk about the significance of the holiday as you work with the kids. Day of the Dead is a Mexican celebration that happens on the first 2 days of November. It's believed that the passageway between the real world and the spirit world is open during this time so deceased loved ones can visit their families. Families prepare by creating altars, decorating graves, and cooking traditional foods.[8]
- Festivities are joyful and often include flowers, music, candles, singing, and dancing.
- Day of the Dead has been celebrated for centuries and it's roots stretch back to the time of the Aztecs.
Making a Strap-On Costume Mask
-
1Cover your work surface with cardboard or plastic to protect it. Crafting can get messy! Place a large piece of cardboard on your work surface or tape down a garbage bag so you don't damage the surface.[9]
- Be sure to work on a flat, stable surface with plenty of room to spread out your craft supplies.
-
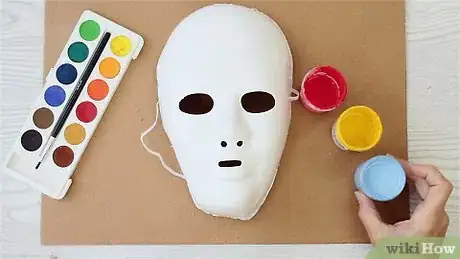
2Cut a plastic craft mask around the edges to create a skull shape. Plain white craft masks are usually rounded, but you can use scissors to alter the shape. Cut into the mask about 1⁄2 inch (1.3 cm) at one of the skull's temples to create a slight indention. Then, cut around the top of the skull to the other temple and cut another indention. Do the same thing under the cheekbones on each side of the face to for an authentic skull shape.[10]
- You can find plain white craft masks made of plastic or cardboard at most craft stores. Be sure to get a mask that has an elastic strap so you can wear your mask once it’s done.
-
3Sketch lines around the eyes, nose, and mouth to create a skull face. Use a pencil to lightly sketch in large teeth around the mouth area. Then, change the eyes to be perfectly round circles. Lightly draw an upside-down heart over the nose area so your mask will look like a skull with a skeleton face.[11]
-
4Draw your favorite Day of the Dead designs on other areas of the skull. Traditional designs include flowers, hearts, curlicues, paisley patterns, and so on. You can place your designs anywhere you'd like. Drawing flower petals around the eyes is a traditional look, but you can be as creative as you want.
- If you need inspiration or want to see traditional designs, type “Day of the Dead” mask into your search engine and check out the image results that pop up.[12]
-
5Fill in the eye and nose shapes with black paint or permanent marker. If you’re using black craft paint, use a paintbrush to fill in the eye circles and upside-down heart nose completely. A black Sharpie will create the same effect, so use whatever tools you feel the most comfortable with or have handy.[13]
- If you'd like, draw or paint a black line between the upper and lower teeth and extend the line to the hollow areas under each cheekbone. Then, fill in the small hollow on each side to create a skeleton mouth.
-
6Use colorful paint or permanent markers to fill in your sketched designs. Day of the Dead masks are traditionally very bright, so feel free to use any color palette that you like. Yellow, blue, red, orange, and green are all great options for your mask.[14]
- Give paint an hour or so to dry before moving on to the next step. If you used permanent marker, this should only take a few minutes.
-
7Outline the designs with black 3D paint or a black Sharpie. Make sure paint is totally dry before you do this! Then, outline all of your designs in black for a traditional look. Using a black permanent marker is an easy option, but you can also create cool texture with squeeze tubes of 3D paint.[15]
- You can buy 3D paint in squeeze tubes from any craft store.
- Try accenting the black outlines with gold or silver for an even cooler look!
-
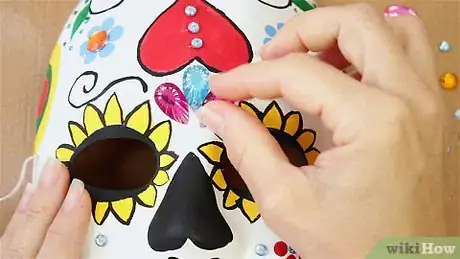
8Hot glue small craft gems to the skull, if desired. Adding small gems to some of the empty spaces on the skull can take your mask to the next level. Use hot glue to attach the gems or buy the stick-on variety and press them on wherever you like.[16]
- To make your design super durable, you may want to add hot glue to the stick-on variety, as well.
- You can buy small craft gems at any craft store or order them online.
-
9Let the mask dry overnight before you wear it. Put the mask somewhere out of the way and let the glue and paint set. At minimum, allow 5-6 hours for this. If possible, let everything set overnight so your mask will be extra durable.[17]
- When you're ready to wear your mask, hold it in front of your face and stretch the elastic band over your head to keep it in place.
Warnings
- Be careful with hot glue! If you’re working with young children, it’s best to handle the hot glue yourself.⧼thumbs_response⧽
Things You’ll Need
Creating a Simple Paper Mask
- Printer paper or construction paper
- Scissors
- Black Sharpie (optional)
- Markers or crayons
- Glitter glue (optional)
- Stick-on rhinestones (optional)
- Sequins (optional)
- Puffy paint (optional)
- 1 wooden popsicle stick per mask
- Hot glue or school glue
Making a Strap-On Costume Mask
- Cardboard or plastic garbage bags
- Plain white craft mask (plastic or cardboard)
- Scissors
- Pencil
- Craft paint or permanent markers
- 3D paint (optional)
- Small craft gems (optional)
- Hot glue (optional)
References
- ↑ https://growingupbilingual.com/day-of-the-dead-mask-craft/
- ↑ https://www.createcraftlove.com/day-of-the-dead-mask-printable/
- ↑ https://www.createcraftlove.com/day-of-the-dead-mask-printable/
- ↑ https://dayofthedead.holiday/sugar-skull/
- ↑ https://www.triedandtrueblog.com/dia-de-los-muertos-free-printable/
- ↑ https://growingupbilingual.com/day-of-the-dead-mask-craft/
- ↑ https://www.createcraftlove.com/day-of-the-dead-mask-printable/
- ↑ https://dayofthedead.holiday/history/
- ↑ https://www.youtube.com/watch?v=IMb6j7KMEKE&feature=youtu.be&t=17
- ↑ https://www.youtube.com/watch?v=IMb6j7KMEKE&feature=youtu.be&t=42
- ↑ https://www.youtube.com/watch?v=IMb6j7KMEKE&feature=youtu.be&t=50
- ↑ https://www.youtube.com/watch?v=IMb6j7KMEKE&feature=youtu.be&t=35
- ↑ https://www.youtube.com/watch?v=IMb6j7KMEKE&feature=youtu.be&t=64
- ↑ https://www.youtube.com/watch?v=IMb6j7KMEKE&feature=youtu.be&t=72
- ↑ https://www.youtube.com/watch?v=IMb6j7KMEKE&feature=youtu.be&t=76
- ↑ https://www.youtube.com/watch?v=IMb6j7KMEKE&feature=youtu.be&t=95
- ↑ https://www.youtube.com/watch?v=IMb6j7KMEKE&feature=youtu.be&t=95
