This article was co-authored by wikiHow Staff. Our trained team of editors and researchers validate articles for accuracy and comprehensiveness. wikiHow's Content Management Team carefully monitors the work from our editorial staff to ensure that each article is backed by trusted research and meets our high quality standards.
There are 16 references cited in this article, which can be found at the bottom of the page.
The wikiHow Video Team also followed the article's instructions and verified that they work.
This article has been viewed 4,124,910 times.
Learn more...
It's easy to lose a case for a CD or DVD. However, instead of buying another one immediately, you can craft a small sleeve for the disk out of paper in no time. The sleeves take less than a minute to create. Once you know how to construct one, you can make lots more.
Steps
Trying a Traditional Sleeve
-
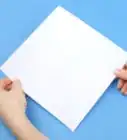
1Put a CD or DVD at the top of the paper. Lay a piece of paper in front of you in the portrait position. The short sides should be at the top and bottom. Then, place your CD, or DVD, at the top of the paper. As it's in the portrait position, the top side will be shorter. Align the top of the disk with the top edge.[1]
- This step determines the size of the sleeve.
-
2Fold the vertical sides inwards. Keep the disk where it is. Fold the right vertical side of the paper to the center of the disk. Then, fold the left side to the center too. Fold the paper as if you were trying to wrap the disk inside.[2]
- The folds won't cover the entirety of the disk.
Advertisement -
3Remove the disk and crease the vertical edges. Take the disk out, making sure not to disrupt the folds. Crease the edges so they're flat and defined once the disk is removed. The paper should be able to hold its shape on its own.[3]
-
4Place the disk in the center of the paper and fold the bottom side upwards. Put the disk back on top of the paper so that it sits on the folds. Bend the bottom horizontal edge up to the disk in the center. The top of this fold should extend just above the central hole of the disk. Remove the disk once you're finished.[4]
- Make the fold stronger by creasing it with your thumb, making the edge flat and defined.
-
5Pull the inside edges of the bottom fold out. Rotate the paper so the fold you just made is furthest away from you. Bend the fold upwards. Pull the inside edges out, so the fold resembles an arrow. The parts of excess paper on the sides are called 'ears.'[5]
-
6Fold the ears around the vertical edges. Hold the ears you've just created. Fold them in along the vertical edge back into the original fold. You should see a paper pocket when both ears are creased back.[6]
-
7Fold the top corners of the sleeve in, then insert the disk. Rotate the paper so the unfolded side is farthest away from you. Fold both of the top corners back in. The point of these corners shouldn't reach the inner folds of the sleeve. Then, put the disk in the pocket you made earlier.[7]
-
8Fold the top of the sleeve down and tuck it into the pocket. Fold the top side of the sleeve down. The two corners you made will act as latches. Fold them into the pocket as well, over the disk.[8]
- You can use a marker to label the other side of the sleeve with whatever is on the disk.

Using an Envelope Style Fold
-
1Lay the paper out on a flat surface and fold the top left side down. Put your piece of paper on a table in the landscape position. A long side should be closest to you. Grab the top left corner of the paper and fold it down to the lower edge, approximately 2 inches (5.1 cm) from the bottom right corner. This is your first fold.[9]
- Run your thumb along the curved edge of this fold to flatten it down.
-
2Fold the top right edge to the horizontal edge of the first fold. Grab the top right corner of the paper. Crease it inwards so that the corner touches the vertical edge of the first fold.
- The top of the paper will now resemble a pyramid. This is your second fold.[10]
-
3Unfold the first crease and turn the paper 90 degrees counter-clockwise. Open out the first fold. You will see a long crease down the middle of the paper. Turn the paper 90 degrees counter-clockwise so that the short edge is facing you.[11]
-
4Grab the top right corner and fold it in. Grab the top right corner of the paper. Then, fold the corner to the center. The top edge of this fold will align perfectly with your second fold. Flatten down the crease with your thumb. This is your third fold.[12]
-
5Crease your first fold back in, then flip the paper over. Keep the paper in the same position. Then, re-do your first fold. It will naturally fall back into its position due to the pre-existing crease.
- Once you've flattened all the folds, turn the paper over so the flat edge of the first fold is closest to you.[13]
-
6Fold the small remaining triangle inwards and re-orientate the paper. A small triangle remains unfolded. Fold this triangle onto the back of the paper. This is your fourth fold. Then, re-orient the paper 90 degrees counter-clockwise so the short side of the folded paper is closest to you.[14]
-
7Fold the bottom of the paper upwards, stopping at the fourth fold. Take a note of where the bottom of the fourth fold is. Grab the bottom of the paper and fold it upwards so that the crease aligns with the bottom of your fourth fold. You will now have made a pocket, with a small triangle pointing upwards.[15]
- Flatten all the edges so that they're defined and sharp.
-
8Put your disk in the pocket and fold the triangle downwards. Slide a disk into the paper fold. It should fit snugly. Then, fold the triangle at the top of the sleeve down over the disk. This will keep the disk in place.[16]
Community Q&A
-
QuestionBoth ways look similar. Is there another way to make a CD sleeve from paper?
 Community AnswerYes, if you know how to make a paper envelope, if you make one large enough it will fit. Or you could make a paper box that is big enough to have a disc in it, you can put a thin tube in the middle and you can have multiple discs in there.
Things You'll Need
- 8.5 x 11 inch (215.9 x 279.4mm) A4 paper
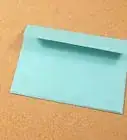
- A CD or DVD

References
- ↑ https://youtu.be/g7_fDRghH8A?t=19
- ↑ https://youtu.be/g7_fDRghH8A?t=24
- ↑ https://youtu.be/g7_fDRghH8A?t=33
- ↑ https://youtu.be/g7_fDRghH8A?t=38
- ↑ https://youtu.be/g7_fDRghH8A?t=48
- ↑ https://youtu.be/g7_fDRghH8A?t=58
- ↑ https://youtu.be/g7_fDRghH8A?t=65
- ↑ https://youtu.be/g7_fDRghH8A?t=70
- ↑ https://youtu.be/HA0q2l6tGvg?t=14
About This Article