This article was co-authored by wikiHow Staff. Our trained team of editors and researchers validate articles for accuracy and comprehensiveness. wikiHow's Content Management Team carefully monitors the work from our editorial staff to ensure that each article is backed by trusted research and meets our high quality standards.
There are 10 references cited in this article, which can be found at the bottom of the page.
The wikiHow Video Team also followed the article's instructions and verified that they work.
This article has been viewed 38,722 times.
Learn more...
If you have old stockings or worn-out pantyhose, or if you’re just interested in learning how to make delicate artificial flowers, crafting stocking flowers may become your new favorite hobby. With just a handful of materials, you can create beautiful arrangements that allow you to enjoy your favorite blooms all year long.
Steps
Forming the Petals
-
1Buy gold or copper crafting wire from your local craft store. Any kind of crafting or floral wire that is thin and flexible will work for this project, but gold or copper will look lovely. Even though the wire will be covered with stocking, it’ll still be slightly visible.[1]
- You’ll also need wire cutters and a small pair of pliers so that you don’t hurt yourself on the wire.
- In general, 24-34 gauge (0.51-.016mm) wire will work best for this type of project, though slightly thicker wire would work, too.
-
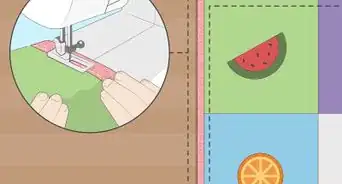
2Choose a flower to replicate for your project. You may already have a flower in mind, and the great thing about this type of craft is that you can make almost any flower with enough time and patience. You just need to know the shape of the petals and how many you need for each flower. Look at photos of your favorite flowers to get inspired. Here are a few of the more common flowers that are great for beginners:[2]
- Create a tulip with 5 petals that come to a rounded tip at the end.
- Make a pansy with 3 round petals and 2 smaller ones in the center.
- Craft a daisy with 10 oblong petals.
- Form an orchid with 5 round petals and 3 smaller ones in the center.
Advertisement -
3Cut pieces of wire that are the same size for however many petals you need. About 6 inches (150 mm) of wire will be large enough to create most petals, and you can always trim away excess material if you need to. Safely cut through the wire with a pair of wire cutters, and set the pieces to the side so they don’t get lost.[3]
- A 6 in (150 mm) piece of wire will make a petal that’s about 2.5 in (64 mm) long.
- You can also make larger flowers by cutting longer pieces of wire.
-
4Create a loop with each piece of wire and twist the ends together. To make sure each petal is the same size, wrap the wire around something small, like a pill bottle, the rod of a curling iron, or a tube of lipstick. Twist the ends together with a pair of jewelry pliers and leave about 1⁄2 in (13 mm) of wire hanging off of the petal.[4]
- You’ll use the small remaining section of wire to securely attach each petal to the stem later on.
- You can trim off excess wire with a pair of wire cutters.
-
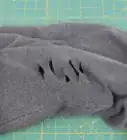
5Create a ridge on your petals by crimping the wire with jewelry pliers. Some petals, like those on anemones, balsams, buttercups, and carnations, don’t have perfectly smooth edges. Add textural detail by taking your pliers and gently bending the wire along the edge to create soft ridges.[5]
- This is where having a photo of the flower can come in handy. But remember, it’s okay if there are some imperfections to your creation!
-
6Pull a piece of stocking over the petal and tie it in place with a piece of thread. You can pre-cut pieces of stocking or you can work with one big piece and cut it as you go. Wrap the stocking over the petal and pull it taut so there aren’t any loose sections. Take a piece of thread and wrap it around the bottom of the petal several times before knotting it.[6]
- If you want the petals to be darker in color or less opaque, wrap a second piece of stocking over the first.[7]
- Pink, purple, and yellow stockings can create a lot of different kinds of flowers, though you can get creative with a variety of colors just depending on what you have available.
- If you don’t have the right colored stockings already at home, you can buy pairs from the dollar store or you could even use food dye to color beige stockings yourself.
-
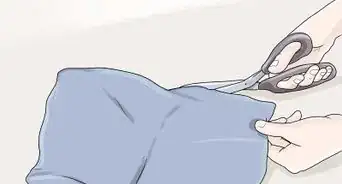
7Cut away any excess stocking material from the petal. Take your scissors and carefully cut just beneath the knot you made. It may help to stretch the stocking away from the petal so you can get as close to the knot as possible.[8]
- If there’s enough excess material, you can use it to create another petal.


Attaching the Petals to the Stem
-
1Cut a 6–8 in (150–200 mm) piece of wire to use as the flower’s stem. Remember, you can always cut off excess wire, but you can’t as easily add more length. If you’re uncertain of how long you want the stem to be, add an additional 1–2 inches (25–51 mm) on top of the original 6–8 inches (150–200 mm).[9]
- If you do decide you want the stem to be longer, you can attach more with florist tape.
-
2Loop the end of the stem around the middle of 3-4 plastic stamens. Purchase stamens from your local craft store—you can generally buy a large pack for just a few dollars, and there are a variety of colors you can choose from. Wrap the end of the wire from the stem around the middle of the stamens and fold them so they’re all pointing in the same direction.[10]
- Some flowers have just a few stamens, while others have dozens; use your reference picture to make your flower as accurate as possible.
- On a real flower, the stamen is made up of an anther and a filament. They’re the part of the flower that sticks up out of the center, and they’re responsible for carrying pollen.[11]
-
3Tie the first petal to the stem using thread. To most accurately resemble a flower, the smaller petals should be closest to the stem, so pick one of your smaller petals to start with. Place it against the stem so that the bottom of the petal, where the wires are twisted together, rests against the section of wire that’s holding the stamens. Wrap thread around the petal and wire 5-6 times before knotting the thread and trimming the end.[12]
- For the sturdiest flower, you’ll want to attach one petal at a time. This will reduce the chance that any of them will come loose.
-
4Add the additional petals, slightly overlapping them to create a full bloom. As you position the next petal, let it overlap about 1/3 of the first one. Wrap the thread around, knot it, and cut the end. Once the smaller petals are in place, add the larger ones using the same technique.[13]
- Don’t worry about the thread getting too thick around the stem. It’ll just make the stem look more realistic once it’s covered with florist tape.
-
5Wrap green florist tape around the stem from the bottom of the petals down. At the top of the stem, wrap the tape around the wire and thread 4 or 5 times to make sure they’re totally covered. Continue wrapping the tape around the wire in a downward spiral, overlapping the tape as you go to create a thick, sturdy stem.[14]
- You could also use brown florist tape if you’re creating a flower that grows on a brown stem rather than a green one, like meadowsweet or flowers that bloom on trees.
-
6Adjust the petals if needed by bending them to make them look more realistic. You may need to gently bend the petals backward so the bloom looks like it’s opening up, or you may need to bend them inward so they look more crowded. You may want to push the sides in to make them curved, or you could just move them around a little to make sure the flower looks symmetrical.[15]
- The great thing about wire is that you can bend and re-bend it as needed. If you make a mistake, simply push the wire back and try again.

Adding Final Touches
-
1Use a marker to draw small details on each petal. You could color around the edge of each petal to create a color gradation, or you could add fine lines to create a specific pattern unique to the flower you made. Opt for a fine-tipped marker rather than a broad one so that you have more control.[16]
- Before drawing on your completed flower, test the marker on a scrap piece of stocking. If the ink bleeds and spreads over the petal, you may want to try a different kind of marker or skip this step altogether.
-
2Add small green leaves to the stem to make your flower more realistic. Create the leaves the same way you did the petals, with wire and green stocking. Tie the leaves to the stem at varying heights, then wrap green florist tape around them to keep them in place.[17]
- Similarly, you could add multiple blooms to a single stem if you want.
-
3Attach buds that haven’t blossomed yet to add more detail. Take two small pieces of wire, create loops with them, and then wrap one around the other to create a circle. Bend the wires slightly to make the circle into an oblong shape, then cover it with stocking and attach it to the stem with thread and florist tape.[18]
- You could even give the bud its own short stem and connect that to the larger one with tape.
-
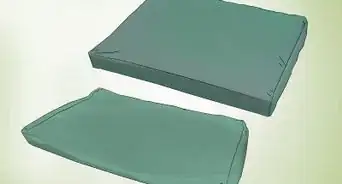
4“Pot” your flowers in a container filled with floral foam to finish your project. Buy floral foam from your local craft store and cut a piece to fill the bottom of a small pot or container. Stick the end of the wire into the foam and position it so it’s bending the way you want.[19]
- Add multiple flowers to a single pot to create a beautiful display.


Community Q&A
-
QuestionHow do I place net in it?
 T. ChinsenTop AnswererIf you are looking to use tulle or nylon netting as a substitute for stockings, it will work for making larger petals. The material is much stiffer, so it will not have as much curvature like stocking material. Follow the instructions in the article using the tulle or nylon netting with a larger petal size.
 -
QuestionHow should I display stocking flowers in a showcase?
 Community AnswerPut them in a pot that seems a perfect fit for the flowers.
 -
QuestionHow is the petal made, using nylon and/or tulle?T. ChinsenTop AnswererSteps 3 & step 4 of the article show how to cut the material and stretch it over the wire to make a petal.
Warnings
- Be careful while you work with the wire. The ends tend to be pretty sharp and can poke or scratch you.⧼thumbs_response⧽
Things You’ll Need
- Colored stockings or pantyhose
- Crafting or floral wire
- Green florist tape
- Wire cutter
- Pliers
- Thread
- Pack of stamens

References
- ↑ https://sewguide.com/make-fabric-flowers/
- ↑ https://diy-enthusiasts.com/diy-home/flower-craft-ideas-adults-make-nylon/
- ↑ https://diy-enthusiasts.com/diy-home/flower-craft-ideas-adults-make-nylon/
- ↑ https://diy-enthusiasts.com/diy-home/flower-craft-ideas-adults-make-nylon/
- ↑ https://diy-enthusiasts.com/diy-home/flower-craft-ideas-adults-make-nylon/
- ↑ https://youtu.be/3LyhJNi60Q0?t=66
- ↑ https://youtu.be/3LyhJNi60Q0?t=101
- ↑ https://youtu.be/3LyhJNi60Q0?t=89
- ↑ https://www.enchantedlearning.com/subjects/plants/printouts/floweranatomy.shtml
- ↑ https://diy-enthusiasts.com/diy-home/flower-craft-ideas-adults-make-nylon/
- ↑ https://www.enchantedlearning.com/subjects/plants/printouts/floweranatomy.shtml
- ↑ https://youtu.be/3LyhJNi60Q0?t=231
- ↑ https://youtu.be/3LyhJNi60Q0?t=231
- ↑ https://youtu.be/3LyhJNi60Q0?t=376
- ↑ https://diy-enthusiasts.com/diy-home/flower-craft-ideas-adults-make-nylon/
- ↑ https://diy-enthusiasts.com/diy-home/flower-craft-ideas-adults-make-nylon/
- ↑ https://youtu.be/3LyhJNi60Q0?t=434
- ↑ https://youtu.be/3LyhJNi60Q0?t=516
- ↑ https://diy-enthusiasts.com/diy-home/flower-craft-ideas-adults-make-nylon/
About This Article

To make a stocking flower, bend 5 small pieces of wire into oval or teardrop shapes, which will form the petals, and stretch cut pieces of nylon stockings over each petal. Next, bend 5 pieces of wire in half to form the stamens and attach them to one long piece of thin wire, which will act as the stem. Then, wrap florist's tape around the stamen pieces and stem to bind them. Finally, arrange the 5 petals around the stamen centerpiece and secure them with florist's tape to complete the flower. For tips on creating a bouquet of stocking flowers, read on!