This article was co-authored by Guy Gabay. Guy Gabay is a Solar Energy Contractor and the CEO of AmeriGreen Builders, a full-service solar energy, roofing, HVAC and window installation company based in the greater Los Angeles, California region. With over eight years of experience in the construction industry, Guy leads the AmeriGreen team focusing on bringing an educational approach to energy efficient home upgrades. Guy holds a B.S. in Marketing from California State University - Northridge.
wikiHow marks an article as reader-approved once it receives enough positive feedback. In this case, 89% of readers who voted found the article helpful, earning it our reader-approved status.
This article has been viewed 575,893 times.
Making dye solar cells is a fun way to see how natural pigments can be used to capture solar energy and generate electricity. By using titanium oxide, carbon from graphite, and natural dye made from berry juice, you’ll be able to see on a very small scale how solar energy panels work. Keep in mind that commercial solar panels use silicon for the solar cells, so the ones you make in this experiment are not the same as commercial-grade cells. These homemade solar cells are just meant to demonstrate how a solar cell can convert solar energy into electricity. You can do this experiment in a classroom setting or even at home in your kitchen!
Steps
Creating a Titania Electrode
-
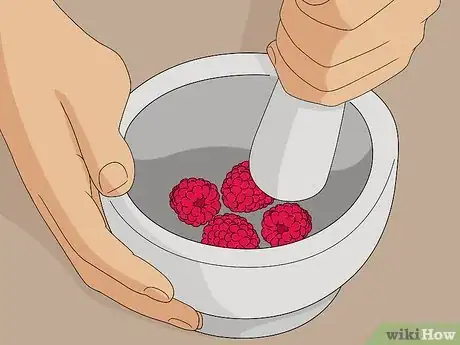
1Crush 3-4 blackberries or raspberries using a mortar and pestle. Place the berries into the mortar bowl. Pound them firmly with the pestle until they turn into a uniform paste, which will be your dye.[1]
- If you don’t have a mortar and pestle, you could crush the berries in a small bowl or dish using a spoon or fork.
- You can use either frozen or fresh berries for this. If you use frozen berries, let them thaw first, so they’re easier to crush.
-
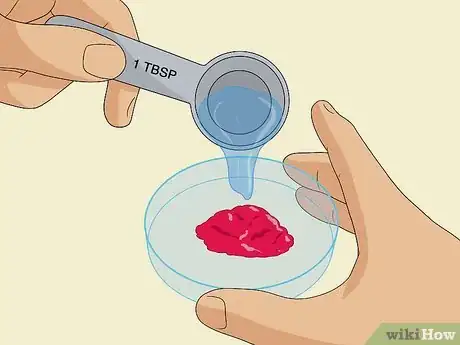
2Mix the berries with 1 US tbsp (15 mL) of distilled water in a petri dish. Transfer the berry paste to a petri dish and pour in about 1 US tbsp (15 mL) of distilled water. Stir the mixture together using a glass rod or a similar utensil.[2]
- If you don’t have a petri dish, you can use a similar clean glass or plastic container.
- The water will help turn the berry paste into a liquid dye that will soak in more easily.
Advertisement -
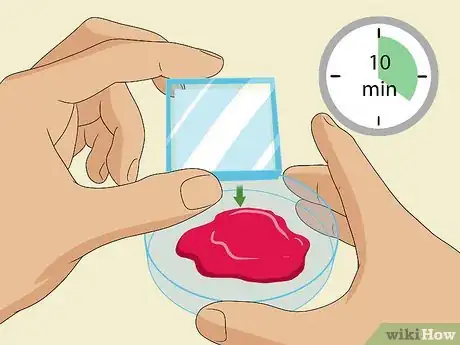
3Put a titanium-oxide-coated glass slide into the dye, face-down, for 10 minutes. The white side of the glass slide is the side with the titanium oxide coating. Place the slide coated-side-down into the petri dish filled with the berry dye and let it soak for about 10 minutes.[3]
- Titanium-oxide-coated glass slides are also known as ITO-coated (indium tin oxide coated) or FTO-coated (fluoride-doped tin oxide coated) slides. They have slightly different coatings but are both electrically conductive glass slides and with work equally well for this experiment.
- You can buy glass slides online. A set of 25 costs under $40 USD.
- Some slides have a transparent coating, in which case the side that feels rougher is the side that should go face-down.
-
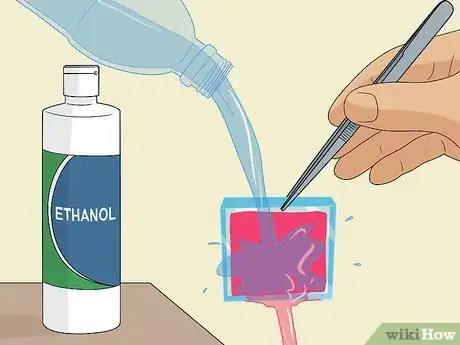
4Pick the slide up with tweezers and rinse it with distilled water and ethanol. Carefully grab the slide by a corner using a pair of tweezers and lift it up out of the petri dish. Pour distilled water carefully over the slide to rinse off the excess dye, then repeat this with ethanol alcohol to thoroughly clean it.[4]
- The titanium oxide coating must be completely stained a deep reddish-purple color. If you can still see the white coating, place the slide back into the berry dye coated-side-down for another 10 minutes.
-
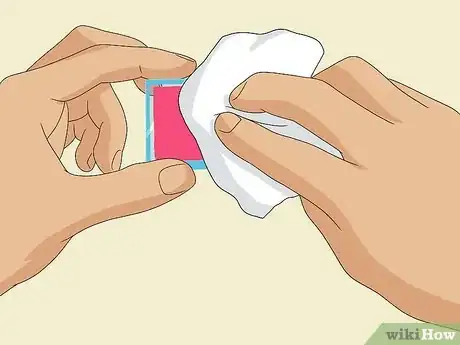
5Dry the slide gently by blotting it with a clean tissue. Dab gently at the slide with a clean tissue to soak up any excess moisture left over from rinsing it with the distilled water and ethanol alcohol. Set it aside and move on to the next part of the experiment.[5]
- This dyed slide is your titanica electrode and will form half of your solar cell.
Making a Counter Electrode
-
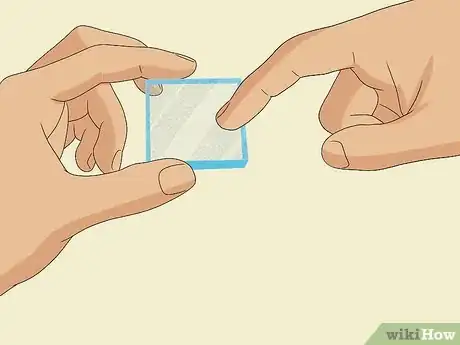
1Feel both sides of a glass slide with your fingernail to find the conductive side. Scratch both sides of a conductive glass slide gently with your fingernail and feel for roughness. The side that feels rougher is the conductive side.[6]
- Note that this is a second, clean slide, different from the slide you dyed in the first part of the experiment.
- The conductive side is also sometimes marked with a “+” sign or may be a white color.
- You can also test a slide with a multimeter to find the conductive side. Set your multimeter to measure in Ohms and place both leads against 1 side of the glass. Repeat this for the other side. The side that measures closest to 0 Ohms is the conductive side.[7]
- You can use either an ITO-coated, FTO-coated, or TCO-coated (transparent conductive oxide coated) conductive glass slide for this.
-
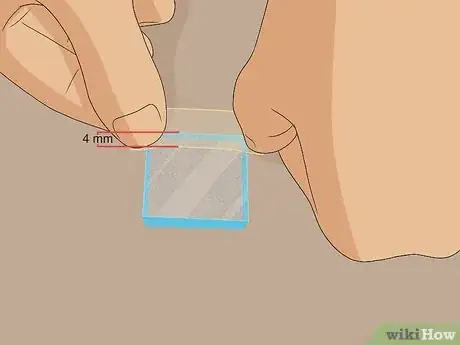
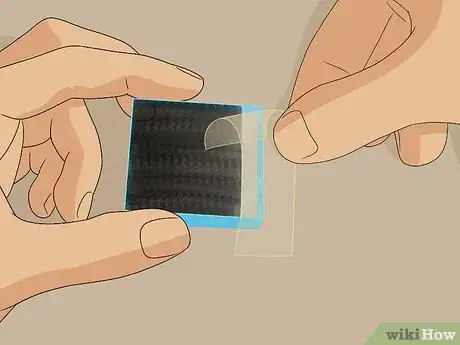
2Cover 4 mm of the conductive side of the slide at 1 edge with a piece of tape. Gently place the glass slide conductive-side-up on a flat surface in front of you. Stick a piece of tape over 1 edge of the slide, so that it only covers about 4 mm of the slide. This prevents you from coating this portion with carbon.[8]
- You can use a piece of tape that is longer than the slide and stick the excess to the surface in front of you to stabilize the slide.
- Any kind of easily removable tape is fine for this. Just use what you have handy!
-
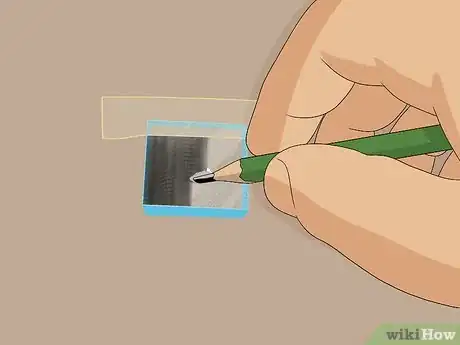
3Rub a graphite pencil over the conductive surface of the slide to coat it. Turn a sharpened graphite pencil on its side to expose the most surface area of the lead. Rub the graphite back and forth all over the conductive side of the glass slide to coat it in an even layer of carbon from the graphite.[9]
- Graphite is a form of carbon and will act as a catalyst to facilitate the chemical reactions in your solar cell.
-
4Remove the tape without touching the graphite-covered surface of the slide. Carefully peel off the tape and discard it. Be careful not to touch the surface of the slide that you just coated in graphite because it will easily rub off.[10]
- This carbon-coated glass slide is your counter electrode and forms the other half of your electrode.
Assembling Your Solar Cell
-
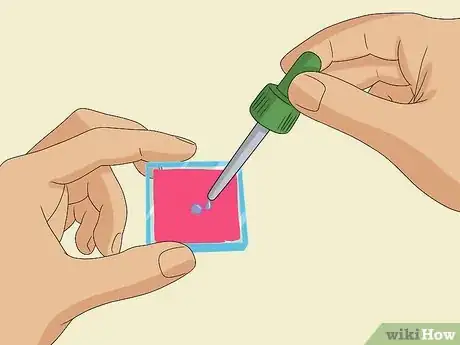
1Squeeze 1-2 drops of an iodide electrolyte solution onto the dyed glass slide. Gently place the dyed glass slide stained-side-up in front of you. Use a pipette to squeeze 1-2 drops of iodide electrolyte solution onto the dyed coating.[11]
- If there is any excess solution near the edges of the slide, where there is no dyed coating, wipe it off with a clean tissue.
- You can buy a bottle of iodide electrolyte solution online for about $30 USD or less.
-
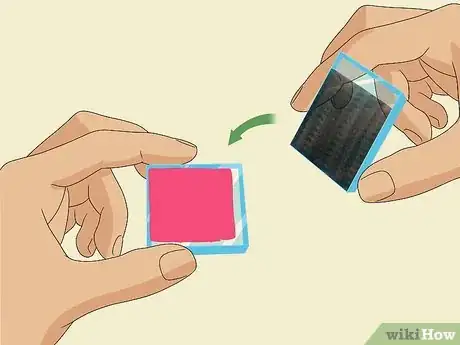
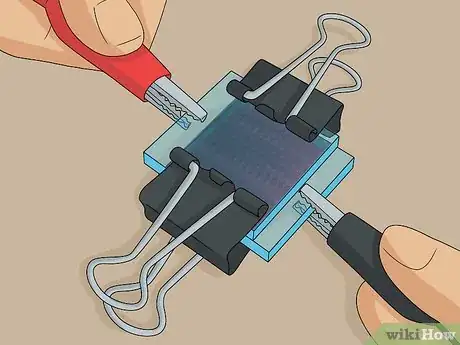
2Offset the carbon-coated slide, graphite-side-down, on top of the dyed slide. Carefully pick up your graphite-coated slide by the sides, without touching the carbon coating. Flip it over on top of the dyed slide and offset it so that the strip that you didn’t cover with graphite is exposed on 1 side and there is a clear strip of the dyed slide exposed on the opposite side.[12]
- These 2 conductive faces of the slides, sandwiched together face-to-face, form the inside of your solar cell.
-
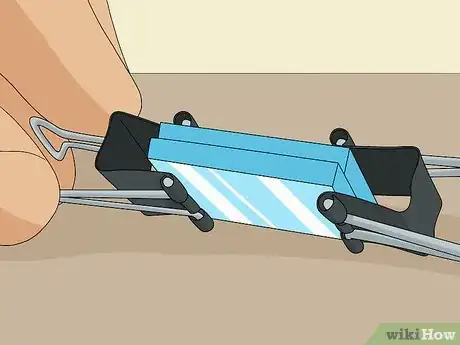
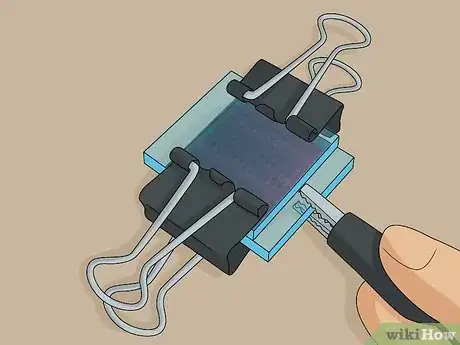
3Clip the slides together at the 2 non-exposed edges using binder clips. The exposed edge of each slide is where you test the solar cell, so don’t put the clips here. Carefully clip the slides together at the 2 other sides where the plates are sandwiched together with no exposed edges.[13]
- This is your completed solar cell. It will work until the electrolyte solution evaporates, at which point you can unclip the slides and add more solution or simply squeeze more solution onto 1 of the edges and let it seep in.
Testing the Solar Cell
-
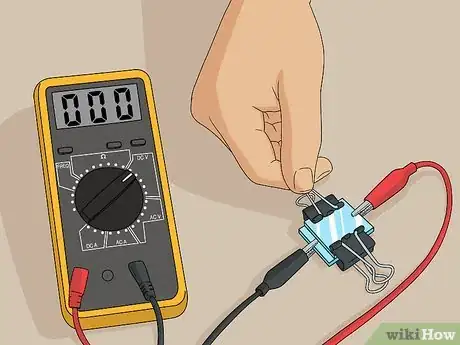
1Clip a multimeter’s negative lead to the exposed edge of the dyed slide. The negative lead is the black cable and has a “-” sign on it. Squeeze open the alligator clip at the end of this lead cable and clip it onto the exposed edge of the dyed slide on your solar cell.[14]
- You can tell which slide is the dyed slide because you can see the reddish-purple tinted coating through the transparent outside.
- You can purchase a basic multimeter with alligator clip leads online for about $12 USD.
-
2Put the multimeter’s positive lead on the exposed edge of the carbon slide. The positive lead is the red cable and has a “+” sign on it. Open up the alligator clip on this lead and stick it on to the exposed edge of the graphite-covered conductive slide on your solar cell.[15]
- You can tell which slide is the graphite coated slide because it will look grayish when you look through that side of the solar cell.
-
3Measure the voltage of the solar cell under full sun illumination. Set your multimeter to measure in volts and place your solar cell in full sunlight. Read the number on the multimeter to see how many volts of electricity your solar cell is generating.[16]
- As an alternative to natural sunlight, you can use an incandescent or halogen lamp.
- The electricity output will vary based on the strength of the light source, but this type of homemade solar cell typically generates between about 0.4 and 0.6 volts of electricity.
Community Q&A
-
QuestionWhich chemical reaction makes an electric induction from these?
 Community AnswerThe sun's photons hit the titanium oxide. It grabs an electron, but loses one at the same time. The traveling electron makes the electronic field.
 -
QuestionIs it okay to use aluminum sheets as a substitute for glass?
 Community AnswerThe glass works because a side is coated by tin oxide, the rest of the glass doesn't really conduct or it would ground out. To get aluminum to work you would cover the sides and bottom with a non-conductive surface. Shrink wrap the bottom and sides or cover them in a layer of rubber or plastic.
 -
QuestionHow do I prepare solar LED lights?
 Community AnswerConnect the solar plate to a number of resistors to check the current, then attach a flick button and an LED to it.
Warnings
- Your solar cell won’t operate if the dyed slide is not fully stained or if you accidentally rub the graphite off the carbon-coated slide.[18]⧼thumbs_response⧽
Things You'll Need
- 1 titanium-oxide-coated glass slide
- 1 additional conductive glass slide
- Mortar and pestle
- Berries (blackberries or raspberries)
- Distilled water
- Petri Dish
- Glass rod
- Tweezers
- Ethanol alcohol
- Graphite pencil
- Tape
- Iodide electrolyte solution
- Pipette
- Binder clips
- Multimeter with alligator clip leads
- Sunlight (or incandescent or halogen lamp)
References
- ↑ http://uwmemc.org/education/lessons/tio2-solar-cell/
- ↑ https://www.solideas.com/solrcell/english.html
- ↑ http://uwmemc.org/education/lessons/tio2-solar-cell/
- ↑ http://uwmemc.org/education/lessons/tio2-solar-cell/
- ↑ https://www.solideas.com/solrcell/english.html
- ↑ https://www.solaronix.com/documents/dye_solar_cells_for_real.pdf
- ↑ http://uwmemc.org/education/lessons/tio2-solar-cell/
- ↑ http://uwmemc.org/education/lessons/tio2-solar-cell/
- ↑ http://uwmemc.org/education/lessons/tio2-solar-cell/
- ↑ http://uwmemc.org/education/lessons/tio2-solar-cell/
- ↑ https://www.solideas.com/solrcell/english.html
- ↑ https://www.solaronix.com/documents/dye_solar_cells_for_real.pdf
- ↑ http://uwmemc.org/education/lessons/tio2-solar-cell/
- ↑ https://www.solaronix.com/documents/dye_solar_cells_for_real.pdf
- ↑ https://www.solaronix.com/documents/dye_solar_cells_for_real.pdf
- ↑ https://www.solaronix.com/documents/dye_solar_cells_for_real.pdf
- ↑ http://uwmemc.org/education/lessons/tio2-solar-cell/
- ↑ http://uwmemc.org/education/lessons/tio2-solar-cell/
About This Article
To make a solar cell, you’ll need 2 glass plates, transparent tape, and a titanium dioxide solution. First, you’ll need to clean both plates with alcohol. Then, bake a titanium dioxide coating onto 1 of the plates before soaking it in a red dye. The other plate should be coated with carbon. Once the coatings are complete, place the carbon-coated plate on top of the titanium plate with an offset of about 5 millimeters. Finally, let a few drops of an iodide solution soak through the plates and wash off excess fluid. For tips on how to test your solar cell, read on!



-Step-12-Version-2.webp)
-Power-Generator-Step-11-Version-2.webp)
