wikiHow is a “wiki,” similar to Wikipedia, which means that many of our articles are co-written by multiple authors. To create this article, 36 people, some anonymous, worked to edit and improve it over time.
The wikiHow Video Team also followed the article's instructions and verified that they work.
This article has been viewed 667,472 times.
Learn more...
Shrinky Dinks are popular arts-and-crafts plastic sheets that people use to create designs. They saw great popularity with children in the 1980s. Shrinky Dinks are still sold by many major retailers and online commerce sites. You can use them to create colorful art or even jewelry. It’s also possible to make homemade versions of the plastic designs.
Steps
Creating a Design with Shrinky Dinks
-
1Draw, trace or copy an image onto a Shrinky Dinks plastic sheet.[1] Shrinky Dinks are usually sold as 8-inch by 10-inch plastic sheets.[2]
- Use colored pencils, markers, and ink on Shrinky Dinks. Use the colored pencil on the rough side of the sheets, and use Sharpie or permanent marker on the smooth side. Some Shrinky Dinks come pre-cut and with designs already outlined on them, and others will just be the plastic sheets.[3]
- Don’t use oily or waxy substances like crayons or oil paint on Shrinky Dinks because they will melt in high heat. Some sheets are machine-sanded frosted sheets that usually come in packs of 10. Some Shrinky Dinks come as non-sanded sheets, though; that version requires permanent markers.
- Printing from a computer directly onto a sheet is also possible, and works great with photos. Print letters in a mirror image so they can be read from the nicer shiny side once shrunk. Tracing is popular as well.
-
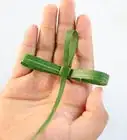
2Cut a design or punch holes in the plastic. You may want to add decorative edges to the plastic, cut out your design, or punch holes in it to make it into a necklace or charms for a bracelet.[4]
- Use paper punches if you want holes in the plastic. You might want holes if you are making jewelry or just for decoration. Punch any holes before you bake the Shrinky Dinks.
- Cut out your design with decorative or regular scissors.

Baking the Shrinky Dinks
-
1Line a cookie sheet tray with non-stick aluminum foil or baking paper. You could also create a mock tray by folding aluminum foil.
- Place the Shrinky Dink cut-out designs on the tray, rough side up. Leave space between the Shrinky Dink plastic shapes or they might stick together.
- Ovens should only be used with adult supervision.
-
2Preheat the oven at 325 degrees Fahrenheit. You probably only need to pre-heat the oven for 1 to 3 minutes. You can use a toaster oven or a conventional oven.
- Once the oven is preheated, put the tray with the Shrinky Dinks into the oven.
- You only need to bake them for 1 to 3 minutes. At first the Shrinky Dinks will curl up, but they will flatten back out. Once they flatten back out, bake for 30 more seconds.
-
3Remove the tray from oven. Use a potholder so you don’t burn yourself, and be careful.
- You could flatten your Shrinky Dinks more by pressing them flat with folded paper. However, this step may not be necessary.
- Let the Shrinky Dinks cool for a few minutes before handling them. The finished piece will shrink to 1/3 the original’s size, but it will become 9 times thicker. The artwork will be brighter and bolder, and you can more easily preserve it.


Making Homemade Plastic Designs
-
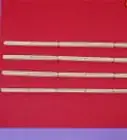
1Obtain a piece of #6 plastic. For example, this is the kind of plastic often used in salad bar containers.[5]
- Look for a “6” on the bottom of the plastic. The plastic needs to be relatively thick to work.
- Cut away the extra plastic until you are left with a flat square.
-
2Draw your design on the plastic, using permanent marker. It’s best with this kind of plastic not to use colored pencils.
- Once baked, the image will shrink to about a third of its size and will increase in thickness.
- Cut your design out and/or punch holes in it. Round the corners a bit as edges may sharpen upon baking.
-
3Preheat your oven to 350 degrees. Put the rack in the lowest oven position. The reason the plastic works for designs is because it’s made out of polystyrene just as Shrinky Dinks are.
- Make a tray out of aluminum foil by folding it until it’s thick enough to hold the plastic. Put the plastic designs on the tray.
- Bake for about 3.5 minutes. The plastic will curl, and then straighten itself out. Remove, and allow to cool.
-
4Finished.


Our Most Loved Articles & Quizzes


Community Q&A
-
QuestionWhich side should I lay my Shrinky Dinks on?
 Community AnswerColored-side up works best.
 -
QuestionI made earrings using Sharpies, but the ink came off on my ear while wearing it. Is there something I can do to prevent the ink from coming off?
 ZebraZoeyDrawsCommunity AnswerYou could try applying a clear top coat for nails to lock in the color. Clear top coats can be found in most pharmacies and super markets in the beauty aisle.
 -
QuestionCan other types of plastic be used as well, like #1 Plastic?
 Community Answer#1 Plastic should not be used due to possible toxins that can be released. (#1 Plastic has been known to release harmful toxins into liquids when left in heat for long periods of time.)

References
- ↑ http://www.michaels.com/shrinky-dinks/M10183880.html
- ↑ https://www.amazon.com/Shrinky-Dinks-Shrinkable-Plastic-Frosted/dp/B0042SYZDE#biss-product-description-and-details
- ↑ https://www.youtube.com/watch?v=hXiEqJfg-pM
- ↑ http://www.planetjune.com/blog/shrink-plastic-ring-tutorial/
- ↑ http://www.curbly.com/users/chrisjob/posts/2252-how-to-make-diy-shrinky-dinks
About This Article
If you have a Shrinky Dinks plastic sheet, create a design on the rough side of the sheets, or use permanent marker to decorate the smooth side. Cut the design into your preferred shape, then lay your shrinky dink on an aluminum-lined baking tray, rough-side-up. Preheat the oven to 325°F then put your Shrinky Dink into the oven for 1-3 minutes or until it’s flat. For advice on how to make your own Shrinky Dinks without a Shrinky Dink plastic sheet, scroll down!