This article was co-authored by wikiHow Staff. Our trained team of editors and researchers validate articles for accuracy and comprehensiveness. wikiHow's Content Management Team carefully monitors the work from our editorial staff to ensure that each article is backed by trusted research and meets our high quality standards.
This article has been viewed 23,002 times.
Learn more...
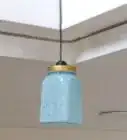
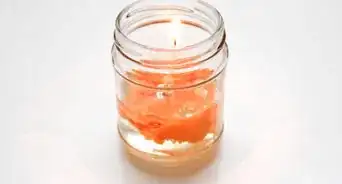
Sea glass jars are beautiful, with their soft colors and frosted finish. Used as candle votives, they can cast a soft, dreamy glow. Used as vases, they can give your home a fresh, country look. Unfortunately, store-bought sea glass jars can be very expensive. Luckily, they are easy to make, and only for the fraction of the cost. Making your own sea glass jars also allows you to choose the color, shape, size, and embellishments.
Steps
Using Mod Podge and Food Coloring
-
1Clean your jar with soap and water, pat it dry, then wipe it down using rubbing alcohol. The rubbing alcohol will help get rid of any oil residue that might prevent the Mod Podge from sticking to the surface. From now on, try to avoid handling the jar on the outside as best as you can; hold the jar by the inside.
-
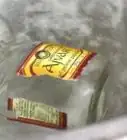
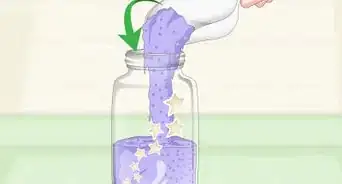
2Mix 3 tablespoons (45 milliliters) of Mod Podge with a 1 to 4 drops of food coloring in a small bowl. The most popular colors of sea glass are blue, green, and turquoise. You can also skip the food coloring to get white sea glass. There are no rules for sea glass, however, so you can use any color you want.
- If you can't find Mod Podge, or any other type of decoupage glue, you can make your own by mixing 3 parts white school glue with 1 part water.
- Try mixing food coloring colors. 3 drops of blue food coloring and 1 drop of green will give you a nice, ocean color.
- Consider adding a drop of dish soap. It will help make the glass look even more frosted.[1]
Advertisement -
3Paint the Mod Podge onto the glass. Turn the glass upside down, so the bottom of the glass is facing you. Using long, downward strokes, apply the colored Mod Podge using a flat paintbrush. You can also tap it on using a pouncer or foam brush instead.
-
4Wait for the Mod Podge to dry, then apply 2 to 3 more coats, if desired. Be sure to let each coat dry before adding another one.[2] The more coats you add, the more opaque your sea glass will be. It will also help conceal any streaks to a certain extent; keep in mind that there will almost always be some streaking.
- Let the jar dry on a sheet of wax paper. This way, it won't stick.
-
5Consider sealing the jar when you are finished. This will help lock the color, and prevent it from chipping off as easily. Be sure to use a matte finish. Once the sealer dries, you can turn the jar upright, and add some sealer to the top rim.
- Do a patch test first. Some people find that certain brands of sealer actually remove the Mod Podge.[3]


Using Frosted Glass Paint
-
1Wash and dry the jar, then wipe it down with rubbing alcohol. The rubbing alcohol will get rid of any oils that may prevent the paint from adhering to the surface.
-
2Brush or tap the paint on. If you are using a flat paintbrush, simply brush the paint on using long, downward strokes. Only paint in one direction for now.[4] If you are using a foam brush or a pouncer, gently tap the paint on instead. The foam brush/pouncer will give you a slightly-textured finish in the end.
- Hold the jar by sticking you hand inside of it. If the jar is small, stick a few fingers inside of it instead.
- If you are using a paintbrush, avoid going back over already-painted areas, or your paint will get streaky. You can always touch up any bare patches in later layers.
-
3Wait 15 minute for the jar to dry.[5] If you painted the bottom of the jar, you might want to place it upside-down instead. If your home is dusty, place a box over the jar, so that nothing gets stuck to the wet paint.
-
4Apply a 2 to 3 more coats of paint. Wait for each coat to finish drying before applying the next. If you brushed the paint on, be sure to paint in opposite directions each time; this will help conceal the brushstrokes. If you used a pouncer, simply continue tapping the paint on.
-
5Cure the paint. The easiest way to cure it is to let the jar sit undisturbed for 21 days. A much quicker way to cure it is to bake it. Each brand has slightly different instructions for baking the paint, so you will need to read the label on your bottle of paint.[6]


Using Tissue Paper
-
1Wash your jar, then wipe it down with some rubbing alcohol. This will ensure that the jar is perfectly clean and oil-free. Any oily residue left on the jar may keep the Mod Podge from sticking.
- This method will not give you perfect jars, but it is great for something quick and easy. It is also great for children.
-
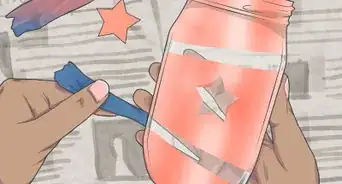
2Cut a sheet of tissue paper large enough so that you can wrap it around your jar. It might be a good idea to cut the tissue paper just a little bit bigger; it is always easier to cut something down than to add on to it.
- Your jar can be any color you want it to be, but white, light blue, light green, and pastel turquoise are the most popular colors for sea glass.
-
3Coat the jar with Mod Podge. Since you will be covering this layer up with tissue paper, it does not matter what finish of Mod Podge you use. If you can't find any Mod Podge, or even a similar decoupage glue, you can make your own by mixing together 3 parts white school glue and 1 part water.
-
4Wrap the tissue paper around the jar, gently smoothing down any ripples or creases as you do so. A quick and easy way to do this would be to set the jar down on top of the tissue paper, and then to roll it.
-
5Smooth the tissue paper over the curved top and bottom edges of the jar. To prevent the tissue paper from wrinkling, you can cut small slits into it. This will cause the tissue paper to overlap, and lay smoothly against the jar instead.
-
6Apply another coat of Mod Podge to the tissue paper. This will help seal the tissue paper. Make sure that you are using a matte finish, or your sea glass jar will turn out glossy.
-
7Wait for the Mod Podge to dry. After this, your jar is ready to use!


Warnings
- The glass paint jars are waterproof and dishwasher-safe, but you should not leave them standing in water, or the paint may bubble or flake off.⧼thumbs_response⧽
- The Mod Podge-based jars are not permanent or waterproof. If you get them wet, the paint/tissue paper will' flake off.⧼thumbs_response⧽
Things You'll Need
Using Mod Podge and Food Coloring
- Rubbing alcohol
- Glass jar
- Mod Podge, matte finish
- Food coloring
- Dish soap (optional)
- Paintbrush or foam brush
- Matte sealer (optional)
Using Frosted Glass Paint
- Rubbing alcohol
- Glass jar
- Translucent frosted glass paint
- Paintbrush or foam brush
Using Tissue Paper
- Rubbing alcohol
- Glass jar
- Mod Podge, matte finish
- Tissue paper
- Scissors
- Paintbrush or foam brush


References
- ↑ https://homedeco50.wordpress.com/2012/05/24/sea-glass-bottles/
- ↑ https://homedeco50.wordpress.com/2012/05/24/sea-glass-bottles/
- ↑ https://homedeco50.wordpress.com/2012/05/24/sea-glass-bottles/
- ↑ http://www.sandandsisal.com/2013/05/diy-sea-glass-vases.html
- ↑ http://www.sandandsisal.com/2013/05/diy-sea-glass-vases.html
- ↑ http://www.sandandsisal.com/2013/05/diy-sea-glass-vases.html
- ↑ https://craftboxgirls.com/blogs/articles/84231364-krylon-sea-glass-vases
About This Article