X
This article was co-authored by wikiHow Staff. Our trained team of editors and researchers validate articles for accuracy and comprehensiveness. wikiHow's Content Management Team carefully monitors the work from our editorial staff to ensure that each article is backed by trusted research and meets our high quality standards.
This article has been viewed 44,528 times.
Learn more...
Pulled sugar is a type of candy making process that results in beautiful, opaque pieces with a satin-like sheen. It is most commonly used to make sugar ribbons and bows, but you can sculpt other pieces with it too. The process is advanced, but you can still try it if you are new to candy-making.
Ingredients[1]
- 1 cup plus 2 tablespoons (270 milliliters) water
- 5 cups (450 grams) granulated sugar
- 2 tablespoons plus 1 teaspoon (35 milliliters) cider vinegar
- Candy flavoring oil (optional)
- Food coloring paste (optional)
Steps
Part 1
Part 1 of 3:
Cooking the Sugar
-
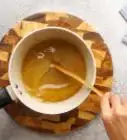
1Pour combine the sugar and water, and vinegar into a saucepan. Make sure that you use white granulated sugar. Don't use the golden-colored kind. Stir everything together until the sugar has mostly dissolved.
-
2Clip a candy thermometer to the inside of the saucepan. Make sure that the candy thermometer is not touching the bottom of the saucepan. The temperature is very important, so make sure that you use one. You can buy them in the baking section of an arts and crafts store, or wherever cooking supplies are sold.Advertisement
-
3Cook the sugar over high heat until it reaches 320°F (160°C). Do not stir the sugar while it is cooking, or it will crystallize. From time to time, Wipe the walls of the saucepan with a brush dipped in cold water. This will further prevent the sugar from re-crystallizing on the walls of the saucepan.
-
4Pour the solution onto silicone baking mats. Set up 3 to 4 silicone baking mats, then distribute the sugar evenly on them. The mat needs to be flexible. You will be using them to help fold the sugar until it cools enough to handle.
- Don't scrape the leftover candy out of the bowl.[2]
-
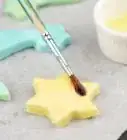
5Allow the candy to cool before adding any dyes and flavorings.[3] Let the candy cool off for a few minutes, then add a few drops of your flavoring oil and/or food coloring right onto the sugar. Stir it in using a wooden skewer and a zigzag motion. Use one color/flavor per mat.
- Do not use liquid food coloring. It won't mix into the sugar properly.
- Match the flavor to the color. Try lemon with yellow, lime with green, cherry with red, etc.


Advertisement
Part 2
Part 2 of 3:
Pulling the Sugar
-
1Set up two heat lamps and pull on a pair of vinyl gloves. Choose a color/flavor to start with and place it under one heat lamp. Place the other mats under a different heat lamps. These lamps will keep the sugar from hardening too fast while you work with it.[4] Lastly, pull on a pair of vinyl or plastic gloves.
-
2Fold the mat around the sugar mound a few times while it cools. Fold the mat in half lengthwise, pressing the sugar in between it. Unfold it, then fold it in half widthwise. Keep folding and unfolding the mat until the sugar starts to clump together and is no longer sticky.[5]
- The mat will stick to the sugar at first. You will have to pull it open hard and fast the first few times.[6]
- Alternatively, you can pull the outer edges of the sugar puddle towards the center until you get a clump.
-
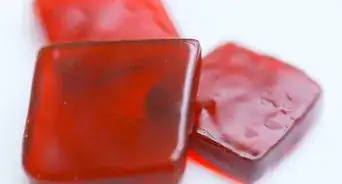
3Fold and pull the sugar 10 to 20 times. Roll the sugar across the mat with your palm first, then fold it in half. Grab both ends and pull on them. Keep folding and pulling the sugar until it starts to turn opaque and take on a satin-like sheen. Don't overdo it, however, or it will re-crystallize and lose its shine.[7]
- This folding and pulling process will take about 4 to 5 minutes.[8]
-
4Fold and pull the other sugar mounds. Once you have one mat complete, start working on the next one. Keep the pulled sugar under the secondary heat lamp so that it doesn't harden. You can save pace by putting multiple mounds of finished pulled sugar onto a single mat. Leave some space between each mound so that they don't fuse together.
-
5Shape the sugar as desired. Choose a color to start with, and bring it under your main heating lamp. Pinch, roll, and pull the sugar into your desired shape. Once you are happy with the shape, set it down onto a sheet of wax paper in front of a fan to cool.[9] For more s
- Keep the rest of the sugar under the secondary heat lamp.
- For more sculpting ideas, read on to the next section!


Advertisement
Part 3
Part 3 of 3:
Shaping the Sugar
-
1Pull two colors together to make ribbons. Place two colors together, side-by-side. Hold them by the ends and pull them apart lengthwise. Cut it in half widthwise. Place the pieces side-by-side again, stretch, and cut. Repeat the process one more time to complete the ribbon.[10]
- Cut the bulky ends off of each ribbon.
- Fold the ribbon to make a bow or a ripple.
- Wrap the ribbon around your finger or a narrow tube to make a spiral.
-
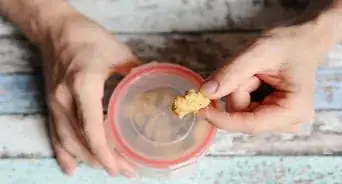
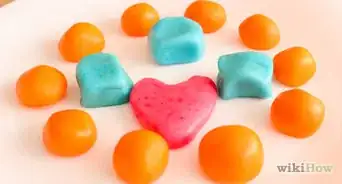
2Roll the sugar into small, flat balls to make lollipops. Pinch off a walnut-sized piece, then roll it into a ball between your palms. Press the ball flat, then shape it into a circle, heart, or oval. Press it onto a lollipop stick, then place it onto a silicone baking mat.[11]
-
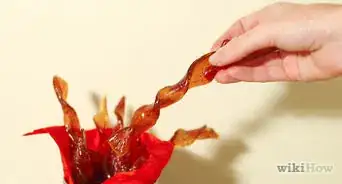
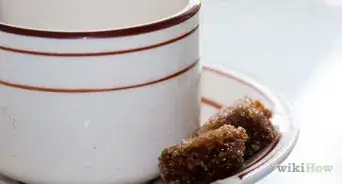
3Cut the candy into logs for old fashioned, bite-sized treats. Roll the candy into a ½-inch (1.27-centimeter) thick rope. For extra texture, give the rope a twist. Allow the candy to cool, then break it into 1½-inch (3.81-centimeter) long pieces.[12]
- You can also try cutting the candy with clean kitchen scissors before it cools.[13]
-
4Twist thin ropes of sugar around dowels to make vines and spirals. Pull or roll some sugar into a thin ribbon or rope. Wrap it around a light-grease dowel in a spiral, like a candy cane. Allow the sugar to cool, then slide it off of the dowel.[14]
-
5Try a pulled sugar rose for something more advanced. Pull off a small piece and shape it into a square. Roll two diagonal corners inward to make a cone. Pull off more pieces and flatten them into different sized petals. Press the petals against the base of the cone. Form green sugar into a stem, then press the rose on top.[15]
- Start with the smallest petals first, then work your way up to the larger ones.
- Over lap the petals slighter, then pull down on the tips. This will give your rose a realistic touch.
- Make the stem by wrapping a green sugar ribbon around an oiled skewer, then pulling it off.
- If the rose won't stick to the stem, you can set it with a flame.


Advertisement
Warnings
Advertisement
Things You'll Need
- Saucepan
- Candy thermometer
- Silicon baking mats
- Heating lamps
- Vinyl or plastic gloves
References
- ↑ http://www.foodnetwork.com/recipes/pulled-sugar-lollipops-recipe-2095696
- ↑ https://chloesblog.bigmill.com/pull-candy-recipe/
- ↑ https://chloesblog.bigmill.com/pull-candy-recipe/
- ↑ https://www.youtube.com/watch?v=w2ZIo6VTPTw
- ↑ https://www.youtube.com/watch?v=w2ZIo6VTPTw
- ↑ https://www.youtube.com/watch?v=w2ZIo6VTPTw
- ↑ http://www.pastrywiz.com/sugarart/sugar-pulled-blown.htm
- ↑ https://chloesblog.bigmill.com/pull-candy-recipe/
- ↑ https://www.youtube.com/watch?v=w2ZIo6VTPTw
- ↑ https://www.rachaelrayshow.com/recipe/17573_Jacques_Torres_Pulled_Sugar/
- ↑ http://www.foodnetwork.com/recipes/pulled-sugar-lollipops-recipe-2095696
- ↑ https://chloesblog.bigmill.com/pull-candy-recipe/
- ↑ https://www.youtube.com/watch?v=w2ZIo6VTPTw
- ↑ https://www.youtube.com/watch?v=w2ZIo6VTPTw
- ↑ http://www.ironwhisk.com/2011/10/pulled-sugar-roses/
- ↑ https://www.youtube.com/watch?v=w2ZIo6VTPTw
- ↑ http://www.ironwhisk.com/2011/10/pulled-sugar-roses/
- ↑ http://www.ironwhisk.com/2011/10/pulled-sugar-roses/
- ↑ https://chloesblog.bigmill.com/pull-candy-recipe/
- ↑ https://www.rachaelrayshow.com/recipe/17573_Jacques_Torres_Pulled_Sugar/
- ↑ https://www.rachaelrayshow.com/recipe/17573_Jacques_Torres_Pulled_Sugar/
About This Article

wikiHow Staff
wikiHow Staff Writer
This article was co-authored by wikiHow Staff. Our trained team of editors and researchers validate articles for accuracy and comprehensiveness. wikiHow's Content Management Team carefully monitors the work from our editorial staff to ensure that each article is backed by trusted research and meets our high quality standards. This article has been viewed 44,528 times.
Co-authors: 2
Updated: July 13, 2020
Views: 44,528
Categories: Sugar Treats
Advertisement