This article was co-authored by wikiHow Staff. Our trained team of editors and researchers validate articles for accuracy and comprehensiveness. wikiHow's Content Management Team carefully monitors the work from our editorial staff to ensure that each article is backed by trusted research and meets our high quality standards.
There are 11 references cited in this article, which can be found at the bottom of the page.
The wikiHow Video Team also followed the article's instructions and verified that they work.
This article has been viewed 79,192 times.
Learn more...
Orange food coloring is great for making Autumn-themed treats or piping frosting carrots on a carrot cake. However, most basic food coloring kits don't come with pre-mixed orange coloring. The good news is that whatever you need it for, you can either make it by mixing other colors together or by using naturally colored ingredients. Whichever method you choose, you can make your frosting or baked goods the perfect shade of orange very easily.
Steps
Combining Colors to Make Orange
-
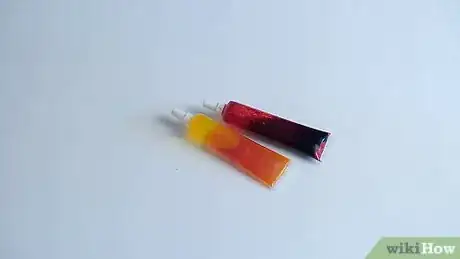
1Purchase red and yellow food coloring. You will need to combine red and yellow food coloring in order to make orange food coloring. Both colors typically come in most packs of food coloring, or you can purchase them separately. Red and yellow food coloring can be purchased at your local grocery store, big box store, specialty cooking store, or from online retailers.[1]
- If you want a dark orange color, you will also want to buy brown or blue food coloring.[2]
- Food coloring comes in liquid and gel forms. Both will work to make orange food coloring.
- If you are worried about the chemicals in food coloring, you can get natural food dyes at natural food stores and online retailers.
-
2Pick the shade of orange you want to create. Decide on how light or dark you want the orange to appear. For example, do you want a bright orange food coloring to frost a pumpkin cookie or do you want a light orange to slightly tint some cupcakes? With your desired outcome in mind, you can mix your red and yellow in the right proportions.[3]
- A dark orange will have a higher proportion of red than yellow and a lighter orange will have a higher proportion of yellow than red.
Advertisement -
3Combine drops of food coloring in specific proportions. If you want to make a basic, bright orange food coloring, mix equal parts red and yellow food coloring. For instance, drop 6 drops of red and 6 drops of yellow into a small glass bowl. Mix the colors together with a small spoon or toothpick.[4]
- If you want a true bright orange, you will need to add 1 part yellow to 1 part red.
- If you want a dark burnt orange, add 2 parts yellow, 2 parts red, and 1 part blue or brown.
- If you want a light orange, do 3 parts yellow to 1 part red.
Tip: The color of the food coloring in the bowl will not really show you what it will look like in frosting or whatever else you are using it in. It’s only when you add it to the product you want to dye that you will know what the exact shade is.
Testing Your Color
-
1Prepare a testing portion of the food you want to dye, if possible. In many cases you will use orange food coloring to dye frosting. In order to get the perfect color, put a 2 tablespoons (16 grams) of it in a separate glass bowl.[5]
- If you are using the orange food coloring to dye a baked good or some other food, you will not be able to test how the coloring will turn out. In that case, you will just have to guess about the shade and how much to use.
- Put the frosting in the container that has some extra room, so that you can easily stir the frosting.
-
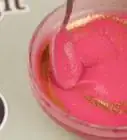
2Dye this smaller portion with the orange food coloring you made. Add a few drops of the coloring mixture at a time and stir the testing portion completely before adding more. As you mix it, decide whether the tone of the orange is right or you want to use a different proportion of yellow and red. This will help you get the color just right. [6]
- Keep track of the amount of coloring you are adding. It will be important when you need to reproduce the color in a larger amount.
- As you add more dye, the tone of the orange will stay the same but the density of the color will increase.
- If you don’t like the tone of the color, try again with a new testing portion and a new mixture of orange food coloring with a different proportion of red and yellow.
-
3Create more orange food coloring in the same proportion. Once you have created the right tone of orange food coloring, make a bigger batch of it to dye all of your frosting or baked goods. Use the same proportion, such as 1 to 1, but just use more food coloring. For example, you will make the same color if you mix 5 drops of yellow and 5 drops of red as you will if you mix 25 drops of yellow and 25 drops of red.
- How much food coloring you need depends on what you are coloring, how dark you want the color, and how much you need to color. For example, for 1 cup (128 grams) of frosting, you will need between 15 and 80 drops of food coloring.[7]
-
4Add the food coloring in the right proportion to the larger batch. Once you know how many drops of each color will dye 2 tablespoons (16 grams) of frosting, you can use that number to dye a larger amount of frosting the same exact color. Measure out how much frosting you have in 2 tablespoon (16 grams) increments. Then multiply the number of drops of each color by the number of 2 tablespoon (16 grams) portions you have.
- For example, if you have 2 cups (256 grams) of frosting, that means you have sixteen 2 tablespoon (16 grams) portions. Multiply the number of drops of red and yellow you used by 16 and that will dye your larger batch the same color.[8]
Making Orange Food Coloring From Natural Ingredients
-
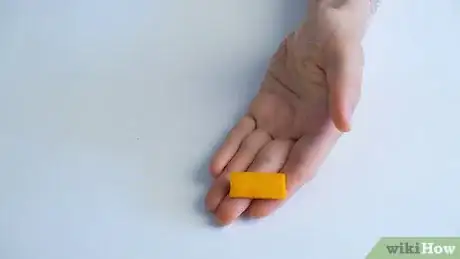
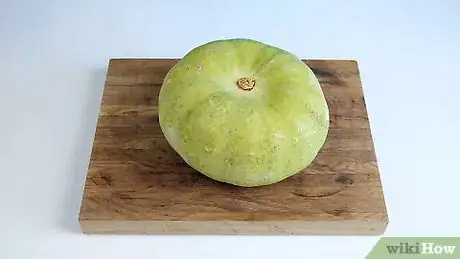
1Purchase carrots, sweet potatoes, or a pumpkin as a natural colorant. Go to your local grocery store or farmer’s market and purchase the deepest orange carrots, sweet potatoes, or pumpkin you can find. You will only need 2-3 carrots, one large sweet potato, or one small pumpkin to create your own food coloring.
-
2Peel and then slice the vegetable very thin. Peel the outside of the vegetable so that the bitter skins or rind are gone. Then use a sharp knife to create very thin slices. Making thin slices will make dehydrating the vegetable faster and more effective.[11]
- The thinner the slices, the better, so don’t be afraid that you are getting the slices too thin.
-
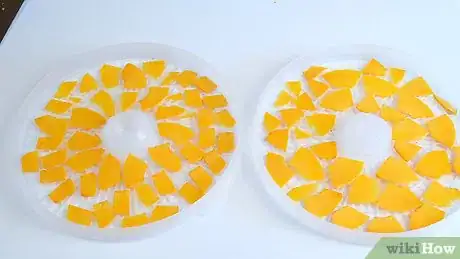
3Place the vegetable slices in a dehydrator in a single layer. Most food dehydrators have shelves or racks that slide into the machine. Lay out the slices of carrot, sweet potato, or pumpkin in a single layer with space between each piece. This will allow air to flow evenly around each piece.[13]
- Keep in mind how much space you have in your food dehydrator. If you have too many very thin slices, they may not fit in all at once.
Tip: If you don’t have a food dehydrator, you can dry out the vegetables in your oven on the lowest setting. However, this will take much longer and runs the risk of burning before its dehydrated.[14]
-
4Run the dehydrator until the vegetables have lost of their liquid. Look at the suggested time and temperature listings provided with the food dehydrator. In most cases, you will run the machine at around 125 °F (52 °C) for several hours. However, this can vary quite a bit because different vegetables have different water contents and the thickness of them will effect the dehydration as well.[15]
- Check your vegetables every hour or so to make sure they are dehydrating evenly. You may need to rotate the racks to get all of the pieces thoroughly dehydrated.
- You can run most food dehydrators between 125–140 °F (52–60 °C). If you run it at a hotter temperature, your vegetables will dehydrate quicker but they may not be as evenly dehydrated.
-
5Grind the pieces into a fine powder in a food processor or spice mill. Put all of the totally dehydrated vegetable pieces in the bowl of the machine you are using. Run it until the vegetable is a fine dust.[16]
- This can take quite awhile, so don’t give up after running the machine for only a minute or two.
- You can also use a mortar and pestle to create the powder but this takes a lot of time and energy.
-
6Add the powder to the food you want to dye. The amount you will need to add varies, depending on what and how much you are dyeing. For a cup of white frosting, start with a tablespoon of orange powder. Mix it in thoroughly and then keep adding teaspoons until you get the color you want.
- Keep in mind that if you add a lot of the powder, it may change the flavor of the food you are coloring. This is especially true when coloring foods with delicate flavors.
- These natural powders are best for making subtle orange tones, not bright, vivid orange.[17]
Things You'll Need
Combining Colors to Make Orange
- Red food coloring
- Yellow food coloring
- Blue or brown food coloring, if necessary
- Small glass bowl
- Small spoon or toothpick
Testing Your Color
- Small glass bowl
- Large glass bowl
- Spoon or rubber spatula
Making Orange Food Coloring From Natural Ingredients
- Carrots, sweet potato, or pumpkin
- Peeler
- Knife
- Mandoline, if available
- Food dehydrator
- Food processor or spice mill
- Spoon
References
- ↑ https://www.tasteofhome.com/article/types-of-food-coloring/
- ↑ https://oureverydaylife.com/make-dark-orange-frosting-food-coloring-41841.html
- ↑ https://oureverydaylife.com/make-dark-orange-frosting-food-coloring-41841.html
- ↑ https://www.foodnetwork.com/recipes/articles/frost-by-numbers-how-to-make-frosting-colors
- ↑ https://www.foodnetwork.com/recipes/articles/frost-by-numbers-how-to-make-frosting-colors
- ↑ https://www.foodnetwork.com/recipes/articles/frost-by-numbers-how-to-make-frosting-colors
- ↑ https://www.foodnetwork.com/recipes/articles/frost-by-numbers-how-to-make-frosting-colors
- ↑ https://www.thespruceeats.com/how-to-scale-a-recipe-995827
- ↑ https://www.ars.usda.gov/news-events/news/research-news/2002/dark-orange-carrots-deliver-more-beta-carotene/
- ↑ https://www.onegreenplanet.org/vegan-food/all-natural-plant-based-food-colorings/
- ↑ https://www.epicurious.com/expert-advice/how-to-dehydrate-fruit-step-by-step-article
- ↑ https://www.finecooking.com/article/how-to-use-a-mandoline
- ↑ https://www.epicurious.com/expert-advice/how-to-dehydrate-fruit-step-by-step-article
- ↑ https://youtu.be/YdMNtfR-mHg?t=53
- ↑ https://www.epicurious.com/expert-advice/how-to-dehydrate-fruit-step-by-step-article
- ↑ https://www.localharvest.org/blog/48630/entry/how_to_make_pumpkin_and
- ↑ https://food52.com/blog/16265-how-to-make-all-natural-food-dyes-from-ingredients-in-your-kitchen
