This article was co-authored by Daniel Siriban and by wikiHow staff writer, Hannah Madden. Daniel Siriban is a Japanese Personal Chef and the Owner of Roshi Experience. With over 18 years of culinary experience, he specializes in sushi, teppanyaki, and traditional Japanese dining. Daniel holds an AA in Restaurant, Culinary, and Catering Management from The Art Institute of California, Orange County.
There are 11 references cited in this article, which can be found at the bottom of the page.
This article has been viewed 151,871 times.
If you’ve ever been to a sushi restaurant, you’ve probably eaten Nigiri sushi, or sushi rice topped with seafood. This artisanal dish is traditionally shaped by hand, and it uses only the finest and freshest ingredients on top, like tuna, eel, haddock, shad, snapper, octopus, and squid.[1] If you’re a vegetarian or vegan, you can also make Nigiri sushi out of thinly sliced vegetables, like bell peppers and shallots.[2] Feel free to get creative with your toppings, and don’t forget to mix up a batch of sushi rice before you start on this delicious meal.
Ingredients
- 2 cups (400 g) of rice
- 3 cups (710 mL) of water
- 1⁄2 c (120 mL) of rice vinegar
- 1 US tbsp (15 mL) of vegetable oil
- 1/4 cup (32 g) of white sugar
- 1 tsp (4.2 g) of salt
- 6 slices of raw or cooked fish
- 4 1/4 ounces (120 grams) of sushi rice
- 1/2 teaspoons of wasabi paste
- 2 cups (475 ml) of su water
- 4 1/4 ounces (120 grams) of sushi rice
- 1 bell pepper
- 1⁄2 c (120 mL) of mirin
- 1⁄4 c (59 mL) of rice vinegar
- 1 scallion
Steps
Preparing Sushi Rice
-
1Rinse the sushi rice in a colander until the water runs clear. Pour 2 cups (400 g) of rice into a colander and bring it over to the sink. Rinse it with cool water until the water runs clear and doesn’t look cloudy anymore.[3]
- Rinsing the rice makes it less sticky and less likely to burn at the bottom of the pot while it cooks.
-
2Pour the rice and water into a pot. In a large pot, pour your rinsed rice along with 3 cups (710 mL) of water. The water should just cover the rice—if it doesn’t, add a little more to ensure that your rice gets nice and fluffy.[4]
- If you have a rice cooker, you can use that instead of your stovetop.
- If you want to cook sushi rice in a rice cooker, you should take water according to the size of the rice.
- For example, if you cook Japanese short-grain rice, use water in a ratio of one to one.
- You can use more water for medium or long-grain rice.
Advertisement -
3Bring the water to a boil, then reduce it to a simmer. Turn your stovetop on high and wait until you see small bubbles rising to the top of your pot. Then, turn the heat down to medium-low until you can only see small bubbles (this means that it’s simmering, which is the ideal temperature for cooking rice).[5]
- If you leave the water boiling for too long, you could burn your rice. Keep an eye on your pot so this doesn't happen!
-
4Cover the pot with a lid and let it cook for 20 minutes. The steam from the covered lid will make the rice cook much faster, so you need to trap in that heat. Set a timer for 20 minutes to let the rice absorb all of the water. If there’s any water left at the bottom of the pot, let the rice cook longer.[6]
- A soggy pot means that your rice isn’t cooked all the way, so it might be a little crunchy.
-
5Take the rice off the heat and let it cool for about 5 minutes. Keeping the lid on the pot, turn the heat off and move your rice to another burner that’s off. Let it sit for about 5 minutes to let the rice absorb the rest of the water and the steam to finish cooking.[7]
- This step is also vital in making sure that your rice isn’t too sticky, so don’t skip it!
-
6Combine rice vinegar, oil, sugar, and salt in a saucepan. Pour 1⁄2 c (120 mL) of rice vinegar, 1 US tbsp (15 mL) of vegetable oil, 1/4 cup (32 g) of white vinegar, and 1 tsp (4.2 g) of salt into a saucepan. Stir them up just slightly to start mixing them together.[8]
- These ingredients will give your rice a little extra flavor and make the rice stick together so it’s easier to form.
-
7Cook the mixture over medium heat until the sugar dissolves. Usually, this will take about 5 minutes. Once you see the sugar dissolve into the liquid, turn the stove off and move the pot off the burner to start letting it cool.[9]
- If you don’t want to deal with a pot on the stove, you can also heat your ingredients in the microwave for 30 seconds at a time until the sugar dissolves.
-
8Let the mixture cool, then stir it into the rice. Set the mixture aside for about 5 minutes so it has a chance to cool down. Pour the rice into a glass bowl, then dump your mixture in on top of it. Use a baking spatula to fold the mixture into the rice until there isn’t any liquid on top anymore.[10]
- When you first combine your ingredient with the rice, it’ll probably look too wet. Just keep stirring—it will combine eventually.
- Once you’ve made your rice, you can set it aside and start preparing the main part of your sushi.


Making Seafood Nigiri Sushi
-
1Purchase some high quality raw fish. Traditional Nigiri sushi is made from raw fish like salmon, tuna, or yellowtail. If you’d like to use raw fish in your sushi, purchase it from a fish market or your local grocery store if you can ensure that the fish is high quality enough to eat raw. Make sure it was displayed on a bed of ice, and don’t eat it if it smells fishy, sour, or ammonia-like.[11]
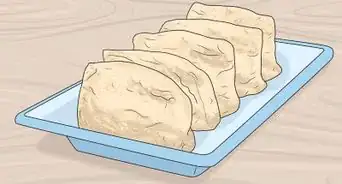
- If you aren’t sure that your fish is high quality enough to eat raw, you can grill, roast, or bake the fish before slicing it up.
-
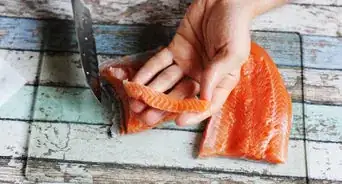
2Cut the fish into slices at a 45-degree angle. Spread your fish out on a cutting board and look for the thin lines on the meat (those are the connective tissue). Hold your knife at a 45-degree angle and make thin slices that are about 0.5 in (1.3 cm) thick. As you reach the bottom of the slice, adjust the angle ever so slightly to make a “cup” shape in the slice. Try to do this in one fluid motion to avoid leaving knife marks.[12]
- This sounds really hard to do, but it does get easier with practice. And if you’re only making sushi for your friends or family, it doesn’t have to look perfect anyway.
- The most important thing to worry about when slicing is making the pieces bite-sized. Anything beyond that is purely for style and presentation.
-
3Mix water and sushi vinegar together in a bowl, then dip your hands in it. Pour about 80 millilitres (0.34 c) of sushi vinegar in a bowl and top it off with water. Dip your hands in it before you start working with the rice to avoid sticky fingers as you make your molds.[13]
- Traditionally, this water and vinegar mixture is called “su water.”
- You can dip your hands in the water any time they start to feel dry or sticky.
-
4Roll small clumps of rice into a 2 to 3 inches (5.1 to 7.6 cm) long log. Scoop up a handful of rice that’s about 3/4 of the size of your palm. Roll and squeeze it together until it forms into a firm oval / rectangle shape that’s about the size of the fish slices you cut up earlier.[14]
- Your rice should be cool enough to work with at this point, so you don’t have to worry about burning your hands.
-
5Dab some wasabi onto the back of a fish slice. Pick up your first slice of fish and grab a pea-sized amount of wasabi. Dab the wasabi onto the center of the slice to act like a “glue” to keep the sushi together (plus add a little spice).[15]
- You can find wasabi at most grocery stores.
- If you aren’t a fan of wasabi, you can skip this step. If you really love wasabi, feel free to add some more.
-
6Press the rice on top of the fish slice. Hold the fish slice in your hand with the wasabi facing upwards. Grab the rice log with your other hand and press it gently onto the fish slice, using 2 fingers to press it downwards. Cradle the sushi in your hand for just a moment to give it its shape, then set it down on a plate.[16]
- This final shaping is what gives the sushi its classic “cup” shape, so it’s very important.
-
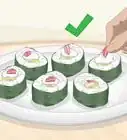
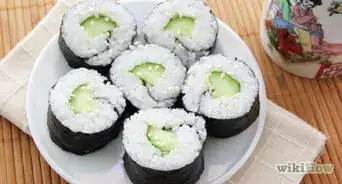
7Arrange the sushi on a serving platter. Spread the slices out on a large plate or a platter so ithey're easy to grab with chopsticks. If you used multiple types of fish or seafood, you can group each type together so they’re right next to each other or go in an alternating row for more variation.[17]


Making Vegetarian / Vegan Nigiri Sushi
-
1Cut a bell pepper in half and scoop out the seeds. You can pick a red or an orange bell pepper to make your vegan sushi. Rinse the pepper off and cut it in half lengthwise, then scoop out the seeds with a spoon.[18]
- You don’t need the seeds anymore, so you can throw them away.
-
2Lay the bell pepper on a baking sheet, then put it under the broiler. Turn on the broiler in your oven and spread out your bell pepper pieces on a baking sheet. When the oven is hot, put your peppers under the broiler and let them crisp up and char for about 5 minutes, then flip them over. Keep them in the oven for about 5 more minutes, then take them out before they get too crispy.[19]
- The peppers will be replacing the fish in your sushi, so make sure they look really tasty.
-
3Cut the pepper into 4 to 8 equal pieces. Using a knife, cut your bell peppers into lengthwise slices that are about 1 in (2.5 cm) thick. You want them to be as big as your rice rectangles, so make them a little larger than bite-sized.[20]
- The peppers might be hot, so use caution!
-
4Marinate the peppers for 3 to 4 hours. Mix together 1⁄2 c (120 mL) of mirin and 1⁄4 c (59 mL) of rice vinegar in a wide, shallow bowl. Submerge the pepper slices in the bowl, then cover the bowl with plastic wrap and let them marinate for 3 to 4 hours.[21]
- To give the peppers even more flavor, let them marinate overnight (if you have the patience).
-
5Shape your rice bundles into rectangular logs. Dip your hands into a mixture of water and rice vinegar (su water) and grab a bundle of rice that’s about 3/4 the size of your palm. Slowly roll and shape it into an oval log with your fingers and the palm of your hand, then set them aside. Try to make as many bundles as you have peppers slices for so they don’t go to waste![22]
- If your hands get dry or sticky, dip them back into the su water.
-
6Place the bell pepper slices on top of the rice. Grab a slice of bell pepper out of the marinade and gently place it on top of one rice log. Press it down onto the rice with 2 fingers to make it stick, then move onto your other slices.[23]
- Since the bell peppers are red (or orange) they’ll even look a bit like raw fish.
-
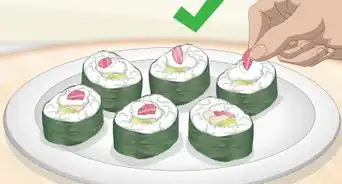
7Garnish the sushi with a sliced scallion. Rinse off a scallion and set it on a cutting board lengthwise, then use a sharp knife to slice it down the middle. Try to make your slices as thin as you can, then cut them to the length of your sushi pieces. Add a scallion on top of each slice of bell pepper as your finishing touch. Now you’ve got a delicious vegan and vegetarian sushi meal that everyone can enjoy![24]


Community Q&A
Did you know you can get answers researched by wikiHow Staff?
Unlock staff-researched answers by supporting wikiHow
-
QuestionDoes the fish have to be raw?
 wikiHow Staff EditorThis answer was written by one of our trained team of researchers who validated it for accuracy and comprehensiveness.
Staff AnswerwikiHow Staff EditorStaff AnswerNo, the fish does not need to be raw, this is just the traditional filling. You can add cooked fish, meat or vegetables if you would prefer.
Support wikiHow by unlocking this staff-researched answer.
-
QuestionDo I eat nigiri sushi with hands or chopsticks?wikiHow Staff EditorThis answer was written by one of our trained team of researchers who validated it for accuracy and comprehensiveness.
Staff AnswerwikiHow Staff EditorStaff AnswerIt is traditional to eat nigiri sushi with your hands and it is perfectly good manners to do so. Just make sure you've cleaned them before your meal.Support wikiHow by unlocking this staff-researched answer.
-
QuestionWhen is it traditional to eat nigiri sushi?wikiHow Staff EditorThis answer was written by one of our trained team of researchers who validated it for accuracy and comprehensiveness.
Staff AnswerwikiHow Staff EditorStaff AnswerIf the nigiri sushi is made from high quality, expensive seafood, then it is traditional to eat it for special occasions in Japan. Cheaper versions are usually enjoyed as snacks, fast food or quick meals.Support wikiHow by unlocking this staff-researched answer.
Warnings
- Only use high quality fish for raw nigiri sushi. Purchase from a fishmonger you're certain provides quality fish.⧼thumbs_response⧽
- The raw fish should always have been in deep freeze (-20 Celsius [-4 Fahrenheit] for at least 24 hours) before preparing as sushi. There are many parasites, some deadly, and freezing is the only way to kill them.[25]⧼thumbs_response⧽
Things You'll Need
Preparing Sushi Rice
- Colander
- Pot
- Bowl
- Baking spatula
- Saucepan
Making Seafood Nigiri Sushi
- Knife
- Cutting board
- Bowl
- Serving platter
Making Vegetarian / Vegan Nigiri Sushi
- Knife
- Cutting board
- Baking tray
- Bowl
- Plastic wrap


References
- ↑ https://airkitchen.me/articles/sushi/1/
- ↑ https://www.washingtonpost.com/recipes/vegetable-nigiri/14455/
- ↑ https://www.allrecipes.com/recipe/99211/perfect-sushi-rice/
- ↑ https://www.allrecipes.com/recipe/99211/perfect-sushi-rice/
- ↑ https://www.foodnetwork.com/recipes/alton-brown/sushi-rice-recipe-1944633
- ↑ https://www.foodnetwork.com/recipes/alton-brown/sushi-rice-recipe-1944633
- ↑ https://www.foodnetwork.com/recipes/alton-brown/sushi-rice-recipe-1944633
- ↑ https://www.allrecipes.com/recipe/99211/perfect-sushi-rice/
- ↑ https://www.allrecipes.com/recipe/99211/perfect-sushi-rice/
- ↑ https://www.foodnetwork.com/recipes/alton-brown/sushi-rice-recipe-1944633
- ↑ https://www.fda.gov/food/buy-store-serve-safe-food/selecting-and-serving-fresh-and-frozen-seafood-safely
- ↑ https://www.seriouseats.com/2010/07/sushi-week-part-4-how-to-make-nigiri.html
- ↑ https://www.japancentre.com/en/recipes/217-nigiri-sushi
- ↑ https://www.youtube.com/watch?v=yG3dlV94LWU&feature=youtu.be&t=51
- ↑ https://www.youtube.com/watch?v=yG3dlV94LWU&feature=youtu.be&t=123
- ↑ https://www.foodnetwork.com/recipes/nigiri-sushi-recipe-1939785
- ↑ https://www.foodnetwork.com/recipes/nigiri-sushi-recipe-1939785
- ↑ https://olivesfordinner.com/2017/08/silky-bell-pepper-sushi.html
- ↑ https://www.washingtonpost.com/recipes/vegetable-nigiri/14455/
- ↑ https://www.washingtonpost.com/recipes/vegetable-nigiri/14455/
- ↑ https://olivesfordinner.com/2017/08/silky-bell-pepper-sushi.html
- ↑ https://olivesfordinner.com/2017/08/silky-bell-pepper-sushi.html
- ↑ https://www.washingtonpost.com/recipes/vegetable-nigiri/14455/
- ↑ https://www.washingtonpost.com/recipes/vegetable-nigiri/14455/
- ↑ https://www.fda.gov/food/buy-store-serve-safe-food/selecting-and-serving-fresh-and-frozen-seafood-safely
About This Article