This article was co-authored by Katya Gudaeva. Katya Gudaeva is a Professional Makeup Artist and the Founder of Bridal Beauty Agency based in Seattle, Washington. She has worked in the beauty industry for over 10 years and worked with companies such as Patagonia, Tommy Bahama, and Barneys New York and with clients such as Amy Schumer, Macklemore, and Train.
This article has been viewed 47,602 times.
Making your own lipstick is a great way to ensure that you know what’s in your makeup. It also lets you make custom colors suited perfectly to your skin tone. You can find most of the materials to make your own lipstick at craft and health food stores. If your local shops don’t carry a specific ingredient, you should have no problem finding them online.
Steps
Using Mineral Pigments
-
1Gather your materials.[1] You can purchase most of these materials at your local health food store. The pigments may be trickier to find in a shop, but they’re easy to purchase online.
- 1.5 tsp Castor oil (thickens and adds shine)
- 1 tsp Jojoba oil (hydrating and antibacterial qualities)
- 1.5 tsp Grapeseed oil (anti-aging)
- 1.5 tsp Beeswax — pearls are preferable (seals in moisture)
- Pigments of your choice (make sure they’re lip safe)
- Flavoring of your choice (optional)
-
2Choose your pigments. Pigments come in a variety of colors and materials. You can use a single pigment on its own, or combine a few different ones to make your own unique color:
- Cinnabar mica, red oxide, and zinc oxide combined at a 2:1/4:1/4 ratio will give you a rich, slightly shimmery brownish-red color.
- Carmine, titanium dioxide, and pearl white mica combined at a 1:1:1/2 ratio will give you a vibrant, shimmery red color.
- Red oxide, yellow oxide, and titanium dioxide combined at a 2:1/4:1/8 ratio will give you a lovely coral color.[2]
- Just how much of each pigment you use will depend on how rich you want your color to be. Two to three teaspoons should be enough, but you can always add a bit more or less to get the color richness that you desire.
EXPERT TIPKatya Gudaeva is a Professional Makeup Artist and the Founder of Bridal Beauty Agency based in Seattle, Washington. She has worked in the beauty industry for over 10 years and worked with companies such as Patagonia, Tommy Bahama, and Barneys New York and with clients such as Amy Schumer, Macklemore, and Train.Professional Makeup Artist Katya Gudaeva
Professional Makeup ArtistTry this easy method for making your own lipstick. Professional makeup artist Katya Gudaeva says: "For an easy way to make your own lipstick, buy pigments from your favorite brand, then melt lip balm until it becomes a liquid consistency. Once it's soft, mix the pigments into the lip balm with a lip brush. Once it's cooled down, it will become solid and it will be ready to use!"
Advertisement -
3Blend pigments together (optional). If you combine pigments, you might like to blend them together in a coffee grinder or with a mortar and pestle. Doing this can help keep the color evenly distributed once it’s blended with the oil and wax.
-
4Set aside the pigment in a small bowl. You won’t add the pigment(s) to the oil and wax mixture until it’s melted, but it’s good to have it handy. That way you can quickly mix it with the melted mixture while it’s still warm.
-
5Combine oils and waxes in a heat-proof container. In this step you combine everything except for the pigments (and the optional flavoring) in a container. Use a small spatula or popsicle stick to mix the ingredients together.
-
6Melt the ingredients together. You can do this in either a double boiler (heat-proof container placed in hot water) or the microwave. With both methods, be sure to stir the mixture regularly until no lumps remain.
- For the double-boiler method, place the heat-proof container (with the mixture inside it) into a saucepan that is 1 to 2 inches (2.5 to 5.1 cm) full of water. The water should be hot but not boiling. The heat-proof container should sit securely (i.e. it shouldn't be floating) in the saucepan.
- For the microwave method, place the heat-proof container (with the mixture inside it) into the microwave and heat it in 10- to 15-second intervals, stirring in between.
-
7Add your pigments to the melted oil and wax mixture. Mix in about 1/4 tsp of pigment at a time, stirring the mixture quickly as you add the pigment to ensure that it’s well blended.
-
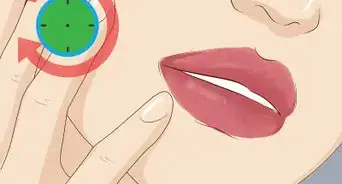
8Check the color. Use a small spatula or popsicle stick to apply a small amount of the lip color on the back of your hand. If it’s not rich enough, add a little more pigment to the mixture.
- Continue to add pigment to the mixture and then test it on your hand until you achieve the color you want.
- Before you do this, make sure the mixture isn’t so hot that you burn yourself.
-
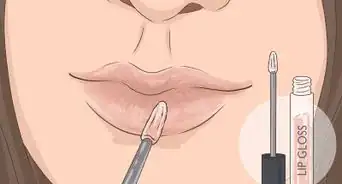
9Pour the mixture into moulds, pots or lip balm tubes. This is where having a container with a spout/beak comes in handy, since it will make pouring much easier.
- If you’re using a bullet-style lipstick mould, use a cotton swab to swipe some oil around the insides of the moulds. This will ensure that the finished bullet-style lipsticks don’t stick to the mould when you remove them.
-
10Cool it. You can put the lipsticks in the fridge for 30 minutes or in the freezer for at least 10 minutes. Some experts recommend leaving them in the fridge for up to an hour.
- Give them ample time to cool. If you take them out too early they may be soft and more likely to break.
-
11Place lipsticks in lipstick tubes (optional). If you used a bullet-style lipstick mould, your final step will be to remove the bullets from the mould with a lipstick tube.
- To do this, remove the top of the mould. The bottom of your lipstick bullet should now be exposed. Twist the base of your lipstick tube to expose the lipstick holder.
- Next, gently place the lipstick holder over the bullet-style lipstick and press down very gently — just enough to make contact with the base of the lipstick.
- Gently lift the lipstick tube as you twist the holder back into the tube. The holder should attach to the bullet-style lipstick and bring it back into the tube with it.
-
12Enjoy your lipstick! That’s it, you’re done. Depending on the size of your moulds, lip balm holders, and bars, you should be able to make at least four sticks and several small jars from this recipe.


Using Beetroot Powder
-
1Gather your materials. This simple recipe only requires 3 ingredients, all of which should be available at your local craft shop or health food store:
- 1 tbsp Beeswax
- 1 tbsp Shea butter (unrefined is best)
- 1.5 tbsp Beetroot powder
-
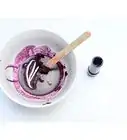
2Combine all of the ingredients into a heat-proof container. You can mix them all together, although some experts suggest melting the wax and butter together and then adding the colorant after.
-
3Heat and stir until melted. You can do this over the stove by placing a heat-proof container into a saucepan with 1 or 2 inches (2.5 or 5.1 cm) of simmering water in it. You can also do this in the microwave.
- If you choose to microwave the mixture, do it at 15-second intervals. At the end of each 15 seconds, remove the container and give the mixture a stir to prevent it from burning.
-
4Ensure that the mixture is well-blended. Once it appears to be fully melted, remove the mixture from the heat source and stir it well to ensure that all of the ingredients are well combined.
- Keep an eye out for any lumps of beetroot powder!
-
5Pour into a storage container. You can use an empty lip balm tube, a small glass or plastic jar, or a lipstick mould, if you want to be a bit fancier.
-
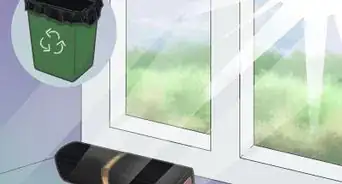
6Refrigerate for 1 hour. Allow the mixture-filled moulds to cool in the refrigerator for 1 hour. Avoid taking them out while they’re still warm, as they might not be fully hardened and could break.
-
7Enjoy your new lip color! This recipe should make just over 2 ounces of lipstick, which should fill roughly 13 traditionally sized (0.15-ounce) lip balm tubes.


Community Q&A
-
QuestionCan I cut it to have a slant?
 Community AnswerDo not cut your lipstick; it would waste a lot of it. Lipsticks slants are made by professionals.
 -
QuestionCan I make lipstick out of pencils?
 Community AnswerNo, although you can use crayons. This article will give you even more options for creating lipstick: How to Make Lipstick.
 -
QuestionCan I use beet powder?Community AnswerYes, you can.
Warnings
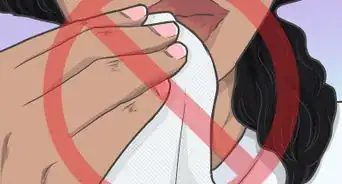
- If you’re making lipstick as gifts or to sell, wear gloves. That way, you won’t contaminate the lipstick with any bacteria that might be on your hands.⧼thumbs_response⧽
- Be careful when adding flavours to your lipstick. If you have sensitive lips, flavors could irritate your skin. If this is a concern but you’d still like to try a flavor, just add a very small amount so that the flavor is mild.⧼thumbs_response⧽
- Note that carmine and some other red pigments are derived from cochineal insects such as beetles.[5] Vegan-friendly alternatives to such pigments include anthocyanins (from fruits and berries), beetroot, and lycopene.⧼thumbs_response⧽
- A popular DIY lipstick is made by melting crayons into coconut oil. Although crayons are non-toxic, Crayola has warned against using crayons on the lips. Crayons have not been tested for regular long-term use on the lips, and are thus not considered 100% safe.[6]⧼thumbs_response⧽
- Pigments can generally be broken down into 2 categories: organic and inorganic (minerals). Organic pigments such as plant materials are generally considered to be safer than metals and minerals, which can be contaminated by traces of heavy metals.[7]⧼thumbs_response⧽
Things You'll Need
- Various waxes, oils, and pigments (see methods for specific recipes)
- Coffee grinder, or mortar and pestle for grinding up pigments
- Measuring spoons
- Small plastic spatulas or popsicle sticks (for stirring)
- A heat-proof container with a spout/beak that you can place in a saucepan of boiling water (pyrex measuring cups are good options)
- Saucepan or microwave (for heating and melting ingredients)
- Packaging products such as empty lip balm tubes, lipstick containers, and pots/jars
- Lipstick mould (optional — only if you want to make professional bullet-style lipsticks)

References
- ↑ https://www.youtube.com/watch?v=Ts3u1nQVC40
- ↑ http://www.humblebeeandme.com/coral-lipstick/
- ↑ http://chemistscorner.com/ingredients-a-makeup-chemist-should-know/
- ↑ http://craftingagreenworld.com/2012/02/29/vegan-beeswax-alternative/
- ↑ https://www.vegsoc.org/Enumbers
- ↑ http://www.crayola.com/faq/safetymsds/is-it-safe-to-use-crayola-crayons-to-make-lipstick/
- ↑ http://chemistscorner.com/ingredients-a-makeup-chemist-should-know/
About This Article