This article was co-authored by wikiHow Staff. Our trained team of editors and researchers validate articles for accuracy and comprehensiveness. wikiHow's Content Management Team carefully monitors the work from our editorial staff to ensure that each article is backed by trusted research and meets our high quality standards.
This article has been viewed 26,566 times.
Learn more...
Isis wings are an item used in belly dancing. They are long, wing-like swaths of fabric with dowels in the tips so that you can hold them and swing them about. When moved, they are reminiscent of the Egyptian goddess Isis' own wings. These wings are not exclusive to belly dancing, however; you can also use them for fairy or butterfly costumes too!
Steps
Sewing the Wings
-
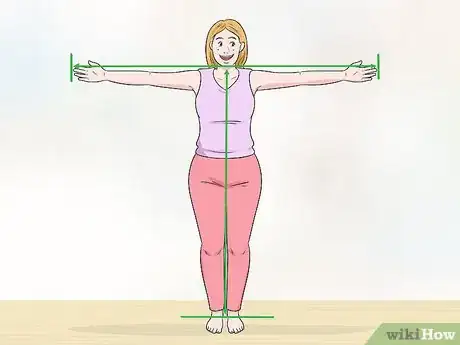
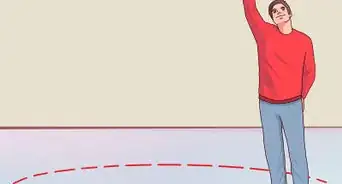
1Measure your arm span and neck-to-floor height. Take a measuring tape between your hands, then stretch your arms out. Record the measurement that you get. Next, measure your height, from the base of your neck to the floor.
-
2Cut a semicircle out of lightweight fabric based on your measurements. Use your arm span for the top, straight edge of the semicircle. Use your neck-to-floor measurement for height of the circle (straight edge to curved edge).
- Use a lightweight fabric with fluid movement, such as organza, lamé, silk, or chiffon.
- This will create 1 wing. You will need to do this entire section twice in order to create the second wing.
Advertisement -
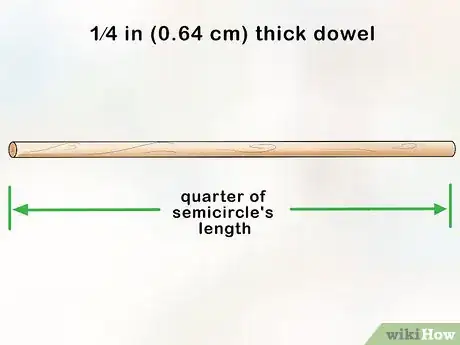
3Cut a 1⁄4 in (0.64 cm) thick dowel a to quarter of semicircle's length. Measure the top, straight edge of the semicircle, then divide it by 4. Cut a 1⁄4 in (0.64 cm) thick dowel to this length. You can use scissors, a utility knife, or a hand saw. If the ends of the dowel are jagged, sand them smooth with sandpaper.
- Start with a 80- to 120-grit sandpaper, then finish with a 360- to 600-grit.
-
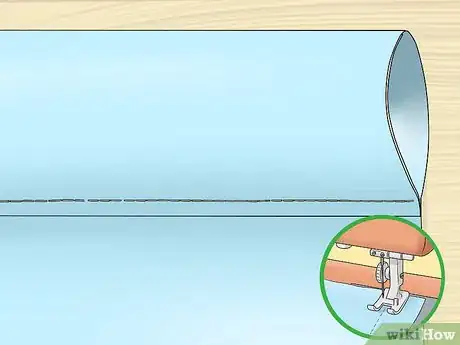
4Hem the edges of your semicircle with a straight stitch. Starting at 1 of the top corners, fold the fabric down by 1⁄4 inch (0.64 cm), and place it under the sewing machine's foot. Sew around the curved edge of the semicircle, folding the fabric as you go. Do this step twice to get a clean, hemmed edge.
- Press the seams when you are done with an iron to make them nice and neat.
- Use a heat setting appropriate for the fabric that you are working with. In most cases, you will end up using a low-heat or synthetics setting.
- If you don't own a sewing machine, you can hem the edges with iron-on hem tape or fabric glue.
-
5Fold the top edge down 1 in (2.5 cm) to create a pocket for the dowel. For a cleaner finish, fold the top edge down by about 1 inch (2.5 cm) then press it with an iron. Fold it down again by about 1 inch (2.5 cm), then press it flat with an iron again. The will create a pocket for the dowel to slide into.
-
6Sew the top, straight edge down with a straight stitch. Sew the pocket down as close to the inside folded edge as you can. An 1⁄8 inch (0.32 cm) seam allowance would be ideal.[1]
- If you make the seam allowance too wide, the dowel won't fit into the pocket.
- If you don't own a sewing machine, you can use fabric glue instead. Don't use iron-on hem tape, or it will make the seam too thick and the pocket too narrow.
-
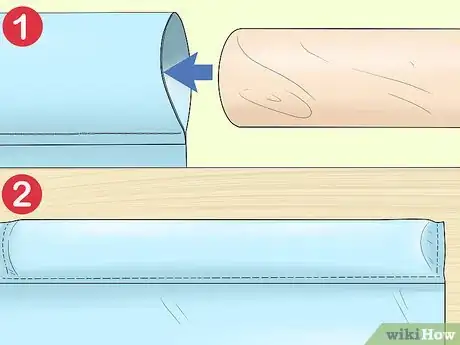
7Slide the dowel into the left side of the pocket, then sew it shut. Flip the fabric over so that the hems are in the back. Insert the dowel into the pocket, then slide it towards the left edge. Sew the hem to each side of the dowel to trap it inside.[2]
- You can try doing this on a sewing machine with a straight stitch, but the dowel may get in the way.
- Consider sewing just the corner of the wing and leaving the other end open. This will make the dowel easier to remove.
-
8Repeat the process for other wing, but slide the dowel to the right. Cut another semicircle out of matching fabric. Hem the curved and top edges exactly the same way you hemmed the first wing. When you insert the dowel, slide it towards the right side of the wing instead. Stitch down the hem to either side of the dowel, just like you did for the first wing.
- When you are done, you should end up with 2 identical wings, 1 with the dowel on the left side, and 1 with the dowel on the right.
Making the Collar
-
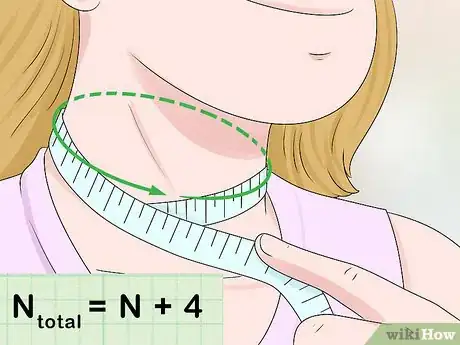
1Measure your neck circumference, then add 4 inches (10 cm). Wrap a measuring tape loosely around your neck. Record the measurement, then add 4 inches (10 cm). This will give you enough room for seam allowances and overlap.
- For example, if your neck is 12 inches (30 cm), then your new measurement will be 16 inches (41 cm).
-
2Cut a 4 in (10 cm) wide rectangle according to this measurement. Draw a rectangle on your fabric. Make the length your neck circumference plus {convert|4|in|cm}}, and the 4 inches (10 cm).
- For example, if your new neck measurement was 16 inches (41 cm), then your rectangle should be 16 by 4 inches (41 by 10 cm).
-
3Fold and iron the narrow ends down by 1⁄2 inch (1.3 cm). Turn the rectangle so that the wrong side is facing you. Fold the left narrow end down and iron it flat with an iron. Repeat for the right end.
- The wrong side is typically the side without a print; it can also be paler in color. Some lightweight fabrics don't have a right or wrong side, so you can choose either side.
-
4Fold the rectangle like making a strip of bias tape. Fold the rectangle in half lengthwise with the right sides facing in and the wrong sides facing out. Iron it flat with an iron. Open the rectangle, and fold the long edges towards the center crease. Iron the long edges, then fold the rectangle along the center crease.
- Press the entire rectangle flat with an iron once more for a cleaner, crisper finish.
-
5Sew around the edges of the rectangle using a straight stitch. Sew around all 4 edges of the rectangle using a 1⁄8 in (0.32 cm) seam allowance and a straight stitch. Match the thread color as close as possible to the fabric, and backstitch when you start and finish sewing.
- Depending on your material, it may not hold creases well. It might be a good idea to secure the fabric with pins as you sew.
-
6Sew Velcro to the narrow ends of the collar. Wrap the collar around your neck again to determine how much the ends overlap by. It should be about 1 1⁄2 inches (3.8 cm). Make a mark where the ends overlap, then take the collar off. Sew 1 piece of hook-side Velcro to 1 end of the collar, and 1 piece of loop-side to the other end of the collar.
- Use a tailor's chalk to make a mark on dark fabrics, and a tailor's pen to make a mark on light fabrics.
- The Velcro should be a little narrower than the collar, about 3⁄4 inch (1.9 cm).
- The length of the Velcro pieces should match the overlap length. If your collar overlapped by 1 1⁄2 inches (3.8 cm), make the Velcro pieces 1 1⁄2 inches (3.8 cm) long.
- Sew the Velcro down; don't use self-adhesive Velcro.
-
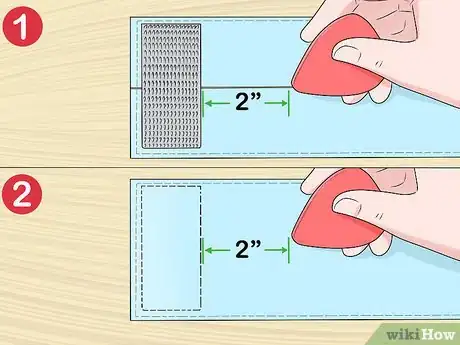
7Make a mark 2 inches (5.1 cm) from each side of the Velcro. Spread the collar out so that the end with the hook-side Velcro piece is facing up. Measure 2 inches (5.1 cm) away from the hook-side Velcro and make a mark with a dressmaker's chalk or pen. Repeat for the loop-side Velcro piece.
- These marks are important; you will use them to align the wings on the collar.
- Don't flip the collar over when you get to the loop-side Velcro. You should see where it ends based on the stitching.
Assembling the Wings
-
1Find the center of each wing's top edge and mark with a pen or chalk. Take your left and fold it in half with the right side (non-hemmed side) facing out. Make a small mark along the top edge of the fold, then unfold the wing. Repeat this step for the right wing.
- You can also make the mark with a dress maker's chalk or pen.
-
2Pin each wing to the collar, using the marks as the guides. Take the left wing and place it right-side-down against the collar. Find the mark that you made along the wing and align it with the left mark on the collar. Insert a sewing pin through both the wing and the collar.[3]
- Repeat this step for the right wing and the right side of the collar.
- The dowel part of the wings should be sticking out to either side. The other end of the wings will meet together in the middle and hang down.
-
3Sew the wings to the collar along the pins using a straight stitch. Open up the collar, and place the left end under the foot of the sewing machine. Make sure that the pins and marks align under the needle. Sew a vertical line down the collar, from top-to-bottom. Use a straight stitch and a matching thread color. Remove the left pin when you are done.
- Backstitch when you start and finish sewing.
- If you don't own a sewing machine, you'll have to do this by hand.
-
4Align the right wing on the collar and sew it down as well. Pull the left wing towards the left side so that it is out of the way. Place the right wing right-side-down on top of the collar. Align the marks on the wing with the right mark on the collar. Sew the wing down along the using a straight stitch, then remove the pin.
-
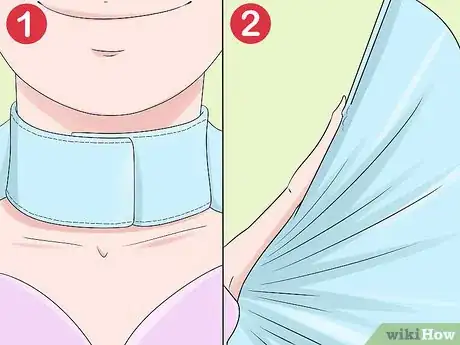
5Wrap the collar around your neck, then hold the wings by the dowels. Place the collar against your neck, then wrap the Velcro ends towards the back. Overlap the ends and press them together to close the Velcro. Hold the left dowel in your left hand and the right dowel in your right hand.
- Swing your arms around to make the wings move.
Community Q&A
-
QuestionWould I be able to fly or at least lift my feet off the ground with these?
 jayxoCommunity AnswerNo, absolutely not and do not try. Flight with wings is not possible for humans. Our bones are too dense, therefore we cannot fly.
 -
QuestionOn #5 in Assembling the Wings, it says to Velcro the ends of the collar toward the back, but the pictures shows the collar put together in the front. Which is the correct way?
 Community AnswerIt can be either way, but it would look more nicer at the back.
 -
QuestionCan this save me from falling?
 Ary BrightmanCommunity AnswerNo. Remember, these are mostly for show. Humans cannot fly, because our bones are too dense.
Things You'll Need
- Lightweight fabric
- 3⁄4 in (1.9 cm) Velcro
- 1⁄4 in (0.64 cm) dowel
- Saw or utility knife
- Sandpaper
- Thread
- Sewing machine
- Sewing pins
- Fabric scissors
- Tailor's chalk or pen










-Step-19-Version-2.webp)




-Step-19-Version-2.webp)


