This article was co-authored by wikiHow Staff. Our trained team of editors and researchers validate articles for accuracy and comprehensiveness. wikiHow's Content Management Team carefully monitors the work from our editorial staff to ensure that each article is backed by trusted research and meets our high quality standards.
The wikiHow Video Team also followed the article's instructions and verified that they work.
This article has been viewed 607,404 times.
Learn more...
Good news: you don’t need an ice cream maker to make ice cream! You can make it at home with a blender, milk, and a few other pantry staples. Whether you’re a chocolate, vanilla, or fruit lover, experiment with different extracts and add-ins to tailor it to your tastes!
Ingredients
- 1⁄4 cup (59 mL) of milk
- 2 cups (470 mL) of ice cubes (crushed ice works best)
- 4 tablespoons (12 tsp) of granulated sugar
- 1 teaspoon (0.33 US tbsp) of vanilla extract
- Nonfat dry milk powder (if necessary)
Makes 4 servings
- 1⁄2 cup (120 mL) of whole milk
- 1⁄2 cup (8.0 US tbsp) of nonfat dry milk powder
- 1⁄2 cup (4.0 fl oz) of heavy cream
- 2⁄3 cup (11 US tbsp) of granulated sugar
- 1⁄2 cup (8.0 US tbsp) of unsweetened cocoa powder
- 1 teaspoon (0.33 US tbsp) of vanilla extract
- 2 cups (470 mL) of ice
Makes 4 servings
Steps
Making Vanilla Ice Cream
-
1Place 2 cups (470 mL) of crushed ice into your blender. Since crushed ice is already broken down (and a little easier to blend than cubed ice), it’s going to create a creamier consistency. If you don’t have crushed ice, use a food processor to crush up the ice into bean-sized chunks beforehand.
-
2Use measuring spoons to add the sugar and vanilla extract. You’ll need to measure out 4 tablespoons (12 tsp) of sugar and 1 teaspoon (0.33 US tbsp) of vanilla extract. If you don’t have measuring spoons, you can use other methods to get close to the right amount.[1]
- For instance, if you have a measuring cup equal to 1 cup, fill it with sugar 1/16th of the way to equal 1 tablespoon.
- If you don’t have a teaspoon tool, one teaspoon is about equal to the size of the tip of your index finger (above the smallest joint).
- Add a tiny pinch of turmeric powder for a beautiful, golden color and rich taste.
Advertisement -
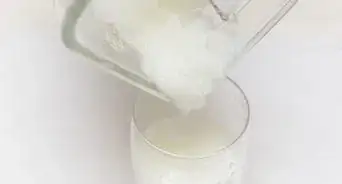
3Pour 1⁄4 cup (59 mL) of milk into the blender. Use 2% or whole milk for a creamier taste and thicker consistency and use 1% for a much lighter taste—just know that more ice crystals will form with lighter milks. You can also use almond, soy, cashew, oat, or full-fat coconut milk. Use heavy cream for a thicker consistency.[2]
- If you want to use skim milk or “light” versions of non-dairy milks because these are too watery. If you do choose to use these, you might need to add in nonfat dry milk powder to thicken it up at the end.
-
4Blend the mixture for at least 1 minute or until it’s smooth. Cover the blender with a lid and blend the ingredients until it’s close to the consistency of a milkshake. If you see large clumps of ice (bigger than the size of a pea), keep blending until they’re not noticeable.[3]
- How long you need to blend it depends on the power of your blender, so check it every 30 to 45 seconds if you’re not sure.
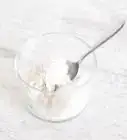
- If the mixture has the consistency of thin milk, add nonfat dry milk powder about 2 tablespoons (6.0 tsp) at a time until you have a thicker, creamy consistency.
-
5Transfer the mixture into a freezer-safe container with a lid. Choose a container with a lot of surface area so the ice cream is exposed to as much cool air as possible. Plastic containers work better than ceramic or glass (which will take longer).[4]
-
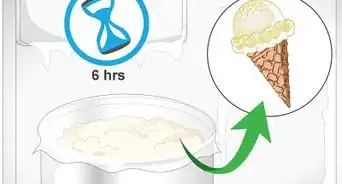
6Put it in the freezer for 2 to 3 hours. Place the container as far back into the freezer as possible to speed up the process. You can even wedge it between other frozen items to make it go even faster. You can take it out sooner if you’re ready to eat it, but note that some parts may be less solidified than others.[5]
- If you like your ice cream super soft, take it out at the 2 hour mark.
-
7Use a spoon to taste to check for the perfect ice cream consistency. Now for the fun part: tasting the ice cream! Scoop a spoonful from the center of the container (which will have frozen last) and give it a taste. Check if it’s thick and smooth enough to your liking.
- If it’s too soft, put it back in the freezer for about 30 minutes to an hour before checking again.
- If it’s too hard, take it out of the freezer and let it sit at room temperature for about 5 to 10 minutes before tasting again.
-
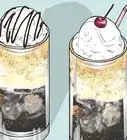
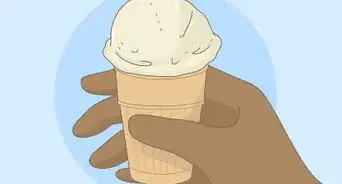
8Spoon the ice cream into serving bowls and add your favorite toppings. Add fresh cherries, sliced bananas, granola (or crushed graham crackers/waffle cones), and chocolate syrup to make a sundae.
- Sprinkle 1 tablespoon (3.0 tsp) of coconut flakes over the top with a few small chunks of fresh mango for a tropical-tasting treat.
- Store leftovers in an air-tight container in the freezer for up to a week. Wrap the top with saran wrap (before putting on the lid) to keep the top from frosting over!


Creating Chocolate Ice Cream
-
1Place the whole milk, milk powder, and heavy cream into your blender. You’ll need to measure out 1⁄2 cup (120 mL) of whole milk, 1⁄2 cup (8.0 US tbsp) of nonfat dry milk powder, and 1⁄2 cup (4.0 fl oz) of heavy cream.
- Use a large blender that has multiple speeds, if possible. If you’re working with a smaller model, cut the recipe in half.
- The nonfat milk powder will help solidify the mixture faster, so there’s very little freezing required (or none at all if you like soft, melty ice cream).
-
2Add the sugar, cocoa powder, vanilla, and ice. Use measuring cups to add 2⁄3 cup (11 US tbsp) of sugar, 1⁄2 cup (8.0 US tbsp) of unsweetened cocoa powder, and 2 cups (470 mL) of ice to your blender. Then use a measuring spoon to pour in 1 teaspoon (0.33 US tbsp) of vanilla extract. If you want to experiment with different flavors, try adding the following ingredients:
- 1 teaspoon (0.33 US tbsp) of peppermint extract and (after blending) 1 cup (16 US tbsp) of chocolate chips
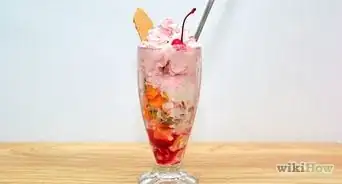
- 1⁄2 cup (8.0 US tbsp) of frozen strawberries, cherries, blueberries, or raspberries
- 1 cup (16 US tbsp) of slivered almonds, crushed pecans, or shelled and crushed pistachios
-
3Blend the ingredients at a low speed to crush up the ice. Starting at a low speed will make sure the ice doesn’t jam up your blender. Blend the mixture at low speed until the ice is crushed into small pea-sized chunks.
- If you’re not sure if there are still ice chunks, stop the blender and use a fork to dip down into it. If you see chunks on the fork, blend for another 15 to 30 seconds before checking again.
-
4Change the blender speed to high. Blend the mixture on the highest speed until it’s thick and creamy like the consistency of a thick milkshake. Make sure to use a lid to avoid a mess!
- Use a fork to run through the mixture to make sure there are no pea-sized chunks of ice left.
-
5Give it a taste test to check the consistency and flavor. Use a spoon to taste-test the ice cream. If it’s too firm, add 1⁄2 tablespoon (1.5 tsp) to 1 tablespoon (3.0 tsp) of any liquid ingredient (whole milk or heavy cream) to thin it down. If it’s too thin, add 1⁄2 tablespoon (1.5 tsp) to 1 tablespoon (3.0 tsp) of nonfat dry milk powder to thicken it up. Blend it again on high speed after adding any new ingredients.
- Feel free to fold in extra toppings and spices once it’s at or close to your desired consistency. For example, toss in some oreos, graham crackers, or cookie wafers and do a quick blend to incorporate them into the ice cream.
-
6Transfer the ice cream into a freezer-safe container and freeze for 1 hour. A shallow, freezer-safe plastic container with a lid is the best choice to ensure quick and even freezing. Place the container as far back into your freezer as possible to speed up the process. Don’t open the lid until around the 1 hour mark.
- You can skip this step if the ice cream is already to your desired consistency.
-
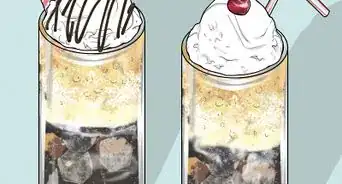
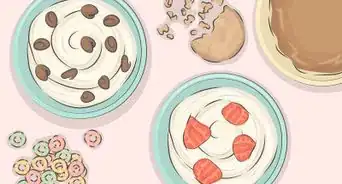
7Spoon the ice cream into small bowls and add any extra toppings. Try adding some sliced bananas, a sprinkle of cinnamon, fresh sliced strawberries, or chocolate syrup for an extra-decadent flavor.[6]
- Put the serving bowls in the freezer beforehand if you’re enjoying it in hot weather.
- Store any leftover ice cream in an airtight container in the freezer. Before securing the lid, wrap the top of the container in plastic wrap to keep it free from “frostbite.”


Community Q&A
-
QuestionWhat if I don't have crushed ice?
 Community AnswerTake an ice cube tray, freeze the water, and when the ice is frozen, take it out of the freezer and stab the ice with a wooden spoon or rolling pin.
 -
QuestionCan I use almond or coconut milk?Community AnswerYes, although the consistency may be a little less creamy than if you use milk.
-
QuestionAfter blending everything, should the mixture be thick or runny before freezing it?
 Community AnswerIt should be runny because it just came out of the blender, but if you put it in the freezer, it will turn into ice cream consistency.
Warnings
- Avoid adding water to your mixtures as it will come out grainy and coarse.⧼thumbs_response⧽
-Step-10.webp)


References
- ↑ https://youtu.be/_Zt1EuIEhvw?t=43
- ↑ https://youtu.be/_Zt1EuIEhvw?t=27
- ↑ https://minimalistbaker.com/vanilla-bean-coconut-ice-cream/
- ↑ https://sweets.seriouseats.com/2013/10/the-best-way-to-store-ice-cream-in-your-freezer.html
- ↑ https://www.tasteofhome.com/article/how-to-make-ice-cream-without-an-ice-cream-maker/>
- ↑ https://sweets.seriouseats.com/2013/10/the-best-way-to-store-ice-cream-in-your-freezer.html
About This Article


-Step-10.webp)