This article was co-authored by wikiHow Staff. Our trained team of editors and researchers validate articles for accuracy and comprehensiveness. wikiHow's Content Management Team carefully monitors the work from our editorial staff to ensure that each article is backed by trusted research and meets our high quality standards.
There are 9 references cited in this article, which can be found at the bottom of the page.
wikiHow marks an article as reader-approved once it receives enough positive feedback. In this case, several readers have written to tell us that this article was helpful to them, earning it our reader-approved status.
This article has been viewed 57,599 times.
Learn more...
If you’re a Harry Potter fan, chances are you love surrounding yourself with items from the books and movies. But sometimes that stuff adds up and can become a little expensive. Lucky for you, there are many easy ways to make your own Harry Potter DIYs at home, often for little or no money at all.
Steps
Making Your Own Wizarding Items
-
1Make a wand out of a chopstick. Harry needed to go to Diagon Alley for his wand, but you can create your own at home! For this project, you will need a 15” bamboo cooking chopstick, brown acrylic paint, a foam brush, a hot glue gun and glossy spray sealant.
- Use the hot glue gun to carefully dribble glue on the bottom third of the chopstick to create the wand’s handle. Use between 1 – 2 glue sticks to make the handle extra thick.
- The handle should look thicker than the rest of the wand, but other than that can be decorated however you'd like.
- After the glue is dry, paint the wand.
- After the paint is dry, apply a coat of sealant to all sides of the wand.
-
2Make a Golden Snitch out of a ping pong ball. You don’t need to catch a Golden Snitch on the Quidditch pitch if you can make your own at home. For this project, you will need a ping pong ball, a thin piece of cardboard, a marker, a glue gun, scissors and gold spray paint.
- Use the marker to draw two wings on the cardboard. Snitch wings should be small enough to attach to your ping pong ball.
- Use scissors to cut out the wings.
- Carefully dribble hot glue on the ping pong ball to create an intricate design of your choosing.
- While the glue is still hot, affix the wings to either side of the ping pong ball.
- Apply two coats of spray paint to the ping pong ball and wings.
- Hot glue a piece of string to the top of the Snitch and hang it from your Christmas tree.
Advertisement -
3Make your own Time Turner. Hermione used her Time Turner to take additional classes and now you can make your own version at home. For this project, you will need gold spray paint, wire, 3 different sized key rings, a hot glue gun and some small beads.[1]
- Take two small beads and thread them through the wire. Hot glue gun the beads so they are affixed to the center of the wire.
- Thread the wire through the smallest key ring, so the beads are positioned at the center of the key ring.
- Thread the wire through the middle key ring, so the beads and small key ring are positioned in the center of the middle key ring.
- Wrap some excess wire around the middle key ring to hold it in place.
- Thread the wire through your largest key ring, so both smaller key rings and the beads are positioned in the center.
- Wrap some excess wire around the large key ring to hold it in place.
- Spray paint the Time Turner gold.
- Allow the Time Turner to air dry for 25 minutes, before removing any excess wire.
-
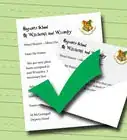
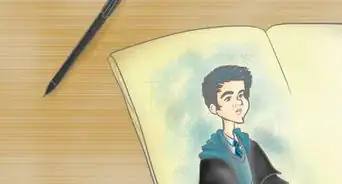
4Make your own Harry Potter textbooks. Every year, Harry had to shop for new textbooks for his classes, but you can make your own very easily. For this project, you will need some old books (preferably old textbooks), craft paper, a printer, glue and a photo editing software, like Photoshop.[2]
- Measure the front, back and binding of your book. Design covers for your book in Photoshop that are the same size as the front, back and binding of your book.
- If you don't feel comfortable using Photoshop, look for Harry Potter book templates online. Make sure to resize them so they fit your book.
- Cut your craft paper down to 8 1/2" x 11" and print your designs onto the paper.
- Attach your printed designs to your book using glue or tape. Cut any excess paper off your book and display your book on a shelf or mantle.


Making Delicious Harry Potter Treats
-
1Make your own Butterbeer at home. Butterbeer is one of the most popular drinks in the wizarding world, and now you can drink it whenever you'd like. To make this recipe, you will need 6 twelve ounce bottles of cream soda, 4.5 tsps imitation butter flavor, 2 cups heavy cream, 6 tbsps sugar and 2 tsps vanilla extract.[3]
- Set out six 16-ounce glasses. Add ½ tsp of imitation butter to each glass, then pour a bottle of soda into each glass.
- In a large bowl, whip the cream for 3 minutes, or until the cream starts to thicken.
- Add the sugar and continue whipping until soft peaks begin to form.
- Stir in the vanilla and the rest of your imitation butter, then whip for another 30 seconds.
- Divide the foam between the six glasses and serve.
-
2Make Polyjuice Potion to serve at your next party. In the magical world, Polyjuice Potion transforms the drinker into someone else, but in real life, it just tastes really good. To make this recipe, you will need 2 packages of Kool Aid lemon lime drink mix, 1 can frozen lemonade concentrate, 2 cans frozen limeade concentrate, 3 2-liter bottles of ginger ale and 4-5 cups of lime sherbet.[4]
- Mix the Kool Aid and concentrates together. Add ginger ale and slowly stir in the sherbet.
- Serve the punch in a large punch bowl or oversized cauldron.
-
3Make Sugar Quills out of cardboard. In Harry Potter, Sugar Quills are a treat intended to help students waste time in class, but they also make a great party favor. To create a Quill, you’ll need a large feather, silver cardboard, scissors, tape, a glue gun, a marker and a Pixie Stick.[5]
- Cut the cardboard so it is 1” wide (2.5cm) and the length of a pixie stick.
- Cut the tip of the cardboard, so it is angled, like a triangle.
- Fold the cardboard in half, lengthwise, and attach the two sides using tape.
- Use scissors to poke a hole in the cardboard 1” (2.5cm) north of your tip.
- Place a dollop of hot glue into the hole, then slide the tip of the feather into the hole.
- Line the back of the feather with glue, then secure the feather to the folded piece of cardboard.
- The feather should now be affixed to the front of the cardboard, hiding everything but the tip.
- Use the marker to draw a line down the center of the Quill’s tip to indicate ink.
- Open the top of the pixie stick and slide the stick top down into the cardboard sleeve. The sugar should slide out of your Quill as you pretend to write.
- When the pixie stick is empty, replace the old pixie stick with a new pixie stick.
-
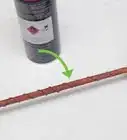
4Make Licorice Wands to hand out as party favors. Licorice Wands are a popular wizarding candy and they're a treat you can easily recreate at home. For this project, you will need a package of Twizzlers, chocolate and gold sanding sugar.[6]
- Leave the Twizzlers out overnight so they will become slightly hard.
- Break your chocolate into chunks and place it in a microwave-safe bowl. Microwave the chocolate in one minute increments until the chocolate is melted.
- Dip the top third of each Twizzler into the melted chocolate, then cover the chocolate with the gold sanding sugar.
- Place the Twizzlers on a cookie sheet and leave them in the fridge to set.


Crafting the Harry Potter Way
-
1Customize your own Harry Potter mug. If you have a favorite line from the Harry Potter books, you can easily use it to inspire your own Harry Potter themed mug. For this project, you will need a white mug, and a few Sharpies in varying colors.[7]
- Using a Sharpie, write your favorite quote from the books on the mug. Let the mug dry overnight before baking it for 30 minute at 350 degrees.
- Place the mug in the oven before it heats up and allow it to cool down in the oven before removing. Skip this step and you may find cracks in the mug.
- Possible quotes for your mug include: “I solemnly swear I am up to no good,” “Always” and “Felix Felicis.”
-
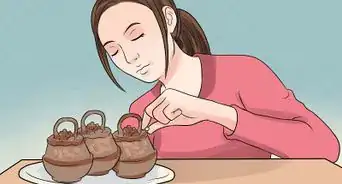
2Make your own potion bottles. Every year, Harry goes to Diagon Alley to stock up on potion supplies and you can make your own potion bottles in just a few easy steps. For this project, you will need miniature bottles, cardstock paper, decoupage glue, a magic marker and a rubber band.
- Tear the cardstock into small pieces. On each piece, write a potion ingredient in magic marker (ideas include frog, dragon’s blood, tears, etc).
- Place a small amount of decoupage glue on the back of each cardstock label, then affix the labels to the bottles. Wrap a rubber band around the labeled bottle to help the glue set.
- Allow the bottles to dry, then play with them or display them as you wish.
-
3Make a Harry Potter Deathly Hallows t-shirt. If you have a white t-shirt, some black paint and a paintbrush, you can create your own Harry Potter t-shirt featuring the Deathly Hallows.[8]
- Place a piece of cardboard in between the layers of the t-shirt. This will keep the paint from seeping through to the back.
- Paint the outline of a triangle on the t-shirt. The triangle should take up most of the space on the tee. If the triangle is not dark enough, go over it again with another coat of paint.
- Paint a line from the top of the triangle to the bottom of the triangle. Darken the line as needed.
- Draw a circle inside the triangle to complete the image of the Deathly Hallows. Darken the circle as needed. Allow the t-shirt to dry before wearing.
- If you prefer not to freehand the image, you can also look for a template online and use the template to create your painting.
-
4Make an owl out of paper plates. Harry Potter's owl, Hedwig, was one of his most loyal friends, and now you can easily make an owl friend of your own. For this project, you will need one small paper plate, two large paper plates, orange paper, two shades of brown paint, wiggle eyes, glue and a brown felt tip pen.[9]
- Paint the small plate and one of the large plates dark brown. Paint the other large plate light brown. Let the plates dry.
- After the plates have dried, draw a series of wavy lines across the light brown plate. These will serve as the owl's feathers.
- Cut the large dark brown plate in half. Glue the two halves of the dark brown plate diagonally over the light brown plate.
- The dark brown halves will serve as the owl's wings, and there should be an opening where you can see the light brown plate and the owl's feathers.
- Glue the small brown plate to the top of the wings to serve as the owl's head.
- Use the orange paper to cut out feet and a beak for your owl. Attach the feet to the bottom of your owl and the beak to your owl's face.
- Glue your wiggle eyes onto your owl's face and display your owl.


Community Q&A
-
QuestionWhere can I find all these items?
 Community AnswerMost craft stores, such as Michaels, Hobby Lobby, etc., have them in stock. If not, you can order them online on stores such as Amazon or eBay.
 -
QuestionIf I break the wand or it snaps, what do I do?Community AnswerMake a new one, or glue it back together. Make it look as normal as possible. Then paint over the hot glue the color of your wand. If you made Ron's, just tape it back together! Otherwise, make a new one -- see How to Make a Harry Potter Wand.
-
QuestionIs there a way to make licorice wands, or to make Berty Bott's Every Flavour beans? I want to make them for a party.
 Community AnswerTwizzlers are excellent licorice wands, and you can actually buy Berty Bott's Every Flavour beans online.


References
- ↑ https://www.youtube.com/watch?v=n8hR3lqdLbQ
- ↑ http://www.mugglenet.com/2014/12/potter-diy-spooky-spell-books/
- ↑ https://mic.com/articles/95918/the-simple-way-to-make-the-mysterious-butterbeer-from-harry-potter#.5vUcKcb2n
- ↑ http://www.thisgrandmaisfun.com/polyjuice-potion-recipe/
- ↑ https://www.youtube.com/watch?v=kEzl7DiY5Bs
- ↑ http://blog.booturtle.com/2011/07/wizarding-week-of-harry-potter.html
- ↑ http://www.popsugar.com/smart-living/Sharpie-Mug-DIY-Project-24955886
- ↑ https://www.youtube.com/watch?v=1pom1CYgYeI
- ↑ https://www.activityvillage.co.uk/paper-plate-owl
About This Article