This article was co-authored by Ndeye Anta Niang. Ndeye Anta Niang is a Hair Stylist, Master Braider, and Founder of AntaBraids, a traveling braiding service based in New York City. Ndeye has over 20 years of experience in African hair including braiding box braids, Senegalese twists, crochet braids, faux dread locs, goddess locs, kinky twists, and lakhass braids. Ndeye was the first female of her tribe in Africa to move to America and is now sharing her knowledge of African braids passed on from generation to generation.
This article has been viewed 970,152 times.
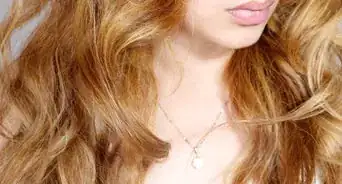
Want beautiful, wavy hair but not the damage that comes with using a curling iron? Fortunately, there are several ways to get gorgeous waves without having to use heat-styling tools. To help you out, we've rounded up the best natural ways to make your hair wavy and broken them down step by step.
Steps
Preparing Your Hair
-
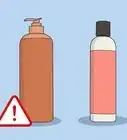
1Wash your hair. Regardless of which of the below methods you choose, getting your hair wet first is an important step. Curls will look better in clean hair.
- Use shampoo to make sure your hair is clean.
- When using conditioner, do not apply it to your scalp but instead focus on the ends of your hair. This makes your hair lighter so that it is not weighted down.
-
2Dry and comb your hair. Eliminate excess water by squeezing it out or using a microfiber towel or t-shirt. Leave your hair slightly damp. The curls will last longer this way.
- If you have very thick hair, use a blow dryer to remove some of the water. Your hair should be damp, but not sopping wet.
- Removing tangles from your hair will allow you to create smooth waves rather than knots which may catch or look unappealing.
Advertisement -
3Apply leave-in conditioner. Leave-in conditioners make hair smoother, stronger and more flexible. Begin by working a small amount, about 1 tsp, into your hair. Too much conditioner can leave your hair weighed-down.
- Apply conditioner to sections of your hair to ensure it is evenly distributed. Avoid applying it to your roots. Apply leave-in conditioner to your ends and about halfway up to your roots.
- Don’t use leave-in conditioner and regular conditioner if your hair is fine.
- You can add more conditioner as needed.
-
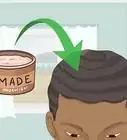
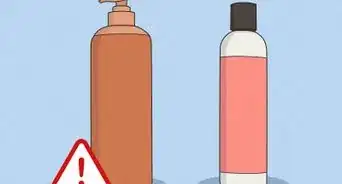
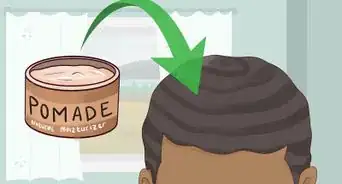
4Consider a curl-enhancing product. If you have very straight hair that struggles to hold a curl, adding a texturing spray, sea salt spray, light hold gel, or a small amount of mousse may help your hair hold a curl for longer. A curl-enhancing cream can also be helpful if your hair has a slight wave to it already.[1]
- The top layer of your hair will need the product the most. As long as you choose the best product for your hair type, your hair should not look greasy.

Using Rag Curlers To Make Waves
-
1Cut cloth strips. To make rag curls you will need small pieces of fabric, about 4 to 5 inches (10 to 13 cm) long and about 1 inch (2.5 cm) wide. How many you need will depend on how tight of a wave you want.
- Begin with 12 strips, 6 for the top layer of your hair, 6 for the bottom.
- Cutting up an old pillowcase or old shirt can be an economical way to get fabric.
-
2Separate a section of your hair. You will have 6 rag curls that go around the crown of your head, then another 6 that go a little below. This means you’ll have 2 sections of hair on each side and 2 sections at the back in your first layer of curls.
- Pull a small handful of hair away from your face. If you divide the side of your head into quarters, it will be 1 quarter of that hair.
-
3Roll 1 section of hair. Spray the ends of your hair with water to make it easier to keep them together. Then, place the rag at the tip of your hair and begin rolling under. At first it will be tricky and the tip will want to come out. Keep tucking it back in and roll your hair upward.
- Watching what you’re doing in the mirror will help as you’re first learning.
-
4Tie the rag curl. Take the 2 ends of fabric and tie them together to secure the curl. You will want the knot to be snug enough that it will not come out as you sleep, but not so tight that you cannot untie it the next day.
-
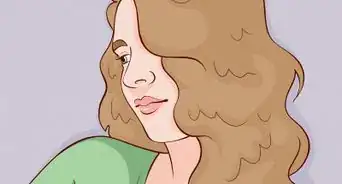
5Set the curl. Allow the hair to dry overnight by sleeping with the damp rag curls. In the morning, undo the knots to release loose waves.
- Run your fingers through your hair to turn ringlets into waves. Do not use a comb or brush as this creates frizz.
- Apply hairspray to set the waves if you have hair that easily loses body.
-
6Try using foam curlers. If you struggle with using rags to curl your hair, purchase foam curlers instead. The process is exactly the same, only instead of tying a rag to set the curl you will instead clip a plastic cross-bar or special pin.
- Some people find sleeping on curlers to be uncomfortable or difficult.
- Remember that the size of the curler will determine how loose or tight the waves are. Big curlers make loose waves.


Braiding Your Hair For Waves
-
1Divide your hair into sections. The hair should still be damp as you do this. The size of the braid will determine how wavy your hair will be. The bigger the braid, the less wavy your hair will appear.
- If you want a tight crimp from the braids, divide your hair into many small sections to braid.
- If you want loose waves, divide your hair into four or five sections.
-
2Braid one section at a time. Take one section of hair and divide it into 3 equal parts. Hold the left section in your left hand, the right section in your right hand, and the middle section between 2 fingers of your dominant hand. Cross the hair over the middle strand.[2]
- First bring the right strand over the middle strand. What was the right strand is now the middle strand.
- Now bring the left strand over the middle. What was the left strand is now the middle.
- Repeat this process until the whole section has formed a braid.
- Make sure that you braid your hair using strong, even tension to get the best results.
-
3Secure the braid. At the end of the braid, use a wide elastic band or butterfly clip to keep the braid in place. You want the braid to be secure enough that sleeping on it or blow-drying it will not cause it to come loose.[3]
-
4Braid the rest of your hair. Repeat the process for each section of hair. Remember that only the braided part of your hair will be wavy.[4]
- Begin as near the crown of your head as possible, to ensure that the waves don’t begin halfway down your head.
- Braid as far down the section as you can so that the tips of your hair are not straight when you undo the braid.
-
5Dry your hair. In order for your waves to stay, you’ll want the braids to dry completely before undoing the braids.
- Use a blow-dryer to dry the braids, or sleep on your braids and undo them in the morning.
-
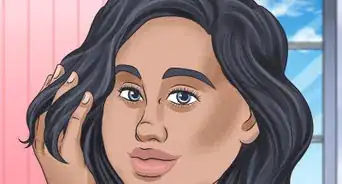
6Undo the braids. Carefully unbraid your hair to release the waves. Gently run your fingers through to separate the strands. Do not brush or comb your hair as this may create frizz or undo your waves entirely.[5]
-
7Apply hairspray. If your hair tends to lose curl easily, add a light covering of hair spray to fix the curls. Choose one with a relaxed hold so that the hair does not become crunchy or sticky. For more volume, try using a texturizing spray instead.
Using Buns To Create Waves
-
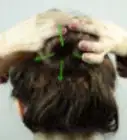
1Divide damp hair into sections. The more sections you create, the more waves you will have. It is a good idea to have a top layer of sections around the crown of your head and a second layer around the bottom.
- If you plan to have your hair parted after your waves are done, make sure to have that part in place before dividing your hair into sections.
- Start with 10 to 12 even sections and secure each of the sections using a clip. After you have experimented you may find you like more or fewer sections depending on hair length or texture.
-
2Select 1 section to twist. You will create small buns one section at a time. Beginning with a section near your face will allow you to clearly see what you’re doing. Work your way backward.
- Start with a section near the crown of your head. If you start with a lower section, hair from an upper section is likely to get in your way.
-
3Twist the hair tightly. Turn the section of hair in 1 direction to create a tight twist. When you hold the strand out from your head it should look something like a rope.
- A tight twist will create a firmer wave.
-
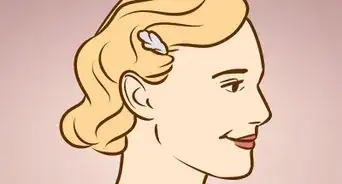
4Create a bun. Coil the strand around itself at the base, so that it look something like a cinnamon roll or snail shell. Make sure to tuck the ends under the bun to hide them.
-
5Affix the bun in place. How large the buns are will depend on how long your hair is and may determine what you use to secure it. Larger buns may require an elastic band around the circumference of the bun.
- Use bobby pins to hold smaller buns in place. Use 2 at perpendicular angles to ensure an even hold.
-
6Set the curl. The curls will need to dry completely before you undo the buns. Sleeping on your wet hair is often the best way to do this. Light blowdrying using a diffuser may also help, but the heat is unlikely to penetrate to the center of the bun.
-
7Release the buns. When the hair has dried completely, undo each bun carefully. First, apply a small amount of shine serum or styling cream to the palms of your hands. Then, run your fingers gently through your hair to make loose waves, but do not brush or comb it.
- Use a hair spray or scrunch fixative gel into your hair to ensure that the waves will stay all day.


Expert Q&A
Did you know you can get expert answers for this article?
Unlock expert answers by supporting wikiHow
-
QuestionDoes braiding your hair really make it curly?
 Ndeye Anta NiangNdeye Anta Niang is a Hair Stylist, Master Braider, and Founder of AntaBraids, a traveling braiding service based in New York City. Ndeye has over 20 years of experience in African hair including braiding box braids, Senegalese twists, crochet braids, faux dread locs, goddess locs, kinky twists, and lakhass braids. Ndeye was the first female of her tribe in Africa to move to America and is now sharing her knowledge of African braids passed on from generation to generation.
Hair Stylist & Master BraiderYes! Braiding your hair will make it curly. Use curling cream with shea moisture if you do this to give your braids some holding power. You can pick any of these hair products up at your local pharmacy or beauty supply store.
Support wikiHow by unlocking this expert answer.
-
QuestionWhat is 2b hair?
 Laura MartinLaura Martin is a Licensed Cosmetologist in Georgia. She has been a hair stylist since 2007 and a cosmetology teacher since 2013.
Licensed Cosmetologist2B is a category of curls according to the Curly Girl book. 2B hair has a strong wave that is difficult to straighten.Support wikiHow by unlocking this expert answer.
-
QuestionHow do you make your hair grow faster?Laura MartinLaura Martin is a Licensed Cosmetologist in Georgia. She has been a hair stylist since 2007 and a cosmetology teacher since 2013.
Licensed CosmetologistYou can't force hair growth, but you can encourage it. Biotin supplements have been shown to improve the growth and strength of hair. Eating a balanced diet and massaging the scalp also improve the rate and quality of growth.Support wikiHow by unlocking this expert answer.
Warnings
- If conditioner doesn't work well in your hair, use hairspray instead. A loose hold hairspray is good to start with, as strong hairsprays may make your hair stiff.⧼thumbs_response⧽
- Make sure your braids or buns are tight, but don't tighten them so much that it damages your hair.⧼thumbs_response⧽
- Apply small amounts of hair product to begin with. You can always add more as needed, but it is difficult to remove excess without starting over entirely.⧼thumbs_response⧽
Things You'll Need
- Shampoo
- Leave-In conditioner
- Comb
- Towel
- Elastics, rag strips, or bobby pins depending on your method of curling
- Blow-drier with the cold option on your drier (optional)
- Optional items: Shine spray or serum, curl enhancing serum, hair spray

References
- ↑ Ndeye Anta Niang. Professional Hair Stylist & Master Braider. Expert Interview. 10 January 2020.
- ↑ http://www.realsimple.com/beauty-fashion/hair/tools-techniques/braid-hair
- ↑ Ndeye Anta Niang. Professional Hair Stylist & Master Braider. Expert Interview. 10 January 2020.
- ↑ Ndeye Anta Niang. Professional Hair Stylist & Master Braider. Expert Interview. 10 January 2020.
- ↑ Ndeye Anta Niang. Professional Hair Stylist & Master Braider. Expert Interview. 10 January 2020.
- Videos provided by Luxy Hair
About This Article
One way to make your hair wavy naturally is to braid it while it's wet. First, divide your hair into 4 - 5 sections for loose waves or 8 - 10 sections for tighter waves. Braid each section and secure the end of the braid with an elastic hair tie. After sleeping on your hair, undo each section carefully to enjoy your waves! Alternatively, you can also do buns to create natural waves. Make sure your hair is damp and part it into 10 - 12 even sections. Twist each section tightly into a small bun and secure it to your scalp using a bobby pin. Undo each bun after sleeping on your hairstyle to release the curls. For more ideas on making hair naturally wavy from our Licensed Cosmetologist co-author, like how to use rag curlers to make waves, read on.